EasyManua.ls Logo

HOMCOM A90-252V70 - User Manual

HOMCOM A90-252V70
11 pages
Print Icon
To Next Page IconTo Next Page
Loading...
ASSEMBLY INSTRUCTION
INapb002_UK
A90-252V70
IMPORTANT, RETAIN FOR FUTURE REFERENCE: READ CAREFULLY
Treadmill
User Manual

Questions and Answers

  • B
    Brittany GibbsAug 17, 2025
    What to do if the HOMCOM A90-252V70 electronic watch has no display?
    • M
      Marie SandersAug 18, 2025
      If the electronic watch on your HOMCOM Treadmill isn't displaying anything, verify that the input voltage is within the allowable range of AC 200-240V. Also, check that the power switch on the treadmill is turned on and inspect the fuse inside the power outlet; replace it if it's blown. Check the LED on the controller and inspect each cable. If problems persist, consider checking or replacing the electronic board or control board.
  • G
    George BlakeAug 20, 2025
    What to do if my HOMCOM A90-252V70 shows over current?
    • E
      Erin RamirezAug 20, 2025
      If your HOMCOM Treadmill is showing an over current error, you should check several components: * Ensure the treadmill isn't overloaded. * Inspect mechanical moving parts for jamming. * Check for a lack of release agent, which increases friction between the running belt and board. * Examine the running board and belt for severe wear. * Look for any short circuits in the motor connection line. If these checks don't resolve the issue, consider checking or replacing the controller or motor.
  • M
    matthewsandovalAug 22, 2025
    What causes overload on a HOMCOM A90-252V70 Treadmill, and how do I fix it?
    • L
      leejosephAug 23, 2025
      An overload on your HOMCOM Treadmill can stem from several issues. First, verify that the treadmill isn't overloaded with excessive weight. Check for any jammed mechanical moving parts. A lack of release agent can also cause increased friction between the running belt and the running board. Additionally, inspect the running board and running belt for severe wear. Finally, check for a short circuit in the motor connection line. If these steps don't resolve the issue, consider checking or replacing the controller or the motor.
  • J
    James HarrisAug 25, 2025
    How to fix a HOMCOM Treadmill when the display board has no signal?
    • H
      Hunter JenkinsAug 26, 2025
      If the display board on your HOMCOM Treadmill isn't showing a signal, start by checking the communication line for looseness, disconnections, or damage. If the problem persists, you may need to check or replace the electronic watch board or the controller.
  • S
    Sandra SotoAug 27, 2025
    What to do if the HOMCOM Treadmill motherboard isn't receiving a signal?
    • C
      Chelsea SmallAug 28, 2025
      If the motherboard of your HOMCOM Treadmill isn't receiving a signal, first check the communication line to ensure it's not loose, disconnected, or damaged. If the issue continues, you might need to check or replace the electronic watch board or the controller.
  • N
    Norman WilsonAug 30, 2025
    Why does my HOMCOM A90-252V70 not start?
    • R
      Robert MoodyAug 30, 2025
      If your HOMCOM Treadmill isn't starting, verify that the power plug is properly plugged in, the power switch is turned on, and the safety switch is removed.
  • J
    Jorge StanleySep 1, 2025
    What to do if some buttons on my HOMCOM A90-252V70 Treadmill aren't working?
    • D
      Danny CarterSep 1, 2025
      If some or all of the buttons on your HOMCOM Treadmill are not working correctly, uncover the upper case of the electronic watch and test the buttons. Also, check the button function after turning the power back on. If problems persist, check or replace the electronic board.
  • M
    Martin JohnsonSep 4, 2025
    What to do if the HOMCOM Treadmill motor is not connected?
    • C
      Charles ReyesSep 4, 2025
      If the motor of your HOMCOM Treadmill isn't connected, check whether the motor wire is loose or has fallen off. If the wire is properly connected, the motor or controller may need to be checked or replaced.
  • T
    Tammie BeardSep 6, 2025
    How to troubleshoot abnormal running sounds in my HOMCOM Treadmill?
    • G
      Gloria ZavalaSep 7, 2025
      If your HOMCOM Treadmill is making abnormal running sounds, check if the machine screws are loose and whether the running belt needs lubrication.
  • L
    Lindsay CarrilloSep 9, 2025
    How do I fix a slipping HOMCOM Treadmill?
    • H
      Heather Johnson MDSep 9, 2025
      If your HOMCOM Treadmill is slipping, adjust the running belt tightly by referring to the instructions.

Summary

Safety Information

Technical Specifications

Parts Specifications

Lists the included parts and tools for the treadmill.

Electronic Control Instructions

Screen Display

Explains the various display modes on the treadmill's electronic screen.

Button Function

Start;Stop and Speed Adjustment

Details on using the start/stop button and adjusting treadmill speed.

Standby Mode

Explains the energy-saving standby mode and how to exit it.

Maintenance Instructions

Running Belt Loose Adjustment

Guide on how to tighten the treadmill's running belt.

Running Belt Alignment

Instructions for centering and aligning the treadmill's running belt.

Lubricants

How to Add Lubricant

Step-by-step guide on applying lubricant to the treadmill.

Errors and Trouble Shooting

Error Message Codes

Lists error codes displayed by the treadmill and their solutions.

Common Problems and Troubleshooting

Addresses common issues like buttons not working or no display.

Warm Up Exercises

Overview

This document is a user manual for the INapb002_UK A90-252V70 Treadmill, manufactured by HOMCOM. It provides essential information for safe operation, technical specifications, usage instructions, and maintenance guidelines.

Function Description

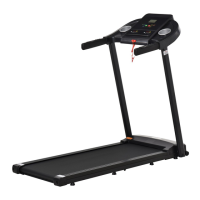
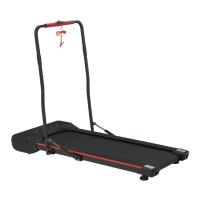
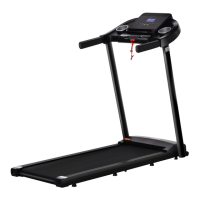
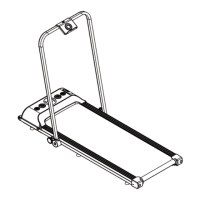
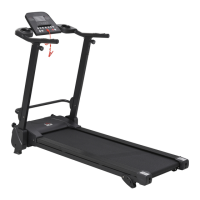
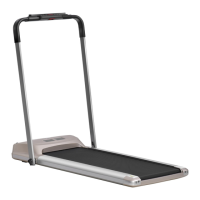
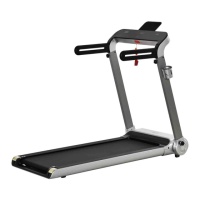
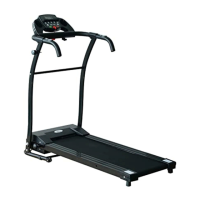
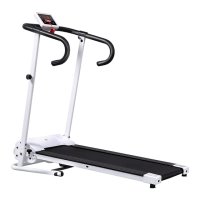
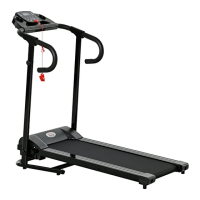
The HOMCOM A90-252V70 Treadmill is designed for indoor use, providing a platform for walking and light running exercises. It features an electronic control panel that displays various exercise metrics such as time, speed, distance, calories burned, and accumulated mileage. The treadmill allows users to adjust speed, start, and stop their workout. It is equipped with a safety lock mechanism for emergency stops and includes features to prevent overheating and electrical malfunctions. The device is suitable for family use and is not intended for professional training, testing, or medical purposes.

Important Technical Specifications

  • Model Number: XD-T1
  • Dimensions: 1330 x 500 x 130mm
  • Running Surface Size: 400 x 1100mm
  • Speed Range: 1-6 Km/h
  • Rated Voltage: 220V-240V
  • Rated Power: 500W
  • Rated Frequency: 50 Hz
  • Max Weight Capacity: 100 Kg
  • Level: HB (likely indicating a home-use grade)
  • Parts Included: Body frame, Controller (Battery), Tools, Manual.

Usage Features

  • Start/Stop Functionality: The treadmill can be started and stopped using a dedicated "START/STOP" button. Holding the STOP button puts the treadmill into sleep mode, and any button press can restart it.
  • Speed Adjustment: Speed can be adjusted in increments of 0.1 km/h using "+" and "-" buttons. Holding these buttons for more than two seconds will change the speed by 0.5 km/h.
  • Display Metrics: The electronic screen displays:
    • Time: Counts forward from 0:00-99:59 or backward from a set time.
    • Speed: Shows current speed (1.0-12 km/h) and countdown (3, 2, 1) at startup.
    • Distance: Counts forward from 0.0-99.9 or backward from a set value.
    • Calories: Counts forward from 000-990 or backward from a set value.
    • Mileage: Shows accumulated mileage since the first use.
  • Standby Mode: If no input is detected for more than 10 minutes in standby mode, the treadmill enters an energy-saving state with no screen display. Pressing any button exits this mode.
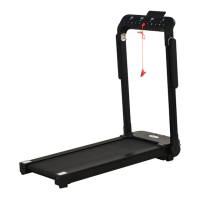
  • Safety Lock: A safety lock cable clip should be attached to clothing during exercise to enable an emergency shutdown.
  • Grounding: The treadmill requires reliable grounding to prevent electrical hazards.
  • Placement: Must be placed on a flat surface indoors, with a safe use space of 2m x 1m (2000mm x 1000mm) at the rear for emergency escape.
  • Emergency Stop Procedure: In an emergency, hold the armrests, prop up the body, and step onto the side rails with both feet, jumping away from the machine from one side.

Maintenance Features

  • Regular Cleaning: Dust should be removed regularly from parts. After each use, the meter and other parts should be cleaned with a dry towel to remove sweat and debris, avoiding splashing water on electrical components or under the running belt.
  • Storage: Store the treadmill in a clean, dry environment with the power turned off and unplugged.
  • Mobility: Equipped with wheels for easy movement; ensure power is disconnected and the body folded before moving.
  • Part Inspection: Frequently check and lock all parts of the treadmill.
  • Rest Periods: Recommended to rest the treadmill for 10 minutes after 30 minutes of continuous use to extend its life and prevent overheating.
  • Running Belt Adjustment:
    • Loose Belt: If the running belt is too loose, use a hex wrench to rotate the left guard's adjustment hole clockwise 1/4 turn, then the right foot's adjustment hole clockwise 1/4 turn. Ensure both sides are adjusted synchronously to keep the belt centered.
    • Tight Belt: If the running belt is too tight, adjust the left and right synchronization counter-clockwise.
    • Alignment: If the running belt deviates from the center (e.g., due to uneven foot pressure), run the treadmill without stepping on it at 6th gear. If it deviates left, rotate the left screw clockwise 1/4 turn. If it deviates right, rotate the right screw clockwise 1/4 turn. Repeat until centered.
    • Caution: Do not over-tighten the running belt or the drum, as this can cause damage to the treadmill and bearings.
  • Lubrication:
    • Treadmills are pre-oiled, but lubrication should be checked after one year or 100 hours of operation.
    • Check for lubricant by pulling the starting belt from the side and touching the table surface; if lubricant is felt, no additional lubricant is needed.
    • To add lubricant, open the side bar on the front left, insert the oil bottle into the opening (after cutting the tip to size), and squeeze the bottle to refuel into the fuel pipe on the platform. Use non-petroleum lubricants.
  • Troubleshooting: The manual provides a detailed table of fault codes (Er1, Er2, Er3, Er4, Er5, Er6, Er13, Er14) with corresponding issues and solutions, covering problems like no signal, over pressure, over current, overload, motor connection issues, motherboard connection issues, IGBT short circuit, and load short circuit. It also addresses common problems like unresponsive buttons, no display, treadmill not starting, belt slipping, belt deviation, and abnormal sounds, offering step-by-step troubleshooting methods.

HOMCOM A90-252V70 Specifications

General IconGeneral
BrandHOMCOM
ModelA90-252V70
CategoryTreadmill
LanguageEnglish

Related product manuals