This document describes a treadmill, model A90-246, with the product code INapb001V02_FR. It serves as a user manual, providing instructions for assembly, operation, maintenance, and exercise guidelines.
Function Description
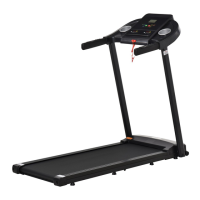
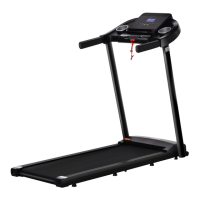
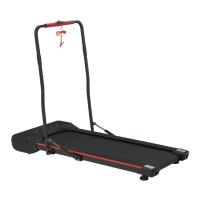
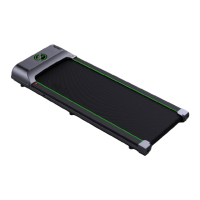
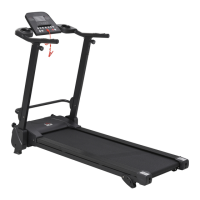
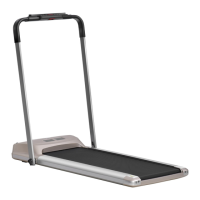
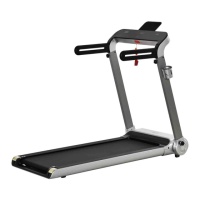
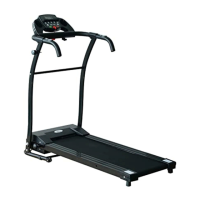
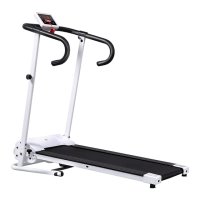
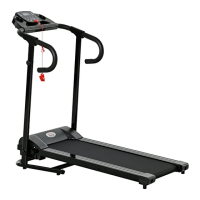
The treadmill is designed for home use, allowing users to perform walking, jogging, and other aerobic exercises indoors. It features an electronic display that shows various exercise parameters and includes a remote control for easy operation. The device is equipped with a safety lock function for emergency stops and supports Bluetooth connectivity for music playback.
Important Technical Specifications
- Current Voltage: 220V-240V
- Current Frequency: 50 Hz
- Product Size: 1435mm (length) x 590mm (width) x 985mm (height)
- Effective Use Area: 400mm (width) x 1100mm (length)
- Speed Range: 1.0-6.0 km/h (0.5-6.5 MPH)
- Maximum Weight Capacity: 100 kg
- Peak Power: 1.5 HP
- Safety Features: Grounded plug, dedicated loop for the socket, safety lock for emergency stops.
- Display Parameters: Speed, Time, Distance, Calories, Total Mileage.
- Remote Control Battery: 2032 button battery (not included).
- Bluetooth Device Name: JF-BTMP3.
- Calorie Standard Value: 30 Kcal/km.
Usage Features
-
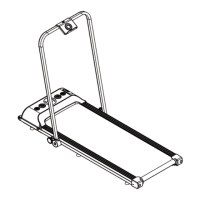
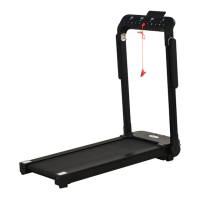
Assembly:
- Remove the main frame from the carton.
- Hold the column with both hands and gently pull upwards, then fix it to the main frame using the round knob (#6).
- Attach the mobile phone holder (#7) to the column using the M6*15 screw (#8). An anti-slip mat (#9) can be placed on the phone holder to prevent the phone from falling.
-
Operation:
- Plug in the power cord and turn on the red power switch. Wait for the screen to light up and enter the start interface.
- Electronic Display: Shows current speed, running time, accumulated distance, accumulated calories, and total mileage.
- Remote Control: Requires a 2032 button battery.
- Start/Stop Button: Press to start the treadmill at 0.5 MPH (0.5 km/h) or to stop it. Stopping clears all data and returns the treadmill to manual mode.
- Speed Adjustment Buttons (+/-): Adjust the speed in increments of 0.1 MPH (0.1 km/h). Holding the button for more than 2 seconds will continuously increase or decrease the speed.
- Safety Lock Function: Removing the safety lock displays "E7" and stops the treadmill with an alarm. Reinserting it clears all data.
- Bluetooth Music Sharing: Turn on the treadmill's power, search for "JF-BTMP3" on your mobile phone, and connect. Once connected, music can be streamed to the treadmill.
-
Safety Guidelines:
- Place the treadmill on a flat, dry indoor surface, ensuring 2m x 1m (2000mm x 1000mm) clear space at the back and 1m (1000mm) at the sides and front for emergencies.
- Ensure the plug is reliably grounded to a dedicated socket.
- Keep the safety lock out of reach of children when not in use, and unplug the power cord for long periods of inactivity.
- Keep lubricating oil out of reach of children.
- Not suitable for disabled individuals or children without supervision.
- Avoid dusty environments and high humidity to prevent static electricity interference.
- Do not touch moving parts or place hands/feet under the running belt.
- Unplug before moving the treadmill.
- Clip the safety lock cable to clothing during exercise.
- Check clothing (fastened, zippered, not too loose) before use.
- Stop exercising and consult a doctor if feeling unwell.
- Avoid prolonged use to prevent overheating and electrical malfunctions.
- Do not jump on the machine during exercise.
- Do not use after eating, when fatigued, or with insufficient physical strength.
- Do not insert needles, trash, or water into the power plug.
- Unplug the power plug when not in use to prevent insulation deterioration and fire.
- The product must be grounded to reduce the risk of electric shock in case of malfunction.
- Do not use if the shell is cracked, broken, or welded parts are fractured.
-
Exercise Guidelines:
- Consult a doctor before starting any exercise program.
- Set realistic goals with a doctor's advice.
- Incorporate aerobic exercises like walking, jogging, swimming, dancing, or cycling.
- Monitor pulse regularly; determine target heart rate based on age and physical well-being.
- Drink plenty of room-temperature water during exercise to prevent dehydration.
-
Warm-Up Exercise:
- A successful exercise program includes warm-up, aerobic, and soothing exercises, starting 2-3 times a week and increasing to 4-5 times.
- Warm-up prepares the body for intense exercise by warming muscles, improving blood circulation, increasing pulse, and delivering oxygen.
- Repeated warm-up exercises after aerobic activity can reduce muscle soreness.
- Recommended exercises include:
- Stretch Down: Knees slightly bent, body bends forward, back and shoulders relaxed, hands touching toes. Hold 10-15 seconds, repeat 3 times.
- Tendon Stretch: Sit on a cushion, one leg straight, other leg inward, touch toes of straight leg. Hold 10-15 seconds, repeat 3 times per leg.
- Calf and Heel Stretch: Stand facing a wall, one foot back, hind leg straight, heels touching ground, tilt towards wall. Hold 10-15 seconds, repeat 3 times per leg.
- Quadriceps Stretching: Hold balance with left hand, extend right hand back, grab right heel, pull towards hips. Hold 10-15 seconds, then relax.
- Sartorius Muscle Stretch: Soles of feet together, knees outwards, hands grasp feet, pull towards groin. Hold 10-15 seconds, repeat 3 times.
Maintenance Features
-
General Maintenance:
- Frequent inspections are required to detect wear and damage early. Replace defective parts (motors, electronic controls, power cords, running belts) immediately.
- Pay special attention to easily worn components like running belts.
- Clean the treadmill regularly. After each use, wipe the meter and other parts with a clean towel or cloth to remove sweat and debris. Avoid splashing water on electrical components or under the running belt.
- Store the treadmill in a clean, dry environment with power off and unplugged.
- For easy movement, the treadmill is equipped with wheels; ensure power is disconnected before moving.
- Rest the treadmill for 10 minutes after 30 minutes of continuous use to extend its life.
-
Running Belt Adjustment:
- Loose Adjustment: If the running belt is too loose, insert a hex wrench into the adjustment hole of the left guard and rotate clockwise 1/4 turn, then do the same on the right foot. Ensure synchronous adjustment to keep the belt centered and not too tight, as excessive tightness can damage the treadmill.
- Alignment: If the running belt deviates from the center (normal during use, but should return to center when not in use), run the treadmill at 6th gear without stepping on it.
- If the belt is to the left, rotate the left screw clockwise 1/4 turn.
- If the belt is to the right, rotate the right screw clockwise 1/4 turn.
- Repeat until the belt is centered. Observe the belt's deviation and smoothness after adjustment.
- Warning: Do not overtighten the drum, as this can permanently damage the bearings.
-
Lubrication:
- Treadmills are pre-lubricated but should be checked regularly. Lubricate after one year of use or 100 hours of operation.
- After 30 hours or 30 days of use, pull the running belt from the side to touch the table surface. If lubricant is felt, no additional lubricant is needed. Use non-petroleum lubricants.
- How to Add Lubricant: Open the front left side bar of the decorative cover. Insert the lubricant bottle into the opening, cut the tip to size, place the bottle into the hole, and squeeze to refuel. Ensure the bottle tip is securely inserted into the fuel pipe on the platform before pouring.
-
Troubleshooting (Error Codes):
- E1 (Communication anomalies): Electronic control and table communication blocked. Check connections, ensure all cores are inserted, and replace cables if necessary.
- E2 (High voltage fault): Check motor line for damage/odor, replace motor.
- E3 (No motor detected): Check motor line connection, reconnect, check for damage/odor, replace motor.
- E5 (Over current protection): Excessive current due to overload or stuck parts. Check motor for overload/burning odor, replace motor. Check controller for burning air, replace controller. Verify supply voltage specifications.
- E6 (Explosion protection): Abnormal supply voltage or motor anomalies. Check if supply voltage is below normal (50%), retest with correct voltage, check controller for odor, replace controller, check motor line connection.
- E07 (Safety switch not on): Put the security lock in place.
-
Troubleshooting (Common Problems):
- Buttons not working: Uncover electronic watch, test buttons, check/replace electronic board, ensure button works after power cycle.
- Electronic watch no display: Check input voltage (AC 200-240V), electric running machine switch, fuse (replace if blown), controller LED, cables, check/replace electronic board/control board.
- Treadmill does not start: Check power plug, power switch, and safety switch.
- Treadmill slips: Adjust running belt tightness as per instructions.
- Running belt deviation: Adjust running belt to center as per instructions.
- Abnormal running sound: Check for loose screws and if running belt needs lubrication.