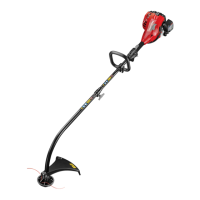
Do you have a question about the Homelite HLT25CDSNC and is the answer not in the manual?
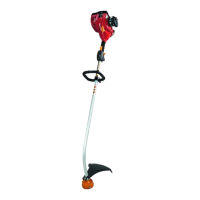
| Engine Type | 2-cycle |
|---|---|
| Engine Displacement | 25 cc |
| Fuel Mix Ratio | 50:1 |
| Starting System | Recoil |
| Shaft Type | Straight |
| Starter System | Recoil |
| Handle Type | Loop |
| Fuel Tank Capacity | 14 fl. oz. |
| Cutting Width | 17 inches |
| Line Diameter | 0.095 inches |
Do not operate when tired, ill, or under the influence of alcohol, drugs, or medication.
Always wear long pants, boots, gloves. Secure hair to avoid entanglement in moving parts.
Wear eye and hearing protection. Inspect for damage before use. Use recommended cutting line.
Maintain firm footing and balance. Do not overreach. Keep cutting attachment below waist level.
Never start or run inside a closed room. Breathing exhaust fumes can cause illness or death.
Mix and pour fuel outdoors where there are no sparks. Remove fuel cap slowly after stopping engine.
Clear work area of objects. Keep children, bystanders, and pets at least 15m away.
Do not use the product in damp or wet locations to avoid falling.
Ensure cutting attachment stops turning when engine idles. Stop all movement before setting down.
Use the product only for its intended purpose.
Refer to these instructions frequently and use them to instruct others who may use the product.
Indicates danger, warning, or caution. Attention is required as your safety is involved.
Manual contains special messages regarding safety concerns, operating, and servicing information.
Wear eye, hearing, and head protection when operating the product.
Carefully remove product and accessories from box. Verify packing list and inspect for damage.
Connect lower shaft to upper shaft by aligning parts and securely tightening the knob.
Install front handle onto upper shaft between foam and label, secure with bolt and wing nut.
Place safety guard over shaft and bracket, install bolt, flat washer, and wing nut securely.
Install PRO-CUT I head assembly on drive shaft and secure it with the spool retainer.
Handle fuel with care as it is highly flammable. Always refuel outdoors and avoid vapor inhalation.
Mix 2% synthetic 2-stroke oil with petrol (50:1 ratio). Mix thoroughly each time before fuelling.
Clean fuel cap area. Loosen cap slowly to release pressure. Pour fuel carefully and replace cap.
Follow specific steps for cold or warm engine start. Ensure switch is ON and use primer/choke.
Release the throttle trigger. Hold the engine switch to the "O" (OFF) position to stop.
Start trimmer, hold at waist level, engine behind body, trim grass parallel to ground.
Replace cutting line with one 500mm length of 2.4mm monofilament line through spool eyelets.
Clean foam filter with warm soapy water, rinse, dry. Apply light engine oil and squeeze out excess.
Check fuel cap for leaks, as it contains a non-serviceable filter and check valve.
The spark arrestor screen should only be cleaned by a recognized service agent.
Use exact replacement spark plug (Champion RCJ6Y/NGK BPMR7A). Replace annually, do not overtighten.
Drain fuel, run engine dry, clean product, and store in a well-ventilated, safe place.
Check switch position, spark, fuel level, and engine flooding. Prime bulb and adjust choke as needed.
Verify oil fuel mixture, air filter condition, and spark arrestor screen cleanliness.
Cut tall grass from the top down. Operate the product at full throttle to prevent wraps.
Operate the product at full throttle. Check fuel mixture and air filter for correct operation.


