7
immediately with clean water. If irritation is still present,
see a doctor immediately.
■ Clean up spilled petrol immediately.
Mixing the fuel
■ The product is powered by a 2-stroke engine and
requires pre-mixing petrol and 2-stroke oil. Store pre-
mix unleaded petrol and 2-stroke engine oil in a clean
container approved for petrol.
■ The engine is certified to operate on unleaded petrol
intended for automotive use with an octane rating of
91 ([R + M] / 2) or higher.
■ Do not use any type of pre-mixed petrol / oil from fuel
service stations, this includes the pre-mixed petrol / oil
intended for use in mopeds, motorcycles, etc.
■ Use synthetic 2-stroke oil only. Do not use automotive
oil or 2-stroke outboard oil.
■ Mix 2% synthetic 2-stroke oil into the petrol. This is a
50:1 ratio.
■ Mix the fuel thoroughly and also each time before
fuelling.
■ Mix in small quantities. Do not mix quantities larger
than usable in a 30 day period. Synthetic 2-stroke oil
containing a fuel stabilizer is recommended.
Filling the tank
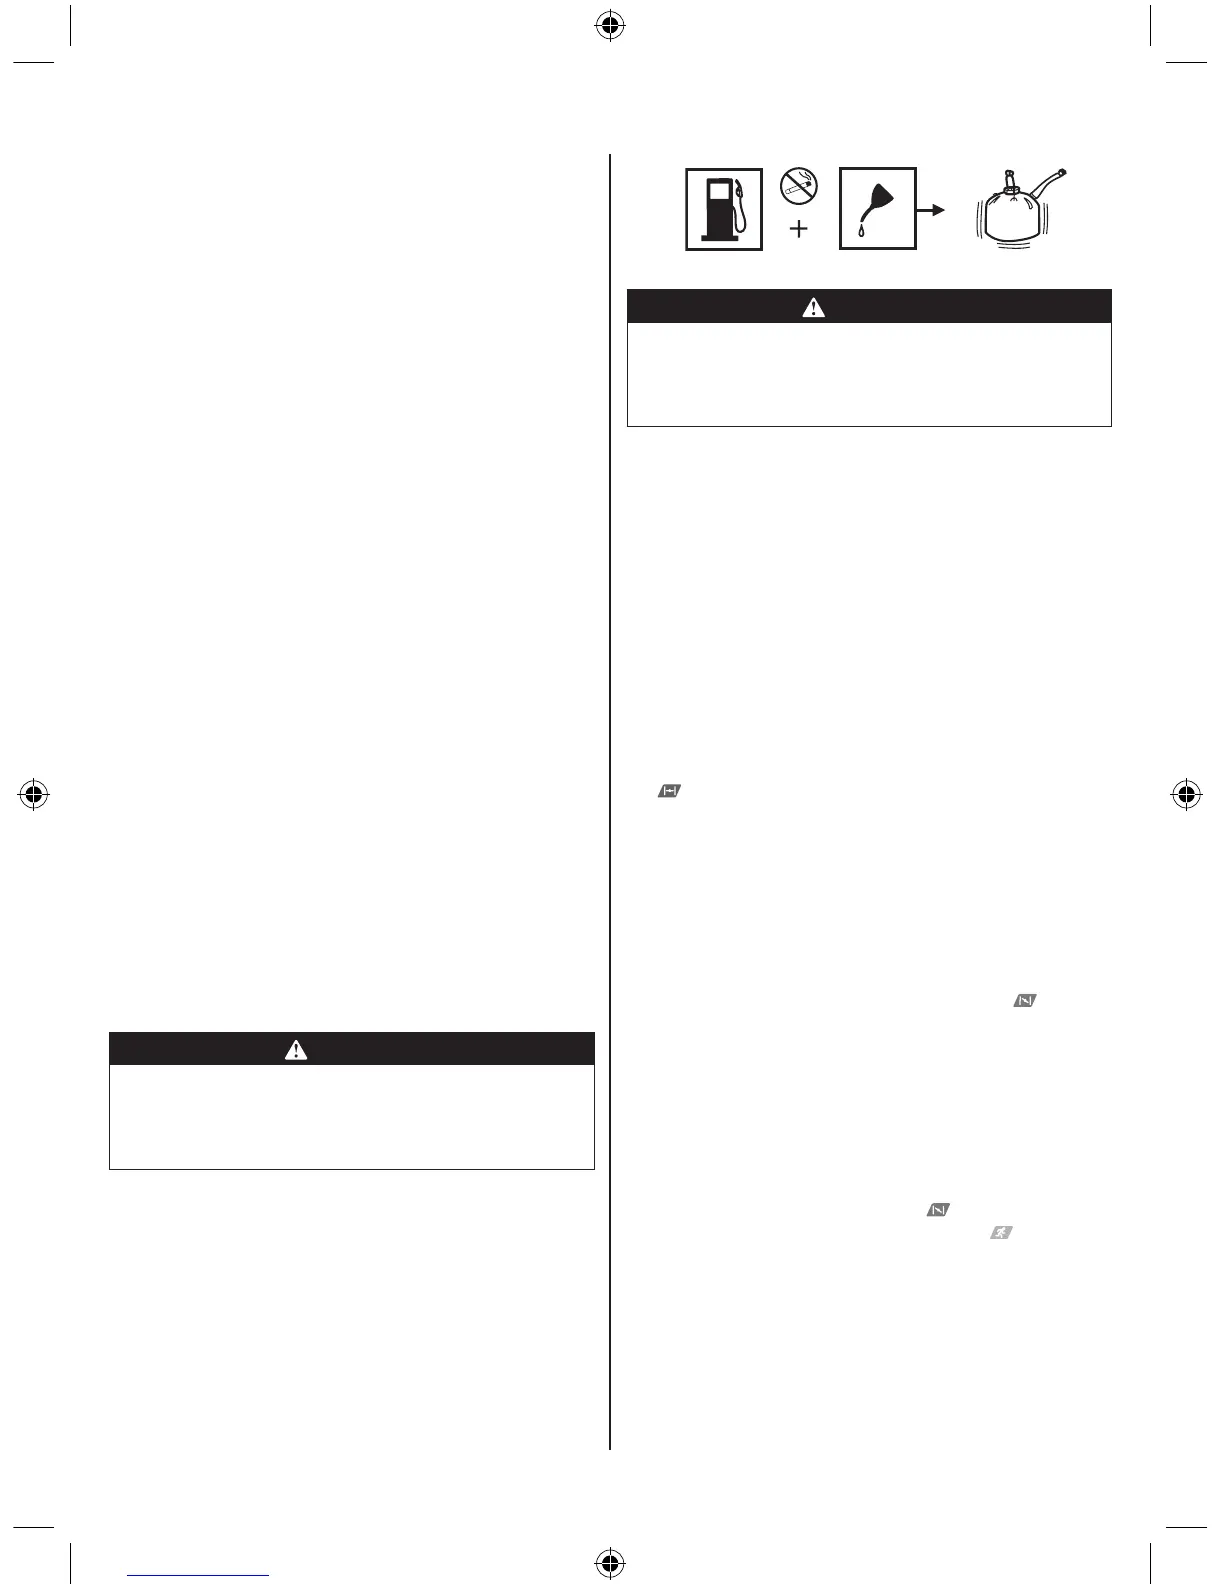
■ Clean surface around fuel cap to prevent
contamination.
■ Loosen fuel cap slowly to release pressure and to
keep fuel from escaping around the cap.
■ Carefully pour fuel mixture into the tank. Avoid spillage.
■ Prior to replacing the fuel cap, clean and inspect the
gasket.
■ Immediately replace fuel cap and hand tighten. Wipe
up any fuel spillage. Move 9 m away from refueling site
before starting engine.
NOTE: It is normal for smoke to be emitted from a new
engine during and after rst use.
WARNING
Always shut off engine before fueling. Never add fuel to
a machine with a running or hot engine. Move at least
9 m from refueling site before starting engine. Do not
smoke!
50:1 Petrol to Oil Mixing Chart
1 Litre + 20 ml = 50:1 (2%)
2 Litres + 40 ml = 50:1 (2%)
3 Litres + 60 ml = 50:1 (2%)
4 Litres + 80 ml = 50:1 (2%)
5 Litres + 100 ml = 50:1 (2%)
WARNING
The product may throw objects during operation,
causing injury to the operator or to bystanders. Always
wear suitable eye protection, heavy, long pants and
boots while operating the product.
STARTING THE PRODUCT
See gures 4a - 4b.
Starting the product differs depending on whether the
engine is cold (not yet started today) or warm (has been
running in the last hour). Always refer to the Starting
Instructions label on the air lter when starting the engine.
Refer below for full instructions.
To start a cold engine:
Follow these steps to start a cold engine.
NOTE: Lay the product on a flat, bare surface.
1. Ensure the engine switch is in the "I" (ON) position.
2. Press the primer bulb approximately 10 times.
3. Set the choke lever to Full choke (choke on) position
.
4. Hold down the throttle lock out button and squeeze
and hold in the throttle trigger. Holding in the trigger
is “wide open throttle” (WOT). With wide open throttle,
pull the starter grip with a quick, rm and consistent
upward motion (No more than 4 pulls).
NOTE: The engine may start after these 4 pulls.
Proceed following steps if it starts. The engine may be
flooded if you continue to pull the starter grip.
5. Set the choke lever to Half choke position .
6. Hold down the throttle lock out button and squeeze
and hold in the throttle trigger (WOT). With wide open
throttle, pull the starter grip with a quick, rm and
consistent upward motion until the engine starts (No
more than 6 pulls).
NOTE: If engine does not start (after 6 pulls with the
choke lever in the Half position), return to step 3 and
repeat the steps.
7. Run the engine with Half choke for 10 seconds.
8. Set the choke lever to the Run position .
NOTE: With choke lever in the Run position, allow
engine to idle for up to 30 seconds prior to operation.
This will allow the engine to warm up. A warm engine
will perform better than a cold engine.
To start a warm engine:
Follow these steps to start a warm engine.
NOTE: Lay the product on a flat, bare surface.
1. Ensure the engine switch is in the "I" (ON) position.

 Loading...