40
Teaching-in
If no pairing operations are carried out, pairing mode is
exited automatically after 3 seconds.
If you want to add another device to the existing devices,
first activate the pairing mode of the existing device and af-
terwards the of the new device.
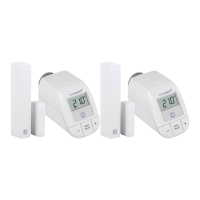
If, for example, you want to add another radiator thermo-
stat, first pair the new radiator thermostat to the existing
radiator thermostat. Afterwards, you can pair the new radia-
tor thermostat with the existing window / door contact.
If you are using several devices in one room, you should pair
all devices with each other.
4.2 Teaching-in to the Access Point (alternative)
You can connect the devices either to the Homematic IP
Access Point or the Central Control Unit CCU2/CCU3. For
detailed information, please refer to the Homematic IP User
Guide, available for download in the download area of
www.eQ-3.com.
To integrate the device into your system and to enable control
via the Homematic IP app, you must teach-in the device to your
HomematicIP Access Point first.
• Open the Homematic IP app on your smartphone.
• Select the menu item “Teach-in device”.
• Remove the insulation strip from the battery compartment (B or
M) of the device. Teach-in mode remains activated for 3 minutes.
 Loading...