53
Replacing batteries
opening the valve. There will be a pleasant room temperature
right away because of the radiated heat.
8 Replacing batteries
If an empty battery is displayed via the app or the device, replace the
used batteries by two new batteries. You must observe the correct
battery type and polarity.
• Open the battery compartment (B or M) of the device (see figure
9 or 10).
• Remove the empty batteries.
• Insert the new batteries making sure that they are right way
around.
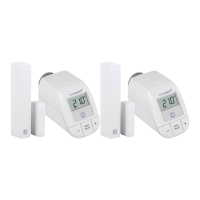
For the radiator thermostat, use two 1.5 V LR6/mignon/AA
batteries and for the door / window contact use two 1.5 V
LR03/micro/AAA batteries.
• Close the battery compartment.
• Please pay attention to the flashing signals of the device LED
while inserting the batteries (see „9.3 Error codes and flashing
sequences“ on page 55).
Once the batteries have been inserted, the radiator thermostat will
perform a self-test (approx. 2 seconds). Afterwards, initialisation
is carried out. The LED test display will indicate that initialisation is
complete by lighting up orange and green.
 Loading...