39
Teaching-in
4.1 Direct pairing
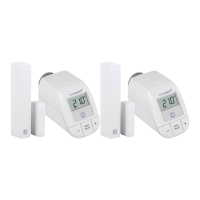
You can directly pair the Homematic IP Radiator Thermostat
– basic (HmIP-eTRV-B) to the Homematic IP Window /
Door Contact with magnet (HmIP-SWDM).
Please make sure you maintain a distance of at least 50cm
between the devices.
You can cancel the pairing procedure by briefly pressing the
system button (D) again. This will be indicated by the device
LED (D) lighting up red.
To connect the radiator thermostat to the Homematic IP Window /
Door Contact with magnet, the pairing mode of both devices has to
be activated.
• Remove the insulation strip from the battery compartment of the
radiator thermostat (B) and the window / door contact (M).
• Press and hold down the system button of the radiator thermostat
(D) for at least 4 seconds to activate the pairing mode (see figure
2). The device LED (D) starts to flash orange. Pairing mode remains
activated for 3 minutes.
• Press and hold down the system button of the window / door
contact with magnet (L) for at least 4 seconds to activate the
pairing mode (see fig. 2). The device LED (L) starts to flash orange.
The device LED lights up green to indicate that teaching-in has been
successful. If teaching-in failed, the device LED lights up red. Please
try again.
 Loading...