45
Installation
5.3 Mounting the window / door contact
5.3.1 Selecting a suitable mounting location
• Select a window or door for mounting the window / door con-
tact.
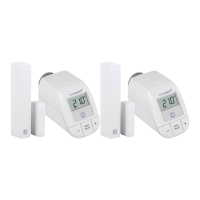
• Fix one part of the window / door contact (magnetic contact (I)
or electronic unit (K) to the moving part (door or window wing),
the other one at the stationary part (frame) of the window or door
(see figure 6).
• Fasten the window / door contact on the side of the window or
door where the handle is located, in the upper third of the win-
dow/door frame (see figure 6) (for fastening see „5.3.2 Adhesive
strip mounting“ on page 45).
• The magnet contact can be mounted in a horizontal or verti-
cal way, left or right to the electronic unit of the window / door
contact.
The electronic unit and the magnet contact should be
mounted at the same height. You can use a spacer (J) for
the magnet contact.
The ideal spacing between the housing edge of the window
/ door contact and the magnet contact should be 5 mm
(see figure 6).
5.3.2 Adhesive strip mounting
When using adhesive strips, make sure that the mounting
surface is smooth, non-disturbed, free of dust, grease and
solvents and not too cold.
 Loading...