BF40AoBFSOA
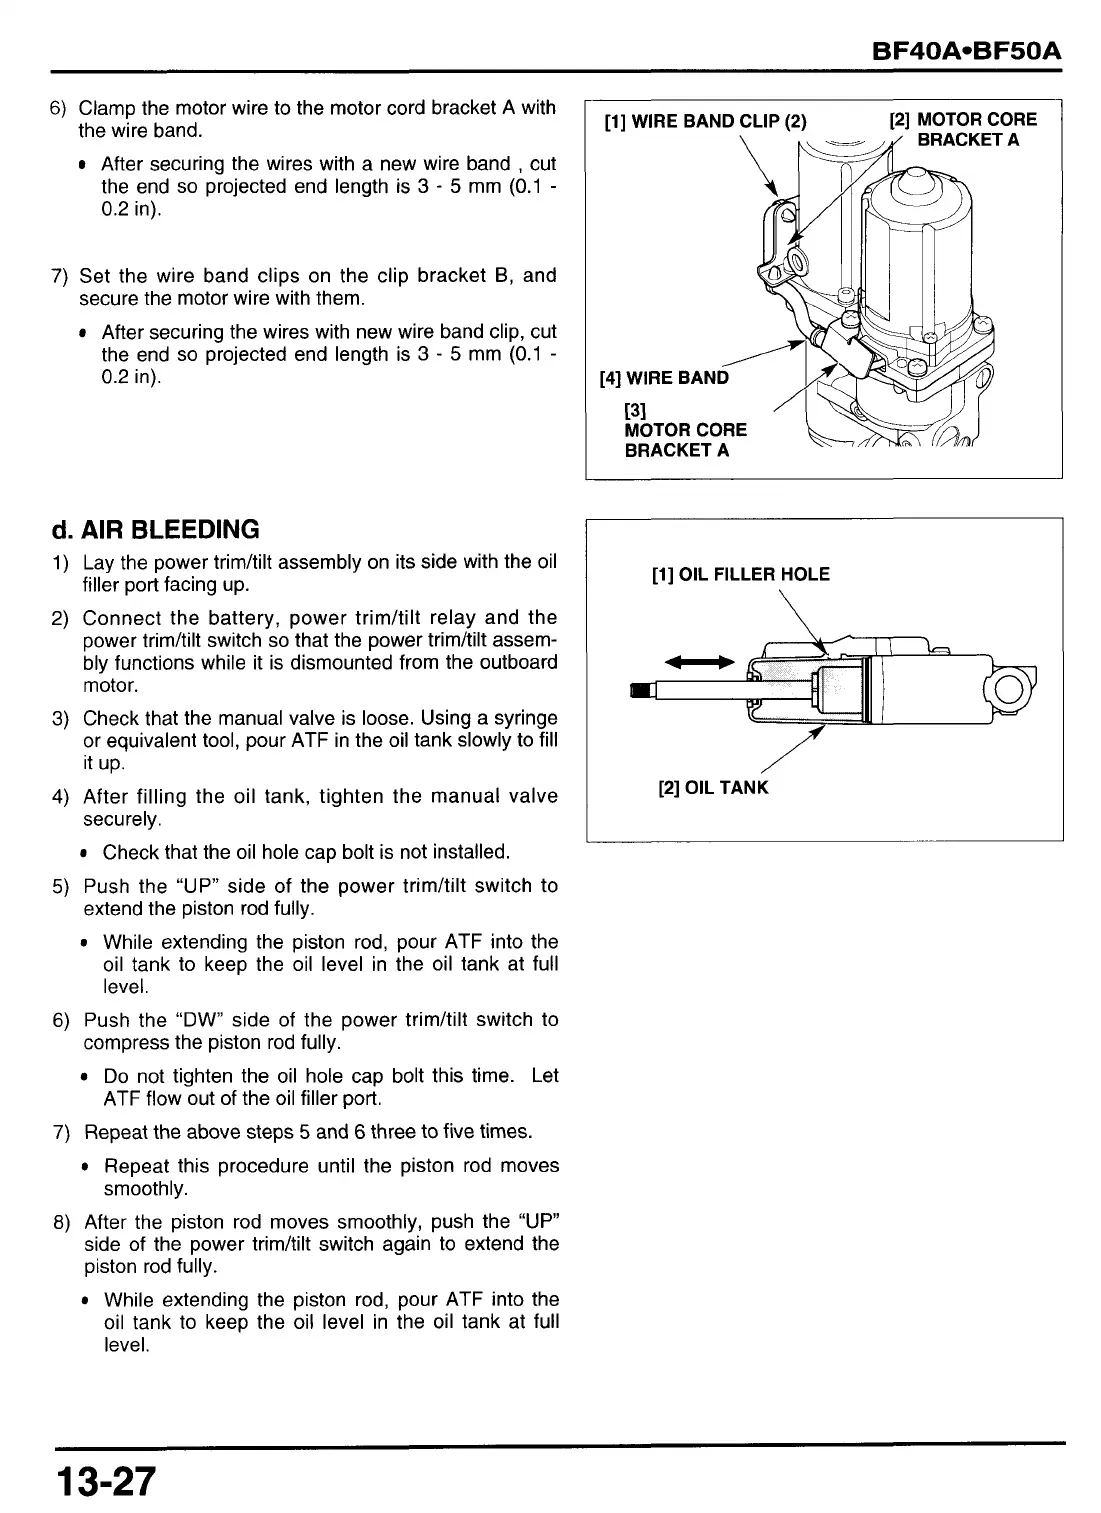
6)
Clamp the motor wire
to
the motor cord bracket A with
the wire band.
After securing the wires with a new wire band
,
cut
the end
so
projected end length is
3
-
5
mm
(0.1
-
0.2
in).
7)
Set the wire band clips on the clip bracket
B,
and
secure the motor wire with them.
After securing the wires with new wire band clip, cut
the end
so
projected end length is
3
-
5
mm
(0.1
-
0.2
in).
d.
AIR
BLEEDING
[l] WIRE BAND CLIP
(2)
[2] MOTOR CORE
[4] WIRE BAN
131
MOTOR CORE
BRACKET A
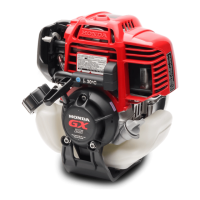
[l]
OIL
FILLER HOLE
1)
Lay the power trimhilt assembly on its side with the oil
filler port facing up.
\
2)
Connect the battery, power trimhilt relay and the
power trimhilt switch
so
that the power trim/tilt assem-
bly functions while it is dismounted from the outboard
motor.
3)
Check that the manual valve is loose. Using a syringe
or equivalent tool, pour ATF in the oil tank slowly to
fill
it up.
4)
After filling the oil tank, tighten the manual valve
securely.
Check that the oil hole cap bolt is not installed.
5)
Push the
“UP”
side of the power trimhilt switch
to
extend the piston rod fully.
While extending the piston rod, pour ATF into the
oil tank
to
keep the oil level in the oil tank at full
level.
6)
Push the “DW” side of the power trimhilt switch
to
compress the piston rod fully.
Do
not tighten the oil hole cap bolt this time.
Let
ATF flow out of the oil filler port.
7)
Repeat the above steps
5
and
6
three to five times.
Repeat this procedure until the piston rod moves
smoothly.
8)
After the piston rod moves smoothly, push the
“UP”
side of the power trimhilt switch again to extend the
piston rod fully.
While extending the piston rod, pour ATF into the
oil tank
to
keep the oil level in the oil tank at full
level.
/
[2]
OIL TANK
13-27