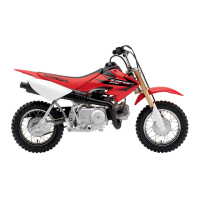
Do you have a question about the Honda CRF50F 2005 and is the answer not in the manual?
Lists causes for clutch slippage during acceleration, such as worn discs or incorrect adjustment.
Identifies reasons for unintended movement when the clutch is disengaged, including warped plates.
Potential causes for difficulty in changing gears, such as loose bolts or damaged spindles.
Lists factors that can cause the transmission to unexpectedly shift out of the selected gear.
Identifies causes for the gearshift pedal failing to return to its neutral position after use.
Details the process of removing the eight bolts securing the right crankcase cover.
Explains how to detach the gasket and dowel pins from the crankcase assembly.
Describes removing the clutch adjusting nut, washer, and O-ring.
Details the removal of the clutch lifter and adjusting bolt assembly.
Outlines the steps for disassembling the clutch assembly, starting with cover removal.
Explains removing the oil passage and its associated spring from the clutch mechanism.
Details removing the clutch outer cover, screws, and bearing.
Instruction on how to prepare a lock washer tab for removal.
Describes using specialized tools to remove the clutch lock nut.
Steps for removing various washers and the main clutch assembly.
Instruction on removing the primary drive gear from the transmission.
Details the procedure for removing the clutch center guide.
Explains removing the snap ring and primary driven gear from the mainshaft.
Instruction on removing the collar from the crankshaft.
Details the complete breakdown of the clutch components into individual parts.
Explains removing the clutch center and outer drive gear components.
Instruction on removing the four damper springs from the clutch assembly.
Details removing the drive plate assembly and its associated clutch springs.
Explains removing the clutch weight stopper ring.
Describes how to inspect the clutch lifter bearing for smooth operation and proper fit.
How to measure clutch spring free length against the specified service limit.
Instructions for inspecting and measuring clutch disc thickness for wear.
How to check clutch plates for warpage using a feeler gauge on a surface plate.
Inspects components for wear or damage and measures their critical dimensions.
Measures the crankshaft's outer diameter at the clutch center guide.
How to inspect the drive gear outer and clutch center for excessive wear or damage.
Details the steps for reassembling the clutch unit.
Steps for installing the clutch weight/center ring onto the drive plate.
Instruction for installing the stopper ring, ensuring alignment with the plate groove.
Details placing clutch springs into the designated holes on the clutch outer.
Describes fitting the drive plate assembly into the clutch outer, aligning bosses with springs.
Instructions for installing plain washers and tightening screws in a crisscross pattern.
Steps for installing the drive gear outer and clutch center components.
Details the correct orientation and installation sequence for clutch discs and plates.
Instruction for installing the clutch set ring with its chamfered side correctly oriented.
Steps for placing the collar onto the crankshaft.
Instruction for installing the driven gear onto the mainshaft and securing it.
Details lubricating the clutch center guide with oil before installation onto the crankshaft.
Steps for installing the primary drive gear onto the mainshaft.
Instruction for mounting the complete clutch assembly onto the crankshaft.
How to install a new 14mm lock washer, aligning tabs with drive plate grooves.
Instruction for correctly positioning lock washer B with its 'OUT SIDE' mark facing out.
Steps for installing and torquing the main clutch lock nut using specialized tools.
Procedure for aligning lock nut and washer tab if initial torque does not match.
Final step of bending up the tab of the 14mm lock washer into the groove of the lock nut.
Instruction for cleaning internal parts of the clutch outer and cover before final assembly.
Details installing the bearing and a new gasket onto the clutch outer cover.
Outlines the steps for disassembling the gearshift linkage components.
Details removing the gearshift pedal and its securing pinch bolt.
Instruction for removing the gearshift stopper arm and its return spring.
Describes the process of pulling out the gearshift spindle from the crankcase.
Details removing the shift cam plate and its retaining bolt.
Instruction for removing the dowel pins and gearshift drum pins.
How to inspect the gearshift spindle for bends or other damage.
Details the steps for reassembling the gearshift linkage.
Steps for installing the gearshift drum pins and dowel pins into the crankcase.
Guidance for correctly positioning the cam plate by aligning pins and dents.
Final steps for installing and torquing the cam plate bolt to the specified value.
Detailed procedure for installing the gearshift spindle into the crankcase.
Steps for installing the gearshift stopper arm and spring, and tightening the bolt.
Instruction for setting the gearshift pedal height relative to the footpeg.
Details securing the gearshift pedal with its pinch bolt.
Steps for installing the clutch lifter assembly into the right crankcase cover.
Instruction for lubricating the O-ring with oil before installing it into the cover groove.
Steps for installing the washer and lock nut onto the clutch lifter assembly.
Details installing the dowel pins and a new gasket onto the crankcase.
Steps for fitting the right crankcase cover and tightening its eight bolts in sequence.
Instruction for installing the kickstarter pedal and tightening its bolt.
Details connecting the return spring to the brake pedal and its holding pin.
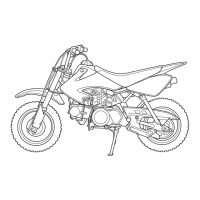
| Engine Type | 49cc air-cooled single-cylinder four-stroke |
|---|---|
| Bore and Stroke | 39.0mm x 41.4mm |
| Compression Ratio | 10.0:1 |
| Induction | 13mm piston-valve carburetor |
| Ignition | CDI |
| Final Drive | Chain |
| Front Brake | Drum |
| Rear Brake | Drum |
| Front Tire | 2.50-10 |
| Rear Tire | 2.50-10 |
| Seat Height | 21.6 inches |
| Curb Weight | 110 pounds |
| Fuel Capacity | 0.7 gallons |
| Starter | Kick |
| Front Suspension | Inverted telescopic fork; 3.5 inches travel |
| Rear Suspension | Single shock, 2.8 inches travel |
| Rake | 25° |
| Valve Train | SOHC; two valves |
| Transmission | 3-speed |