7 69-1285—2
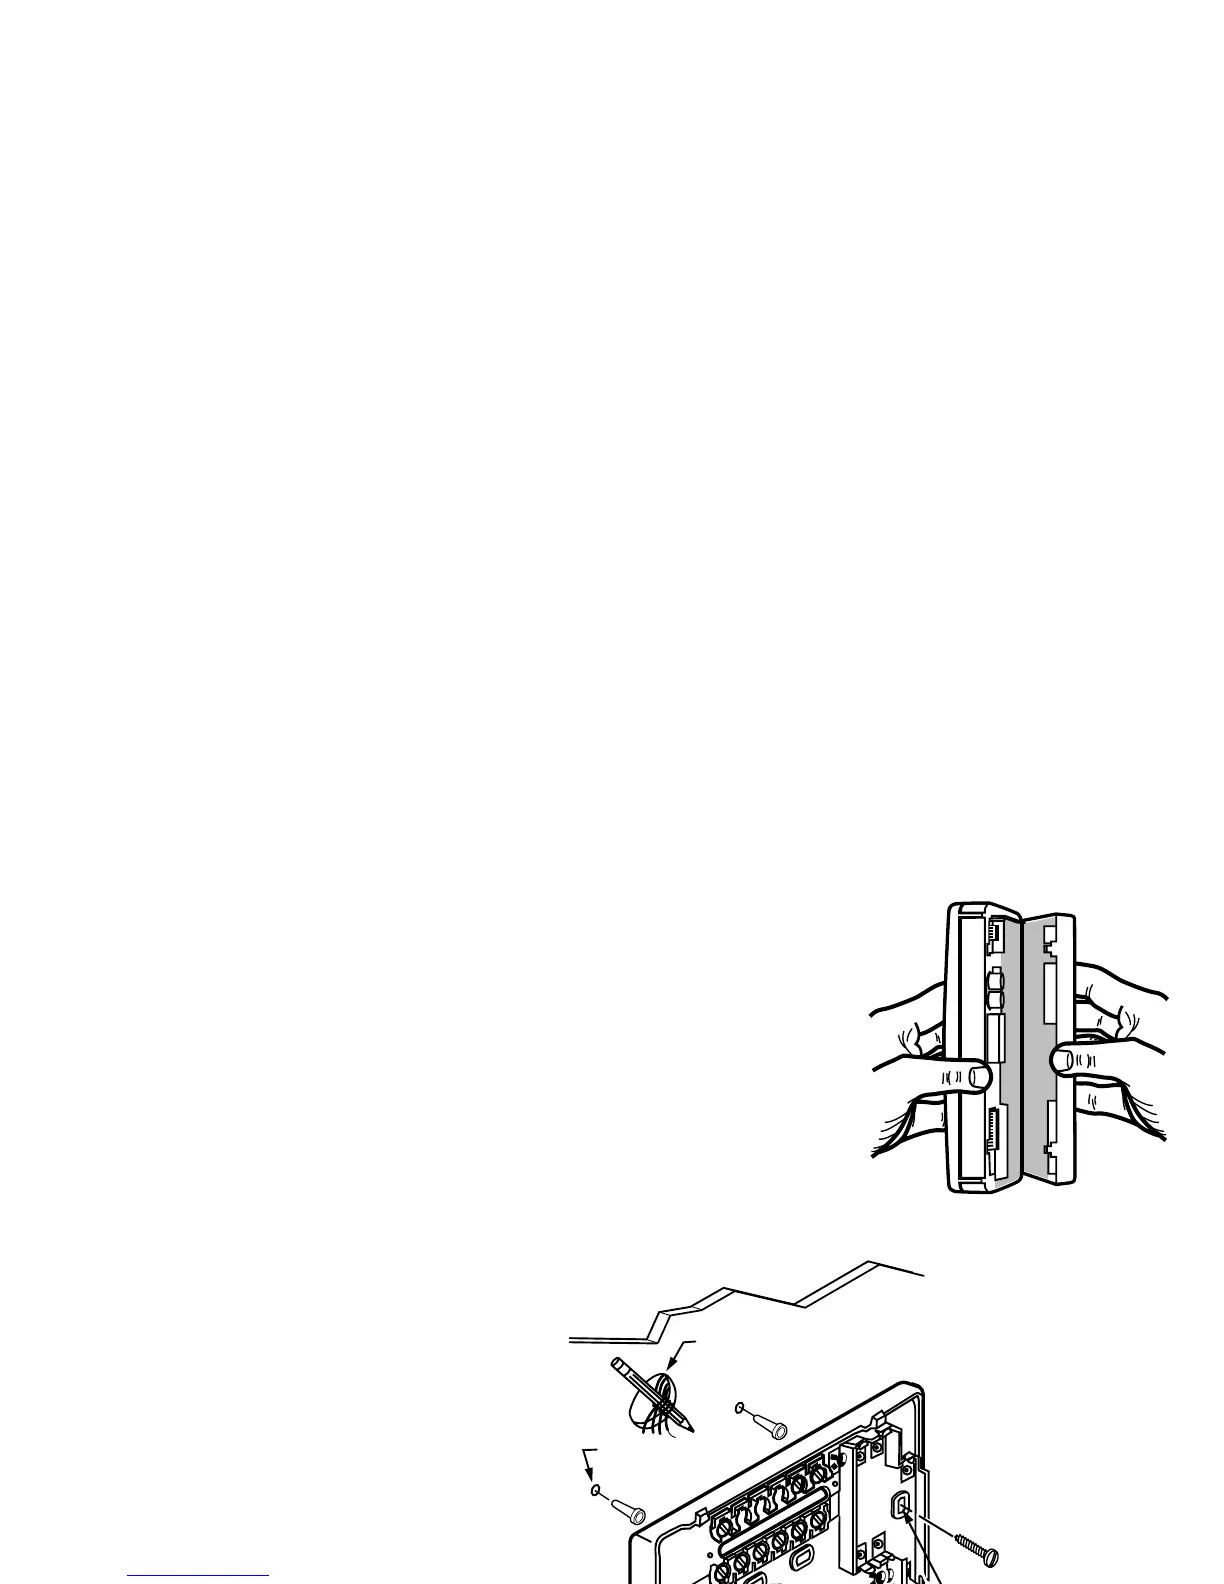
STEP 3. MOUNT THERMOSTAT WALLPLATE
❑ Separate the wallplate from the thermostat b
ers
between the bottom of the wallplate and the thermostat, and pullin
from the thermostat. See illustration at ri
ht.
❑ Position the wallplate on the wall. Level the wallplate for appearance if desired.
Use a pencil to mark the two mountin
holes that best fit the application.
❑ Remove the wallplate from the wall. Drill two 3/16 in. holes in wall (if dr
wall) as
shown. For materials such as plaster or wood, drill 7/32 in. holes where marked.
Gentl
, tap the (provided) anchors into the drilled holes until the
are flush with
the wall.
❑ Reposition the wallplate over the holes. Pull the wires throu
screws into each of the holes.
❑ Level the wallplate if desired. Thermostat functions properl
WIRES
THROUGH WALL
WALL
MOUNTING
HOLES
M15044
MOUNTING
SCREWS
WALL
ANCHORS (2)
 Loading...