15 - 10
Channel Bracket Installation (Pre-existing Hardware Installations)
When choosing a location and installing the optional channel bracket:
• Do not exceed 150 lbs. maximum load on the channel bracket.
• Leave a minimum of 16 in. (40.64 cm) of horizontal space between the hardware used to attach the
channel bracket to the wall.
• An electrical outlet must be easily accessible.
• The mounting location should be dry, stable, easily accessible, and well lighted.
Tools Required
•Drill
• 7/8 in. Drill Bit (for hollow wall installations) or 1/4 in. Drill Bit (for wood stud installations)
• #2 Phillips Screw Driver
• Medium Flat Head Screw Driver
• 9/16 in.Socket Wrench
Hardware Required
• 3/8 in.-16 spring nut, for 13/16 in. deep strut, Qty. 4 per wall bracket
• 3/8 in. flat washer, Qty. 4 per wall bracket
• 3/8 in.-16 x 1.00 in., cap screw, grade 5, Qty. 4 per wall bracket
• Hollow Wall Installations:
3/8 in. x 4 in. round head toggle bolt, 2-5/8 in. usable length, Qty. 4
3/8 in. flat washer, Qty. 4
• Wood Stud Installations:
3/8 in. x 2 1/2 in. length hex head lag screw, Qty. 4
3/8 in. fat washer, Qty. 4
Installation
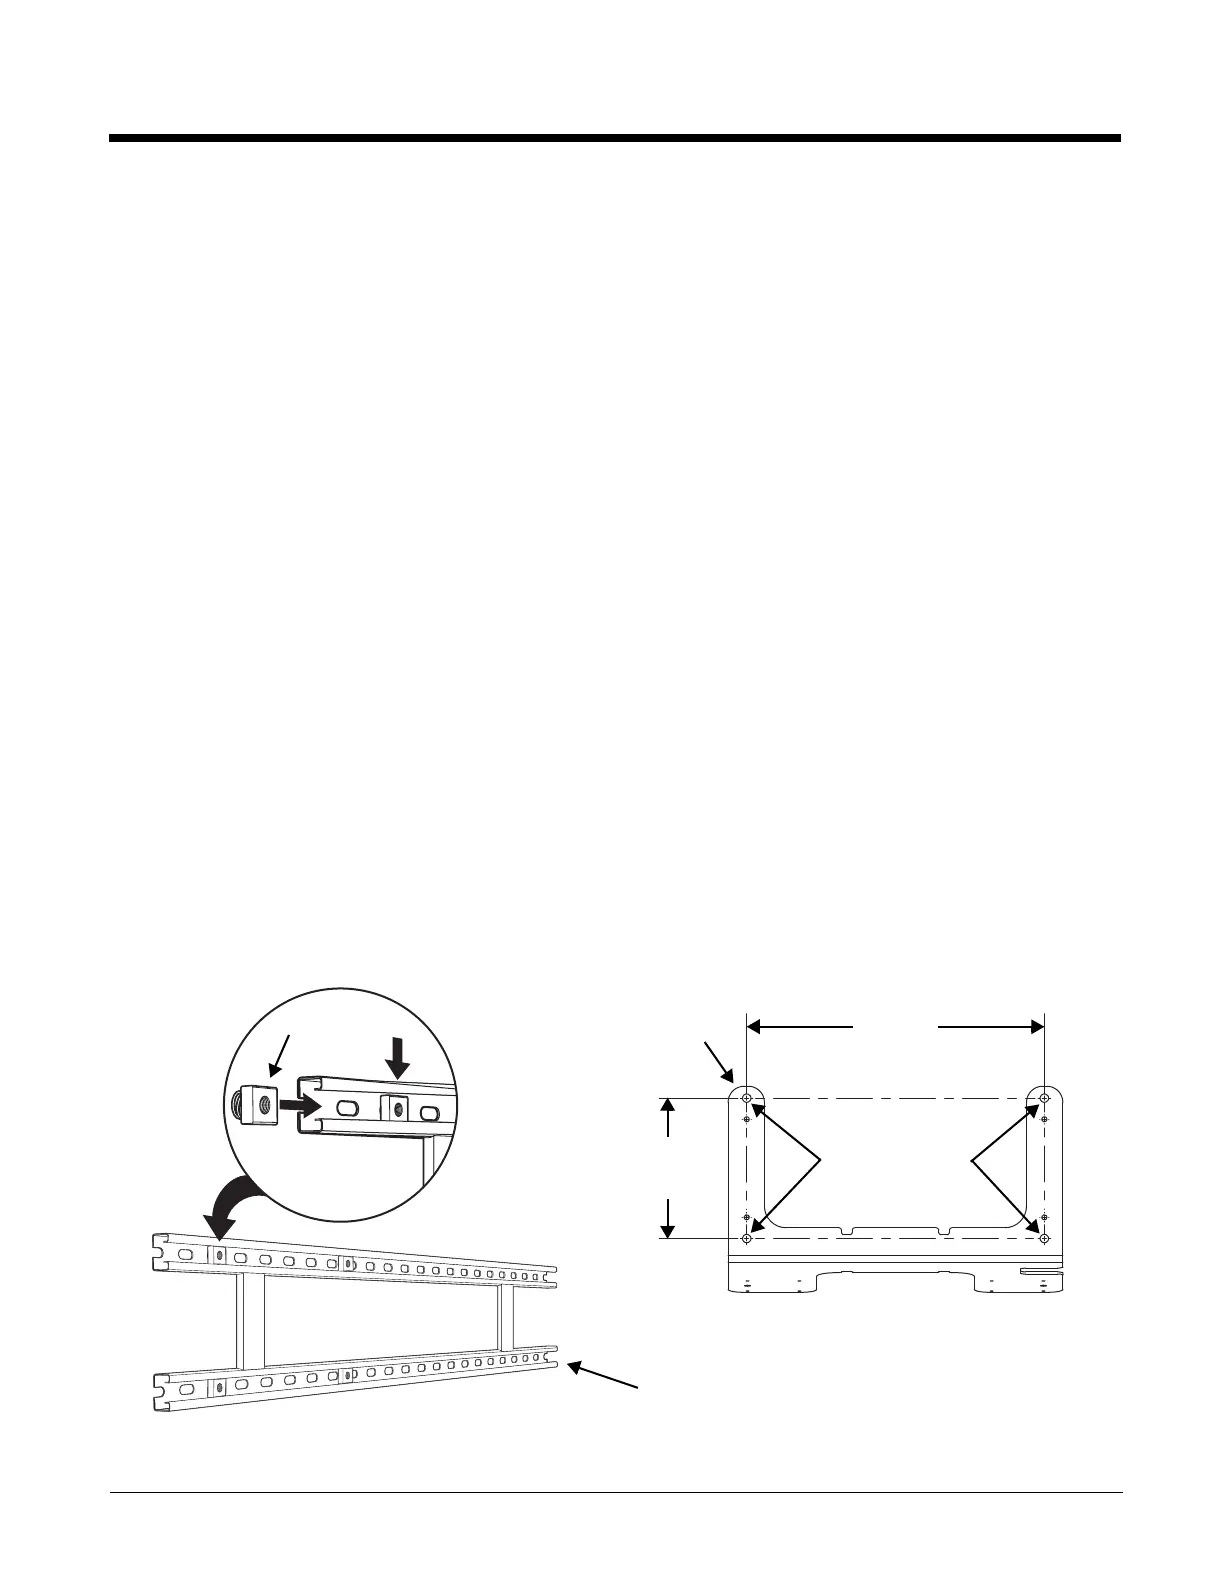
1. Slide the spring nuts into the channel of the bracket and position them to line up with the mounting
holes on the wall bracket.
Wall Mount Holes
6.5 in.
[16.5 cm]
13.78 in.
[35 cm]
Wall Bracket
Channel Bracket
Spring Nut
 Loading...