9
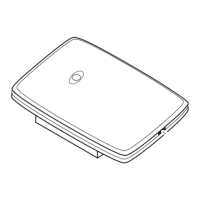
FSL100-SM21 Swivel Mount
The optional swivel mount is a convenient mounting device for fixing the FSL100 series of flame detectors to a variety of
surfaces or poles. The two axis swivel enables you to accurately align the detector’s field of view to the area of fire risk, or you
can use it to increase the detector’s stand-off from the mounting surface (i.e. for cooling and ventilation).
The FSL100-SM21 swivel mount is suitable for Hazardous Area applications, but see the Warning below.
9.1 How to Install the Detector Using the Swivel Mounting
Installation should be carried out by qualified persons only, and in conjunction with the instructions in this handbook.
Tools required:
13 mm wrench
7 mm wrench
#7 screwdriver
Wall plate
Figure 16. Swivel Mounting Fitment (Optional)
1. Unbolt either of the two swivel joints to make it easier to fix the detector to the mounting plate later on.
2. Mount the wall plate to a vibration free wall, ceiling or pole using 4 suitable fixings (not supplied).
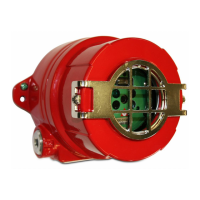
3. Carefully undo the four plastic screws at the corners of the detector cover plate, and gently separate the cover from the
body. Be careful not to touch or damage the electronics inside.
4. Locate and remove the four steel bolts shown in the figure above. Use these bolts to secure the detector body to the swivel
mounting plate, ensuring that the screw heads are fully seated in the body recesses, that the swivel hub is closest to the
cable gland, and that the cable gland will point downwards when fully assembled.
5. Reconnect the swivel joint and tighten the bolt finger tight.
6. Connect the power/signal cable (see Wiring to a Controller (General)) and tighten the cable gland.
7. Place the cover of the detector on the housing and carefully tighten the four red plastic screws to 2 Nm (1.5 ft/lb) torque.
Note: The sensors should be clearly visible through the detector window.
8. Adjust the detector to the correct orientation and fully tighten the two swivel bolts.
9. Check that all is secure and correctly fitted, and then test (with a Honeywell approved test lamp) to ensure that the
operation is correct.
 Loading...