RLV4300 69-1918EF 7/24/06 2/4
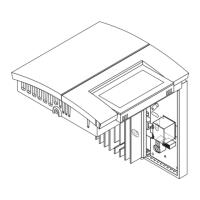
Mount the back plate to the electrical
box using the provided screws. Insert
the screws through a pair (left or right)
of mounting holes on the back plate.
Re-install the front plate of
the thermostat onto the
back plate and secure it
with the screw underneath
the thermostat.
NOTE: If there is a protective film or sticker on the thermostat’s
screen, peel it off.
Apply power to the heating system. Verify the installation by checking
that the heater can be turned On and Off by raising and lowering the
setpoint using the buttons.
ATTENTION: Keep the thermostat's air vents clean and free from
obstructions at all times.
The factory settings are indicated by the gray cells in the following
table.
Warning: Every time you change the thermostat’s configuration, the
clock and schedule parameters return to their default settings.
3.1 Temperature Display Format
To change the temperature display between °C and °F:
n Pull the cover down.
o Press and hold the button.
p Insert a pointed object (e.g., paperclip) through the reset open-
ing. Remove it when the thermostat’s screen becomes blank.
q Wait one second and release the button.
3.2 Time Display Format
To switch between the 12-hour format and the 24-hour format:
n Pull the cover down.
o Press and hold the button.
p Insert a pointed object (e.g., paperclip) through the reset open-
ing. Remove it when the thermostat’s screen becomes blank.
q Wait one second and release the button.
3.3 Control Type
Use proportional control in most cases as it provides better
temperature control.
You must use conventional control if you have a fan-forced
heater or if proportional control causes light flickering (especially
in rural regions).
The FAN indicator is displayed when conventional control is selected.
To switch between the two types of control:
n Pull the cover down.
o Press and hold the button.
p Insert a pointed object (e.g., paperclip) through the reset open-
ing. Remove it when the thermostat’s screen becomes blank.
q Wait one second and release the button.
The clock must be set when TIME flashes on the screen.
n Press the button to set the day.
o Use the and buttons to set the clock.
p Press the button to exit.
The thermostat normally displays the room (measured) temperature.
• To view the set temperature (setpoint), press once on either the
buttons.
• To change the setpoint, press one of the buttons until the
desired setpoint is displayed.
• The screen is backlit for 10 seconds when any button is pressed.
p
Configuration
3.
Temperature display °C °F
Time display
24 h 12 h
Temperature control
Proportional
(15-second cycles)
Conventional
(deadband ± 0.9°F [0,5°C])
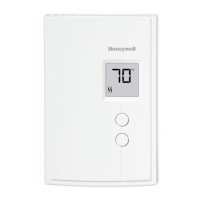
Reset
opening
Pull cover down
q
Clock and Day Setting
4.
r
Temperature Display and Setting
5.
 Loading...