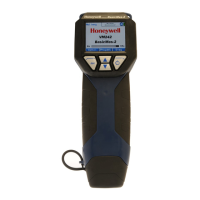
VM242A BASICMES-2 OPERATING INSTRUCTIONS
MU2H-1054GE25 R0411 4 Honeywell • All rights reserved
Operation Command Key
Move to date ↓ DOWN
Change date same way as described above. When all
changes are done:
Leave setup menu Return ESC
Confirm or decline changes Yes / No ON / ESC
Return to main screen Esc ESC
2.7.2 Other Setup Options
Other options in the setup menu are listed below. Default
value is underlined or in brackets:
Time format: 12 / 24
hours
Date format: dd.mm.yyyy
, mm/dd/yyyy
Medium density: 0.10…5.00 kg/l (1.00)
Pressure unit: bar, mbar, kPa, hPa
, m H
2
O, psi, in
wc
Pressure measurement mode: normal
(i.e. measurement
is updated every four seconds) or fast (measurement is
updated every second)
Temperature unit: °C
or °F
Display brightness: 20…100% (60%)
Printer: TD600
, Other
Search by: Cust. num.
, Cust. name
Language: English
, Deutsch
Printer logo: allows up to six lines of text which are printed
at the beginning of each printout with the optional pocket
printer. Default is: (line 1): Honeywell, (line 2) VM242A,
(line 3) BasicMes-2
3 QUICK START
When the BasicMes-2 is switched on it performs a zero
calibration, i.e. the pressure differential between high and low
pressure sensor is set to zero. This takes approx. 10 seconds
and is indicated by a progress bar. After zero calibration the
BasicMes-2 switches to the main screen:
Table 3. Components of main screen
1 Mode – Hydronic balancing
2
Measured flow based on selected valve and
valve presetting
3 Measured differential pressure
4 Measured temperature over T1 (if connected)
5 Selected valve type and size
6 Selected valve presetting
7 Date and time, device and battery status
8 Density
9 Measured temperature over T2 (if connected)
10
kv-value of selected valve at selected
presetting
See
Fig. 7
11 Menu bar
The following descriptions assume the main screen as
starting point.
3.1 Flow Measurement using Valve
Database
Select valve and valve size from device database
Compare valve presetting with presetting shown in display
of the BasicMes-2. Values must be identical!
Connect the BasicMes-2 to valve
red hose is installed to higher pressure outlet (before
orifice or valve seat)
blue hose is installed to lower pressure outlet (after
orifice or valve seat)
Ensure that both pressure hoses are free of air and dirt. If
required flush hoses by opening bypass and ballvalve at
end of red hose
Perform zero calibration. Make sure to open and close
bypass and ballvalve as instructed by the BasicMes-2
3.1.1 Valve Selection
The BasicMes-2 has a database with valve data of Honeywell
balancing valves and common balancing valves of some
other manufacturers. When valve database is used kv-values
of valve being measured are read out of database and do not
need to be input by hand.
The BasicMes-2 uses last selected valve and valve presetting
until value is changed or device is reset.
How to access valve selection menu and select a valve:
Operation Command Key
Stop ongoing measurement Stop ON
Change to main menu Menu ESC
“Select valve” is first menu point and already highlighted
Select “Select valve” Ok ON
Highlight manufacturer, e.g.
“Honeywell”
↑↓ UP/DOWN
Select manufacturer Ok ON
Highlight and select valve and
valve size in same way
↑↓ / Ok
UP/DOWN
/ ON
The BasicMes-2 automatically returns to main screen
where valve presetting can be changed. Default presetting
is lowest presetting stored in database
1 Selected valve
2 Valve presetting
See
Fig. 8
3 kv-value of presetting
1 Valve presetting (5.9)
2 High pressure outlet (red)
See
Fig. 9
3 Low pressure outlet (blue)
How to change presetting of selected valve:
Operation Command Key
Restart measurement Proceed ON
Increase presetting value ↑ UP
Decrease presetting value ↓ DOWN
 Loading...
