Before performing any maintenance task, ensure the Robo.com² is switched o.
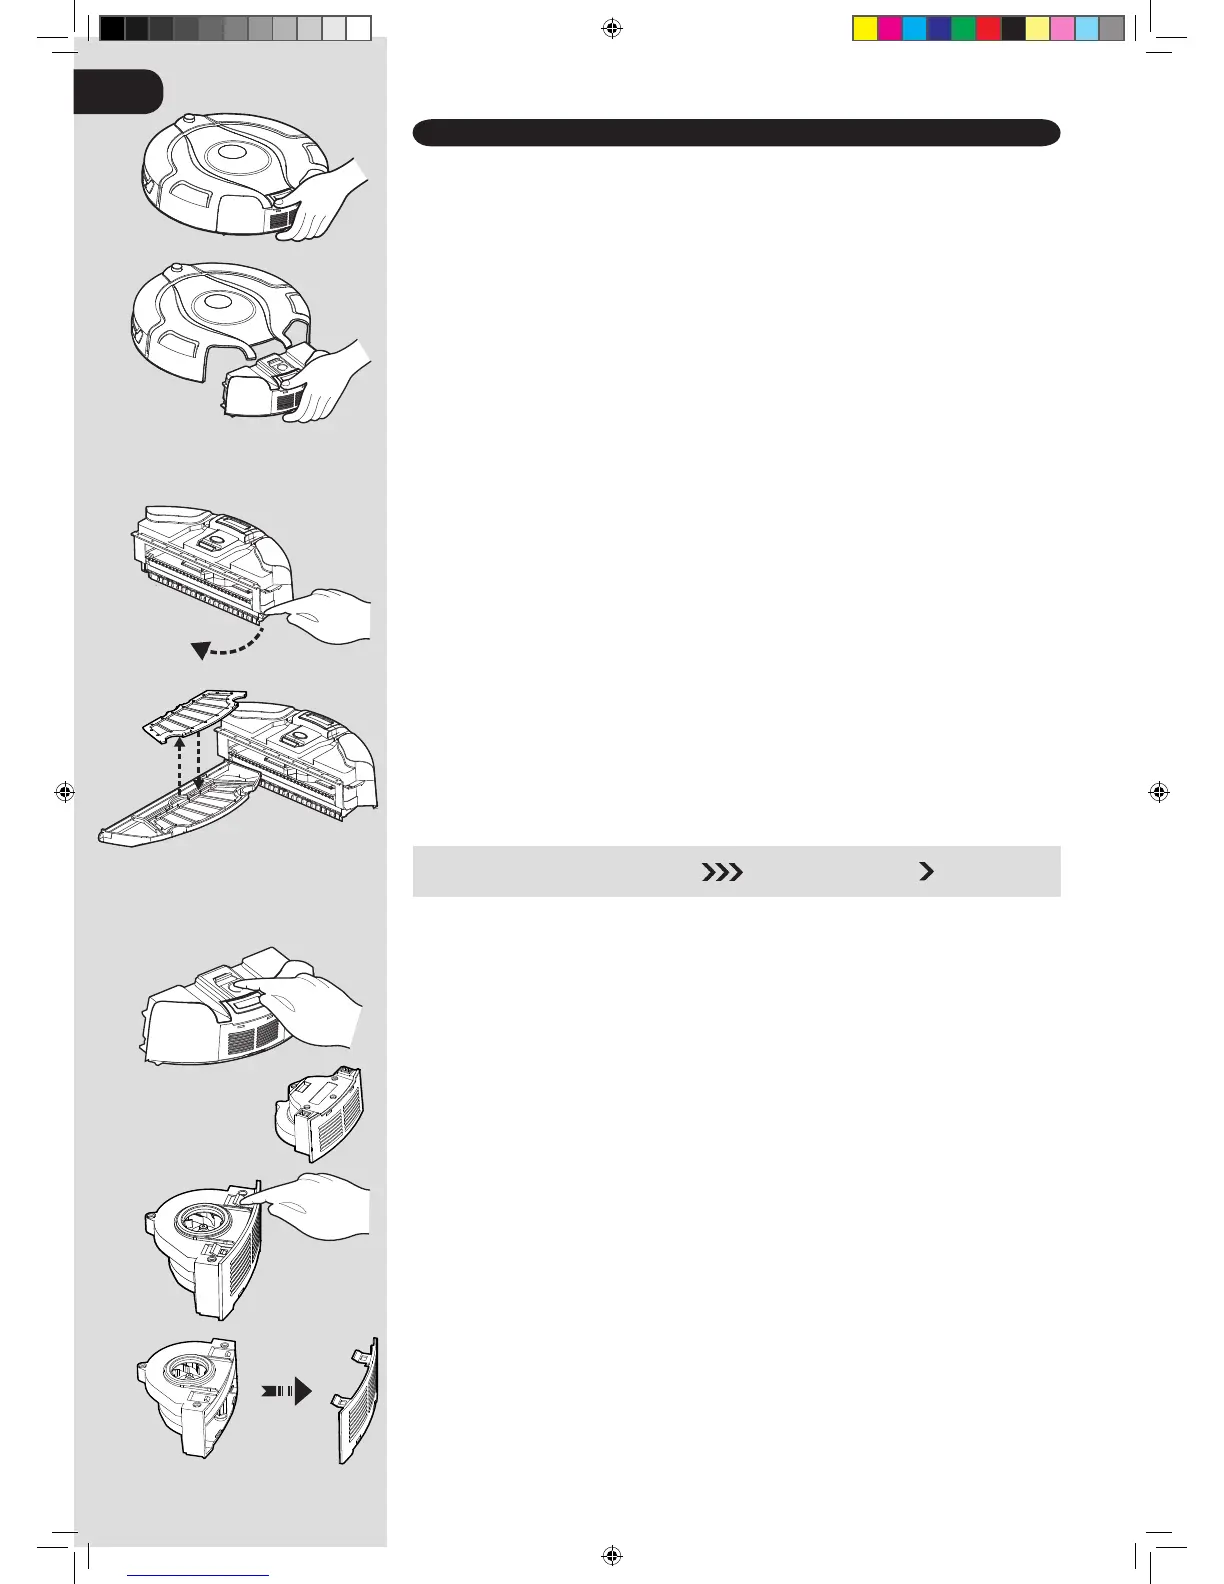
Turn the Robo.com² o and remove from the Charger Base Station.1.
Use a damp cloth with a little soap to clean all surfaces. DO NOT allow water into any part of the product 2.
whilst cleaning.
Dry with a soft Cloth.3.
Emptying the dust container
Empty the dust container every cleaning cycle or when the dust container is full.
Turn the Robo.com² o and remove from the Charger Base Station.1.
Press the dust container release button and remove the Dust Container from the Robo.com².2.
Hold the dust container over a bin to empty.3.
Use the Multi-purpose Cleaning Brush when necessary to remove any excess dust from the internal 4.
surface of the dust container.
Ret the dust container to the Robo.com².5.
Cleaning the lters
The Robo.com² is tted with a pre-motor lter. To maintain optimum cleaning performance, regularly clean the
lter. The lters should be cleaned every 5th dust container empty and should be washed.
IMPORTANT: The lter should be cleaned and washed after the dust container has been emptied 5
times. Failure to clean your lter may result in air blockage, overheating and product failure. This may
invalidate your guarantee.
Turn the Robo.com² o and remove from the Charger Base Station.1.
Press the dust container release button and remove the Dust Container from the Robo.com².2.
Pull the lter drawer tab to open the lter drawer.3.
Push the underside of the lter to pop it out of the bracket.4.
Gently tap and wash the lter using hand warm water. Remove excess water from the lter with a dry 5.
cloth and leave to dry.
Reassemble once completely dry and ret to the cleaner. DO NOT use the Robo.com² without a lter 6.
tted.
IMPORTANT - Regularly check and maintain the lters by following the lter maintenance instructions,
it is also recommended that you purchase new lters after every 3rd lter wash. This will maintain your
cleaners performance.
GB
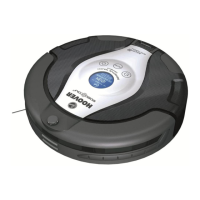
MAINTAINING YOUR ROBO.COM² CLEANER
Cleaning the Motor Assembly
Under normal conditions of use, the motor assembly will not require any maintenance unless the pre motor
lter has not been tted correctly.
Turn Robo.com² o and remove from the Charger Base Station.1.
Press the dust container release button and remove the Dust Container from the Robo.com².2.
Press the motor release button, the motor will pop out.3.
Turn the motor over and unclip the exhaust cover.4.
Clean using the Multi-purpose Cleaning Brush provided.5.
IMPORTANT: Never use water to clean the motor.
CLEAN FILTER REGULARLY PULL TO ACCESS THE FILTER