EN
4
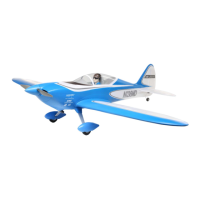
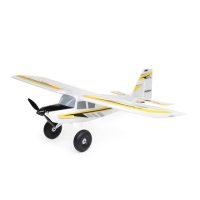
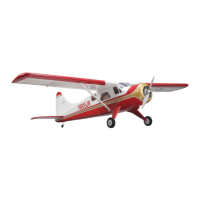
Maule M7
Preight
Transmitter Setup
IMPORTANT: After you set up your model, always rebind the transmitter and
receiver to set the desired failsafe positions.
Dual Rates
At rst y with Low Rate.
NOTICE: To ensure AS3X
®
technology functions properly, do not lower rate
values below 50%. If lower rates are desired, manually adjust the position of
the pushrods on the servo arm.
NOTICE: If oscillation occurs at high speed, refer to the Troubleshooting
Guide for more information.
Expo
After rst ights, you may adjust expo in your transmitter.
Computerized Transmitter Setup
Start all transmitter programming with a blank ACRO model (perform a model
reset), then name the model.
Set Dual Rates to
HIGH 100%
LOW 70%
Set Servo Travel to 100%
Set Throttle Cut to -130%
DXe
Refer to spektrumrc.com for the appropriate download setup.
DX6i
1. Go to the SETUP LIST MENU
2. Set MODEL TYPE: ACRO
3. Go to ADJUST LIST MENU
4. Set FLAPS: Norm £100 Flap Elev 0
LAND 100 Flap Elev 10
DX7S
DX8
1. Go to the SYSTEM SETUP
2. Set MODEL TYPE: AIRPLANE
3. Set WING TYPE: 1 AIL 1 FLAP
4. Go to the FUNCTION LIST
5. Set FLAP SYSTEM: Choose Flap
NORM: -100% FLAP
MID: 0% FLAP 4% Elevator
LAND: 100% FLAP 10% Elevator
SPEED 2.0S: SWITCH = FLAP
DX6e
DX6 (Gen2)
DX7 (Gen2)
DX8 (Gen2)
DX9
DX10t
DX18
DX20
iX12
iX20
NX6
NX8
NX10
1. Go to the SYSTEM SETUP
2. Set MODEL TYPE: AIRPLANE
3. Set AICRAFT TYPE (Model Setup, Aircraft Type)†:
WING: 1 AIL 1 FLAP
4. Go to the FUNCTION LIST (Model Adjust)†
5. Set FLAP SYSTEM:
SELECT SWITCH D:
POS 0: -100% FLAP
POS 1: 0% FLAP 4% Elevator
POS 2: 100% FLAP 10% Elevator
SPEED 2.0
1. Remove and inspect contents.
2. Read this instruction manual thoroughly.
3. Charge the ight battery.
4. Setup Transmitter using transmitter setup chart.
5. Fully assemble the airplane.
6. Install the ight battery in the aircraft (once it has been fully charged).
7. Check the Center of Gravity (CG).
8. Bind the aircraft to your transmitter.
9. Make sure linkages move freely.
10. Test the ap operation.
11. Perform the Control Direction Test with the transmitter.
12. Perform the AS3X Control Direction Test with the aircraft.
13. Adjust ight controls and transmitter.
14. Perform a radio system Range Test.
15. Find a safe open area to y.
16. Plan ight for ying eld conditions.
SAFE
®
Select Technology (BNF Basic)
The BNF Basic version of this airplane includes SAFE Select technology which can offer an extra level of protection in ight. Use the following instructions to make
the SAFE Select system active and assign it to a switch. When enabled, SAFE Select prevents the airplane from banking or pitching past predetermined limits, and
automatic self-leveling keeps the airplane ying in a straight and level attitude when the aileron, elevator and rudder sticks are at neutral.
SAFE Select is enabled or disabled during the bind process. When the airplane is bound with SAFE Select enabled, a switch can be assigned to toggle between
SAFE Select mode and AS3X mode. AS3X
®
technology remains active with no banking limits or self leveling any time SAFE Select is disabled or OFF.
SAFE Select can be congured three ways;
• SAFE Select Off: Always in AS3X mode
• SAFE Select On- no switch assigned: Always in SAFE Select mode
• SAFE Select On with a switch assigned: Switch toggles between SAFE Select mode and AS3X mode
†
Some of the terminology and function locations used in the iX12 programming may
be slightly different than other Spektrum AirWare™ radios. The names given in
parenthesis correspond to the iX12 programming terminology. Consult your transmitter
manual for specic information about programming your transmitter.
‡
The settings provided above for the DX6 and DX6e do not allow for the use of a SAFE Select
switch. To use a SAFE Select switch on these systems see the section below for transmitter
setup and operation information.
 Loading...