Apprentice
®
STOL S 700mm
EN
11
Before attempting to y this aircraft for the rst time, we recommend using the
RealFlight Trainer Edition RC Flight Simulator (RFL1205, Included with the RTF
version, not with the Bind and Fly Basic version), along with the SLT6LP transmitter
included with the RTF version to learn and practice the basics of ying. The included
transmitter may be connected to a PC for simulator use with a standard USB-C
cable. Featuring six popular Horizon Hobby trainer aircraft and built-in Virtual Flight
Instructor lessons, new pilots can learn to y successfully by practicing on a PC at
home or on a laptop just about anywhere else!
We also encourage you to connect with experienced RC pilots in your area
through hobby shops or at designated ying elds. And for those located in
the United States, we recommend joining a national organization such as the
Academy of Model Aeronautics (AMA). The AMA can provide information on
local clubs, instructors and established ying sites in your area in addition to
insurance coverage. Visit www.modelaircraft.org for more information.
Before Your First Flight
RealFlight
Trainer Edition
WARNING: Do not perform this or any other equipment test without
turning on throttle cut. Serious injury or property damage could result
from the motor starting inadvertently.
If the control surfaces do not respond as shown, DO NOT FLY. Refer to the
Troubleshooting Guide for more information. If you need more assistance,
contact the appropriate Horizon Hobby Product Support department.
1. Power on the transmitter.
2. Turn on throttle cut.
3. Set the ight mode switch to Experienced Mode.
IMPORTANT: Do NOT check the controls in the Beginner or
Intermediate Modes.
4. Place the model on level ground away from obstacles.
5. Power on the aircraft, and wait for it to fully initialize.
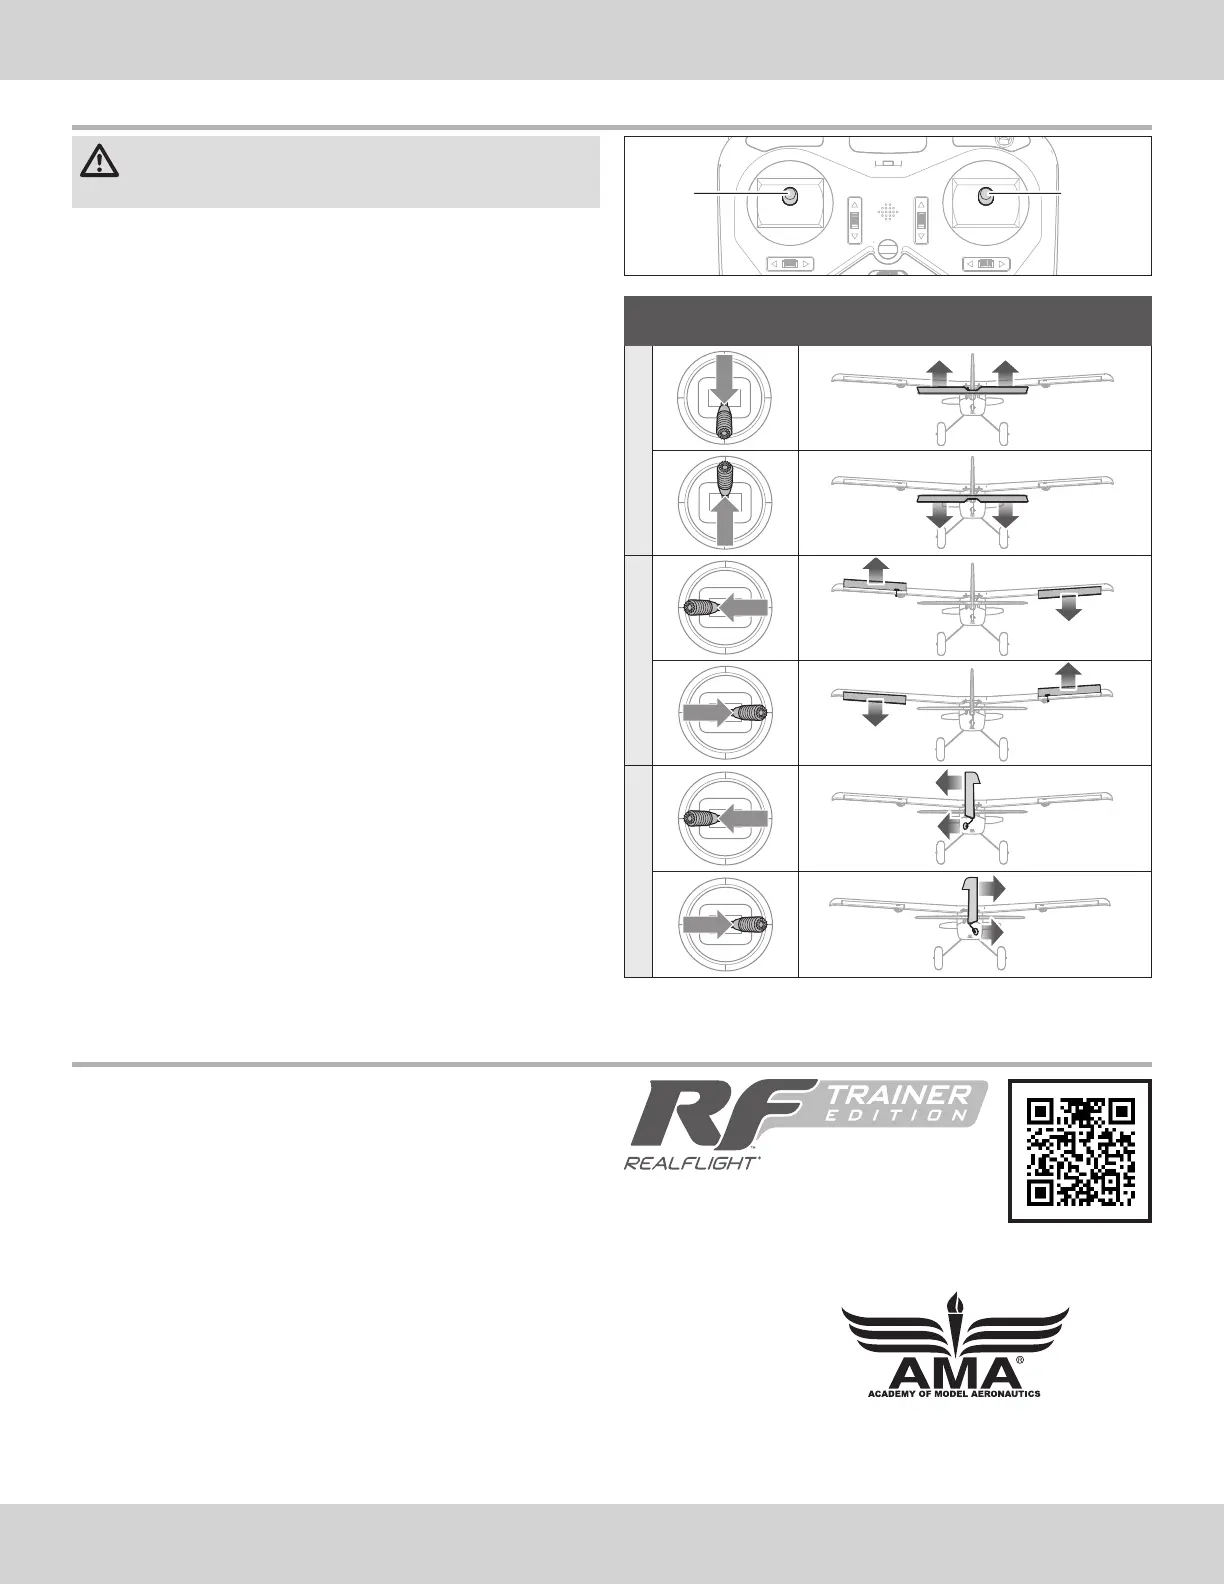
6. Move the sticks on the transmitter as shown in the table and observe the
control surfaces on the aircraft. Ensure the aircraft control surfaces respond
as shown and return to neutral when the control input is released.
7. Check for any binding in the control surfaces.
8. With the aircraft on a smooth surface, roll the aircraft forward by hand.
Push the rudder trim button on the transmitter left or right until the aircraft
tracks straight.
TIP: The transmitter emits a faint beep with each click of the trim buttons in
either direction. Holding the button in either direction quickly adjusts the trim
several steps until the button is released or until the trim reaches the end of
its travel. If the trim button does not beep when clicked, the trim is at the far
end of its travel. Center trim is indicated by a slightly louder beep.
Centering the Control Surfaces
After checking for correct control surface movement, release the transmitter
sticks. Check each of the control surfaces to make sure they are centered.
If adjustments are required, see the Control Surface Centering section for
details.
Control Direction Test
Transmitter
Command
Control Surface Response
(viewed from the rear)
ElevatorAileronsRudder
Throttle/
Rudder Stick
Elevator/
Aileron Stick




 To Next Page