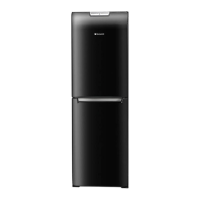
AUTO-TEST
This helps with a quick check
of
the loads and sensor (thermistor), which otherwise are difficult to
activate. NOTE: - Before using the AUTO-TEST it
is
advisable to check the correct operation
of
the
refrigerator lamps, which is used for signalling possible malfunctions.
ACTIVATION DEACTIVATION CHECK RESPONSE
1.
Turn the freezer
Defrost Heater,
Gutter Heater & Freezer
control knob to
Automatically:
Duct Heater (if fitted).
the minimum After250
setting
seconds from the
NOTE:
(appliance OFF start of the Auto
The heaters will only
be
position).
Test it will
be
checked during the auto
deactivated.
test if the freezer
Fridge interior
2.
Turn the control
evaporator temperature
lamp flashes if
NO-FROST
knob from the
is
lower than (-10°C).
during the
MODEL
OFF position
to
Manually
by:
checks
FF1758
the maximum
Turning the
described a
setting.
control knob from fault
is
the OFF position. detected.
3.
Turn the control
knob from or
Temperature Sensor
maximum to the
(thermistor)
minimum setting
Switching OFF
(appliance OFF
the power supply
position).
Auto-Test Sequence
1. Heaters - 6 second test
For the 'Auto-test' to check the heater circuit, the evaporator must be sensing a temperature
of
-10°C
or
colder.
The defrost, gutter and duct heater (iffitted) are connected in parallel. 'Auto-test' only checks for
a circuit, therefore provided only 1
of
the heaters are okay the 'Auto-test' will not detect a failure.
To be sure that all heaters are in order, they must be checked with a test meter individually.
2.
Sensor - 6 second test
Auto-test checks for open
or
short circuit.
3.
Fan - 6 second test
Manually check the air flow.
4. Heater, Fan - 216 second test
Check the fan operation visually - test the heater manually.
Where the Auto-test sequence highlights a failure, CHECK the wiring connections at the plugs
and sockets of the various components.
11
VVPL00003242_0011