Howto Usethe Hold/Timer
Your HOLD/TIMER, which oper-—
e
ates without microwave ene’rgy,
has three timing functions.
It operates as a Minute” Timer, it
can be set to delay cooking or may
be used as a hold setting after de-
frosting. Hold/Timer can be set up
to 99 minutes.
Step 1: Touch HOLD/TIMER pad.
The display shows :0. Signal light
above HOLD/TIMER flashes.
Step 2: Select the amount of time
you desire. Touch the appropriate
number pads. If, for example, you
are timing a three minute phone
call, touch 3, 0, and O.The display
shows 3:00.
Step 3: Touch START. The readout
display shows the time as it counts
down.
Step 4: When time is up, oven will
signal and display will show time
of day.
The HOLD/TIMER can also be
used to program “standing time”
between microwave cooking func-
tions. The time can range from one
second to 99 minutes and 99 sec-
onds. A HOLD, or “standing” time
may be found in some of your own
recipes or Cookbook.
To set the oven to delay cooking
up to 99 minutes follow Steps 1
and 2 to enter hold time, then set
Time Cook and time, or Temp
Cook and temperature desired
before pressing START. When
holding before temperature
cooking, be sure probe is in food
before pressing START.
Howto Defrost–Hold/Time–Time Cook
To help you become acquainted with the HOLD/TIMER feature as used with Time Cook or Temp Cook follow
steps below to defrost a frozen casserole for 15 minutes, then hold 10 minutes and then cook 25 minutes. If using
Temp Cook after Hold/Timer, be sure to insert probe correctly as shown on page 12.
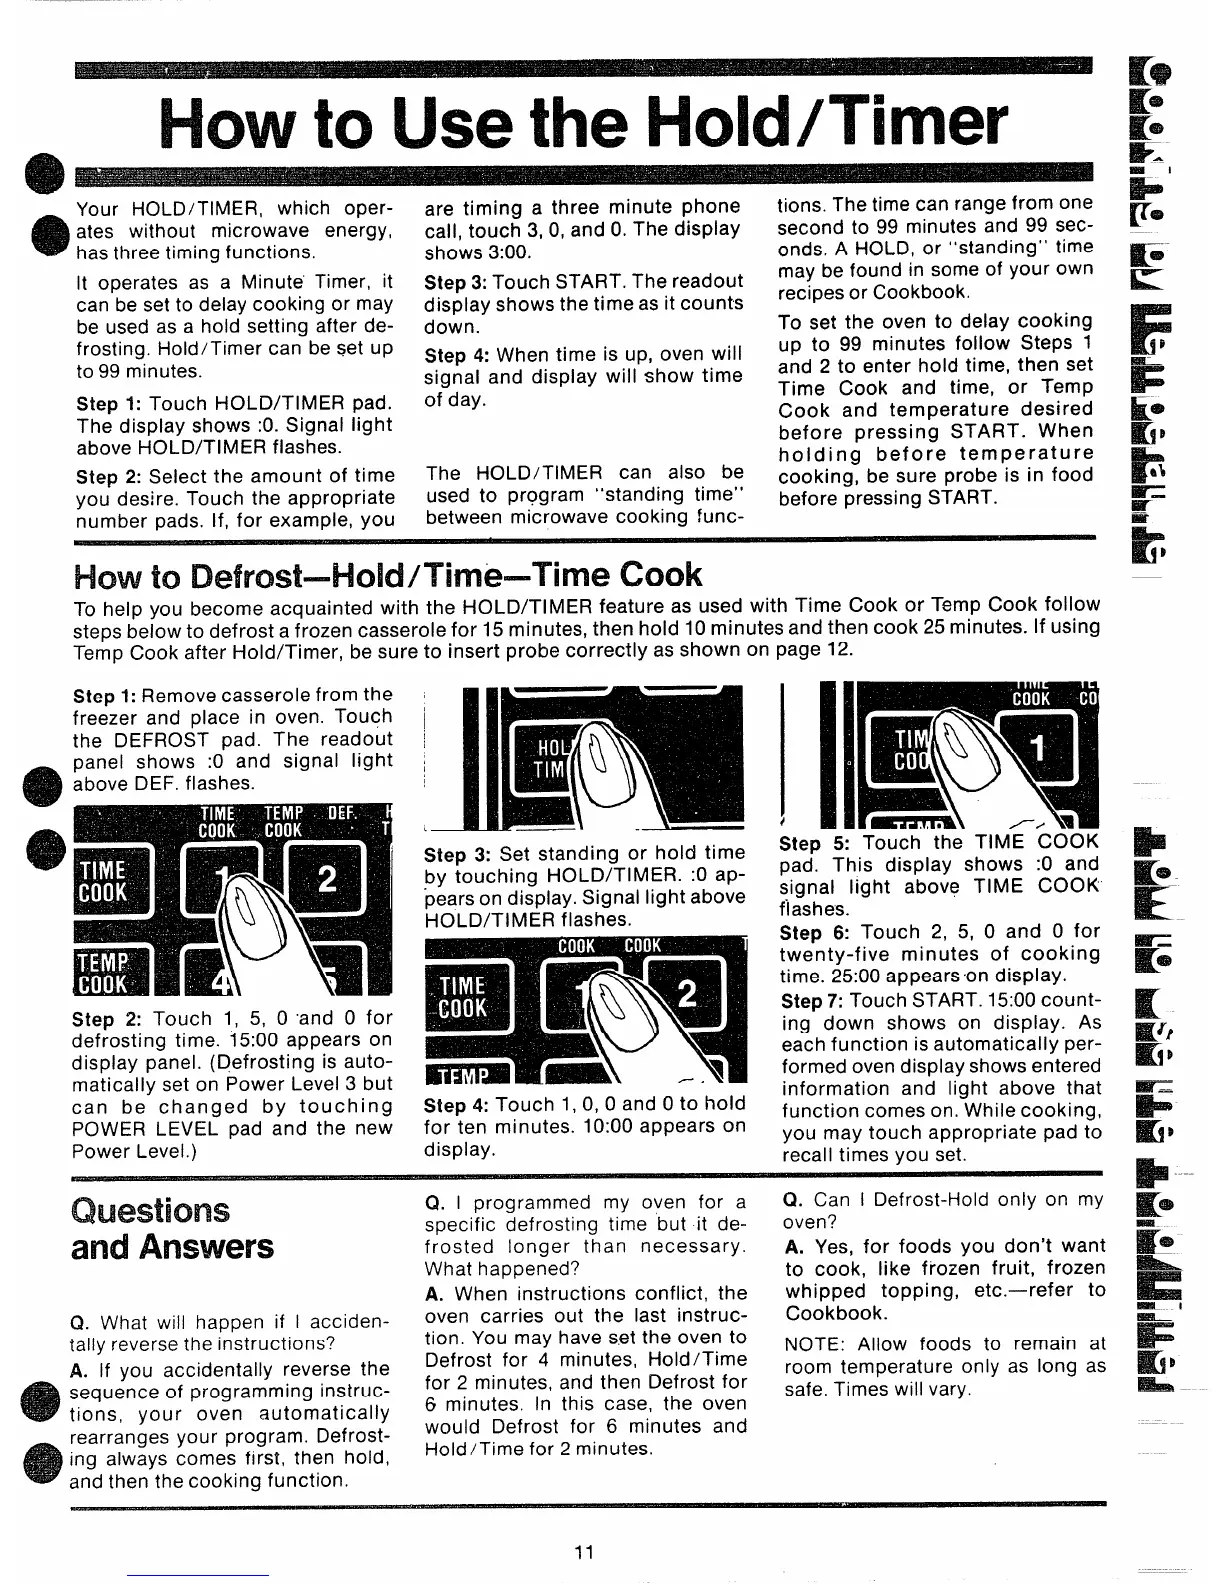
Step 1: Remove casserole from the
freezer and place in oven. Touch
the DEFROST pad. The readout
panel shows :0 and signal light
above DEF, flashes.
1
I
!
Step 2: Touch 1, 5, 0 ‘and O for
defrosting time. 15:00 appears on
display panel, (Defrosting is auto-
matically set on Power Level 3 but
can be changed by touching
POWER LEVEL pad and the new
Power Level.)
L
Step 3: Set standing or hold time
by touching HOLD/TIMER. :0 ap-
pears on display. Signal light above
HOLD/TIMER flashes.
Step 4: Touch 1, 0, 0 and Oto hold
for ten minutes. 10:00 appears on
display.
Step 5: Touch the TIME COOK
pad. This display shows :0 and
signal light above TIME COOK
flashes.
Step & Touch 2, 5, 0 and O for
twenty-five minutes of cooking
time. 25:00 appearson display.
Step 7: Touch START. 15:00 count-
ing down shows on display. As
each function is automatically per-
formed oven display shows entered
information and light above that
function comes on. While cooking,
you may touch appropriate pad to
recall times you set.
Questions
andAnswers
Q. What will happen if I acciden-
tally reverse the instructions?
A. If you accidentally reverse the
sequence of programming instruc-
tions, your oven automatically
rearranges your program. Defrost-
ing always comes first, then hold,
and then the cooking function.
Q. I programmed my oven for a
specific defrosting time but it de-
frosted longer than necessary.
What happened?
A. When instructions conflict, the
oven carries out the last instruc-
tion. You may have s,etthe oven to
Defrost for 4 minutes, Hold/Time
for 2 minutes, and then Defrost for
6 minutes. In this case, the oven
would Defrost for 6 minutes and
Hold/Time for 2 minutes.
Q. Can I Defrost-Hold only on my
oven?
A. Yes, for foods you don’t want
to cook, like frozen fruit, frozen
whipped topping, etc.—refer to
Cookbook.
NOTE: Allow foods to remain at
room temperature only as long as
safe. Times will vary.
11