Your oven is designed to give you the best results in
baking, broiling, and roasting when used as recom-
mended. Before using your oven, look at the direc-
tions for setting and using all of the controls and
timer.
ovenLight
Light comes on automatically when door is opened
or use switch on window door to turn it on when
door is closed.
ovenshelves
When the shelves are correctly placed on shelf sup-
ports they are designed with stop-locks to prevent
them from coming out of the oven or tilting when
food is placed on them. TO REMOVE, lift up rear of
shelf and pull forward with stop-locks along top of
shelf support. TO REPLACE, insert shelf with stop-
Iocks resting on shelf supports and push toward
rear of oven until it falls into correct position under
shelf support.
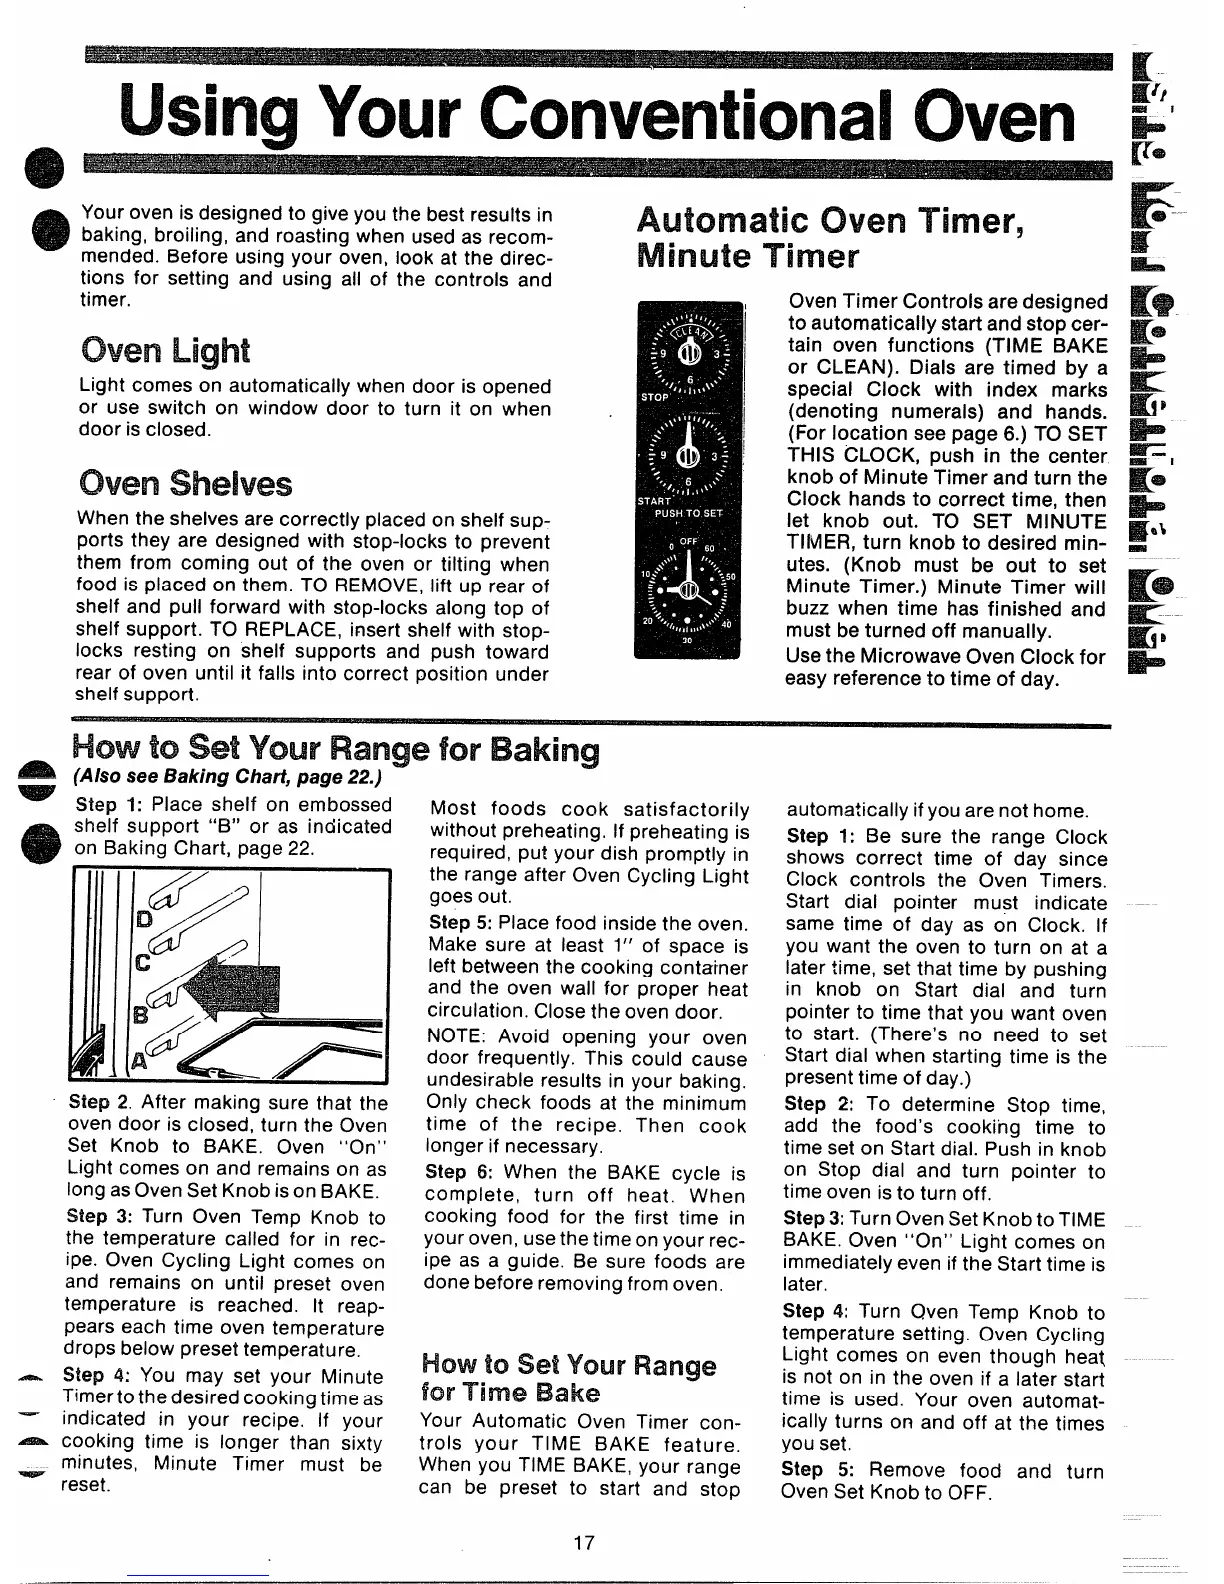
Automatic Oven Timer,
Minute Timer
,
HowtosetYour RangeforBaking
}
(
4
i
i
Oven
Timer Controls aredesigned
to automatically startandstop cer-
tain oven functions (TIME BAKE
or CLEAN). Dials are timed by a
special Clock with index marks
(denoting numerals) and hands.
(For location seepage 6.) TO SET
THIS CLOCK,
push in the center
knob of Minute Timer and turn the
Clock hands to correct time, then
let knob out. TO SET MINUTE
TIMER, turn knob to desired min-
utes. (Knob must be out to set
Minute Timer.) Minute Timer will
buzz when time has finished and
must be turned off manually.
Use the Microwave Oven Clock for
easy reference to time of day.
(Also see Baking Chart, page 22.) -
Step 1: Place shelf on embossed
shelf support “B” or as indicated
on Baking Chart, page 22.
Step 2. After making sure that the
oven door is closed, turn the Oven
Set Knob to BAKE. Oven “On”
.ight comes on and remains on as
ong as Oven Set Knob ison BAKE.
step 3: Turn Oven Temp Knob to
he temperature called for in rec-
pe. Oven Cycling Light comes on
md remains on until preset oven
emperature is reached. It reap-
]ears each time oven temperature
jrops below preset temperature.
Hep 4: You may set your Minute
‘imertothedesired cooking time as
ldicated in your recipe. If your
ooking time is longer than sixty
linutes, Minute Timer must be
eset.
Most foods cook satisfactorily
without preheating, If preheating is
required, put your dish promptly in
the range after Oven Cycling Light
goes out.
Step 5: Place food inside the oven.
Make sure at least 1“ of space is
left between the cooking container
and the oven wall for proper heat
circulation. Close the oven door.
NOTE: Avoid opening your oven
door frequently. This could cause
undesirable results in your baking.
Only check foods at the minimum
time of the recipe. Then cook
longer if necessary.
Step 6: When the BAKE cycle is
complete, turn off heat. When
cooking food for the first time in
your oven, usethetime on your rec-
ipe as a guide. Be sure foods are
done before removing from oven.
HowtosetYcw Range
forTime Bake
Your Automatic Oven Timer con-
trols your TIME BAKE feature.
When you TIME BAKE, your range
can be preset to start and stop
r
$s$
K*.
automatically if you are not home.
Step 1: Be sure the range Clock
shows correct time of day since
Clock controls the Oven Timers.
Start dial pointer must indicate -
same time of day as on Clock. If
you want the oven to turn on at a
later time, set that time by pushing
in knob on Start dial and turn
pointer to time that you want oven
to start. (There’s no need to set
Start dial when starting time is the
present time of day.)
Step 2: To determine Stop time,
add the food’s cooking time to
time set on Start dial. Push in knob
on Stop dial and turn pointer to
time oven is to turn off.
Step3: Turn Oven Set Knob to TiME
BAKE. Oven “On” Light comes on
immediately even if the Start time is
later,
Step 4: Turn Qven Temp Knob to
temperature setting. Oven Cycling
Light comes on even though heat
is not on in the oven if a later start
time is used. Your oven automat-
ically turns on and off at the times
you set.
Step 5: Remove food and turn
Oven Set Knob to OFF.
17
 Loading...