46 Chapter 9 D82007778Q 09/15
Removal and installation of seats with side rails
The seat assembly is heavy. To avoid injury, do not attempt to
lift beyond your capability.
Removal
1. Remove the controller (See page 45).
2. Remove the controller cable from seat if so attached.
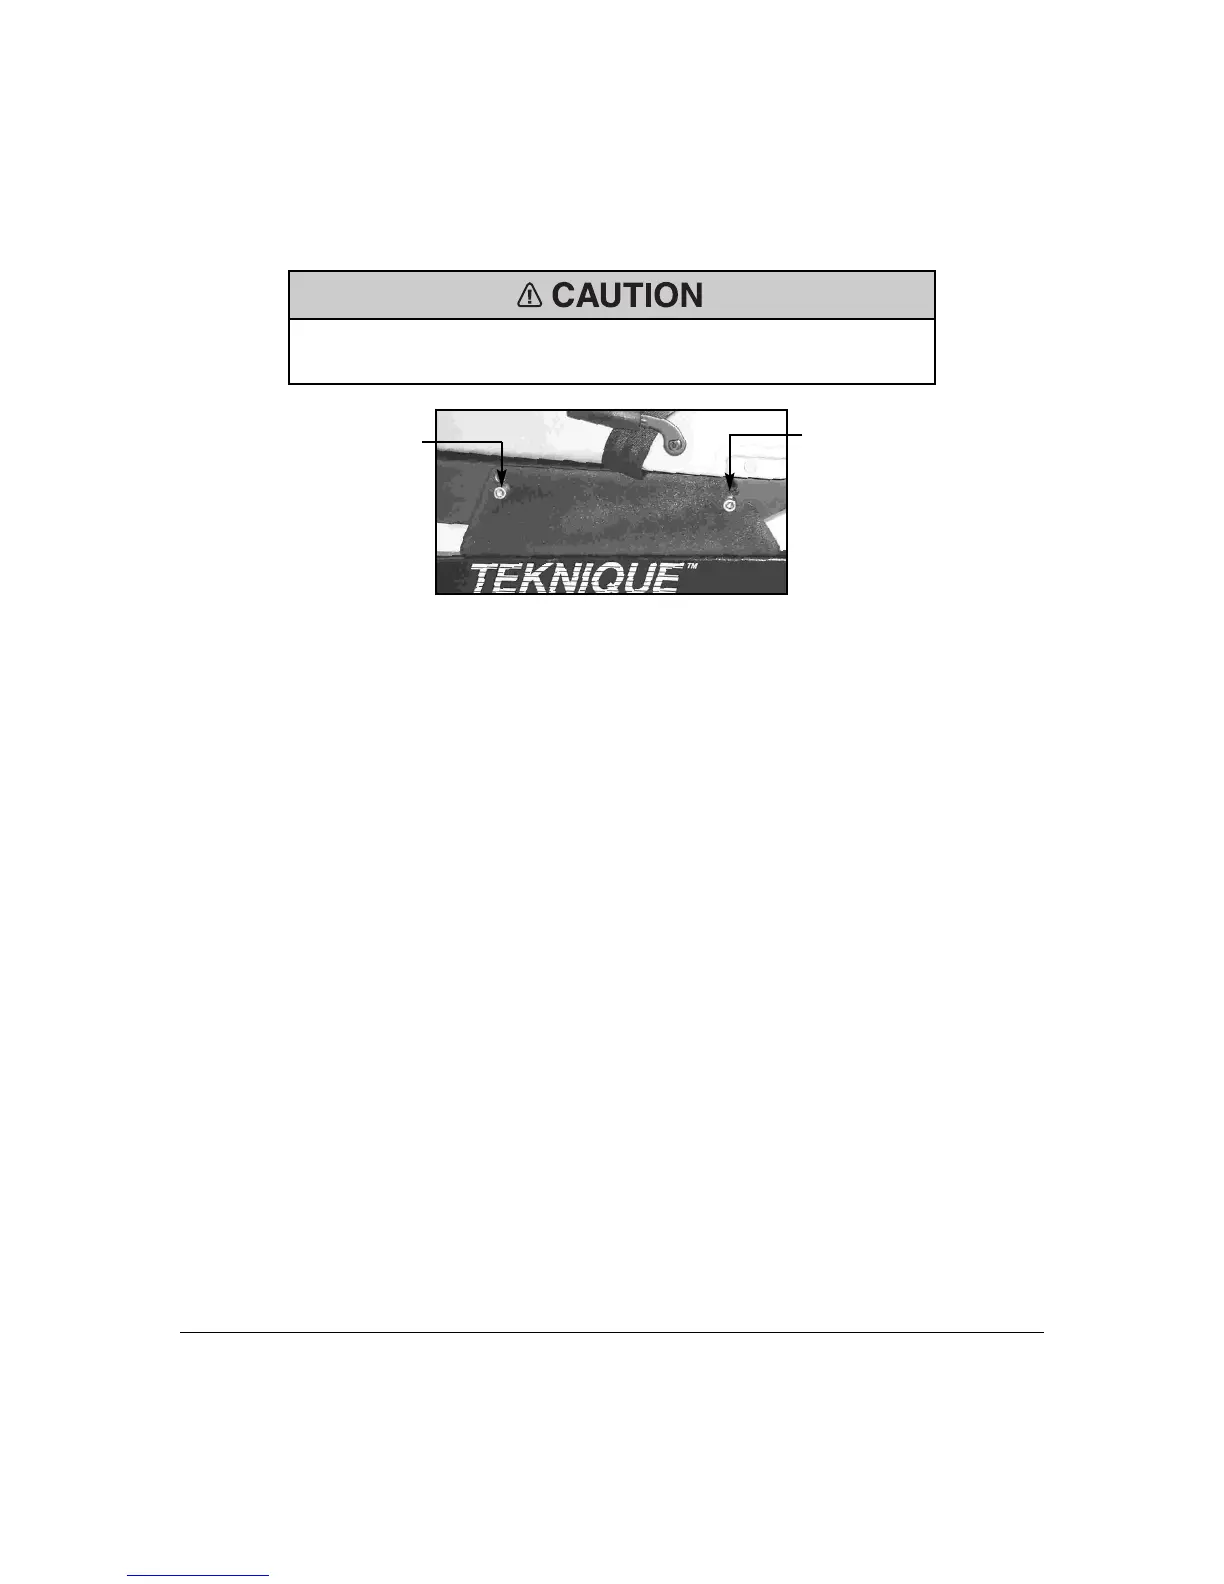
3. Locate the front and rear bolts on each of the side brackets below
the seat (See Figure 9C).
4. Remove the front bolts, leave the rear bolts installed but loose. Note
the position of the bolts for reinstallation.
5. From the rear, tilt the seat back and remove from the rear slots.
Replacement
1. Locate the rear mounting holes on the brackets attached to the seat.
If bolt has been removed, loosely install it in the same position as prior
to removal of the seat.
2. Locate the controller cable to the rear of the chair and between the
side rails.
3. From the rear, lift the seat, placing the rear bolts into the slots in the
rear of the frame bracket and allow the seat to rest in the forward
position on the base frame.
4. Locate the front mounting holes in the side rails and install the front
bolts and tighten the front and rear bolts.
5. Reinstall the controller cable and controller mounting bracket.
Position the cable to the minimum length to allow the arm to lift. To
prevent cable damage, do not let the cable hang free or extend
beyond the chair. Use care when driving to keep the cable from
catching on objects.
Front Bolt Rear Bolt
Figure 9C