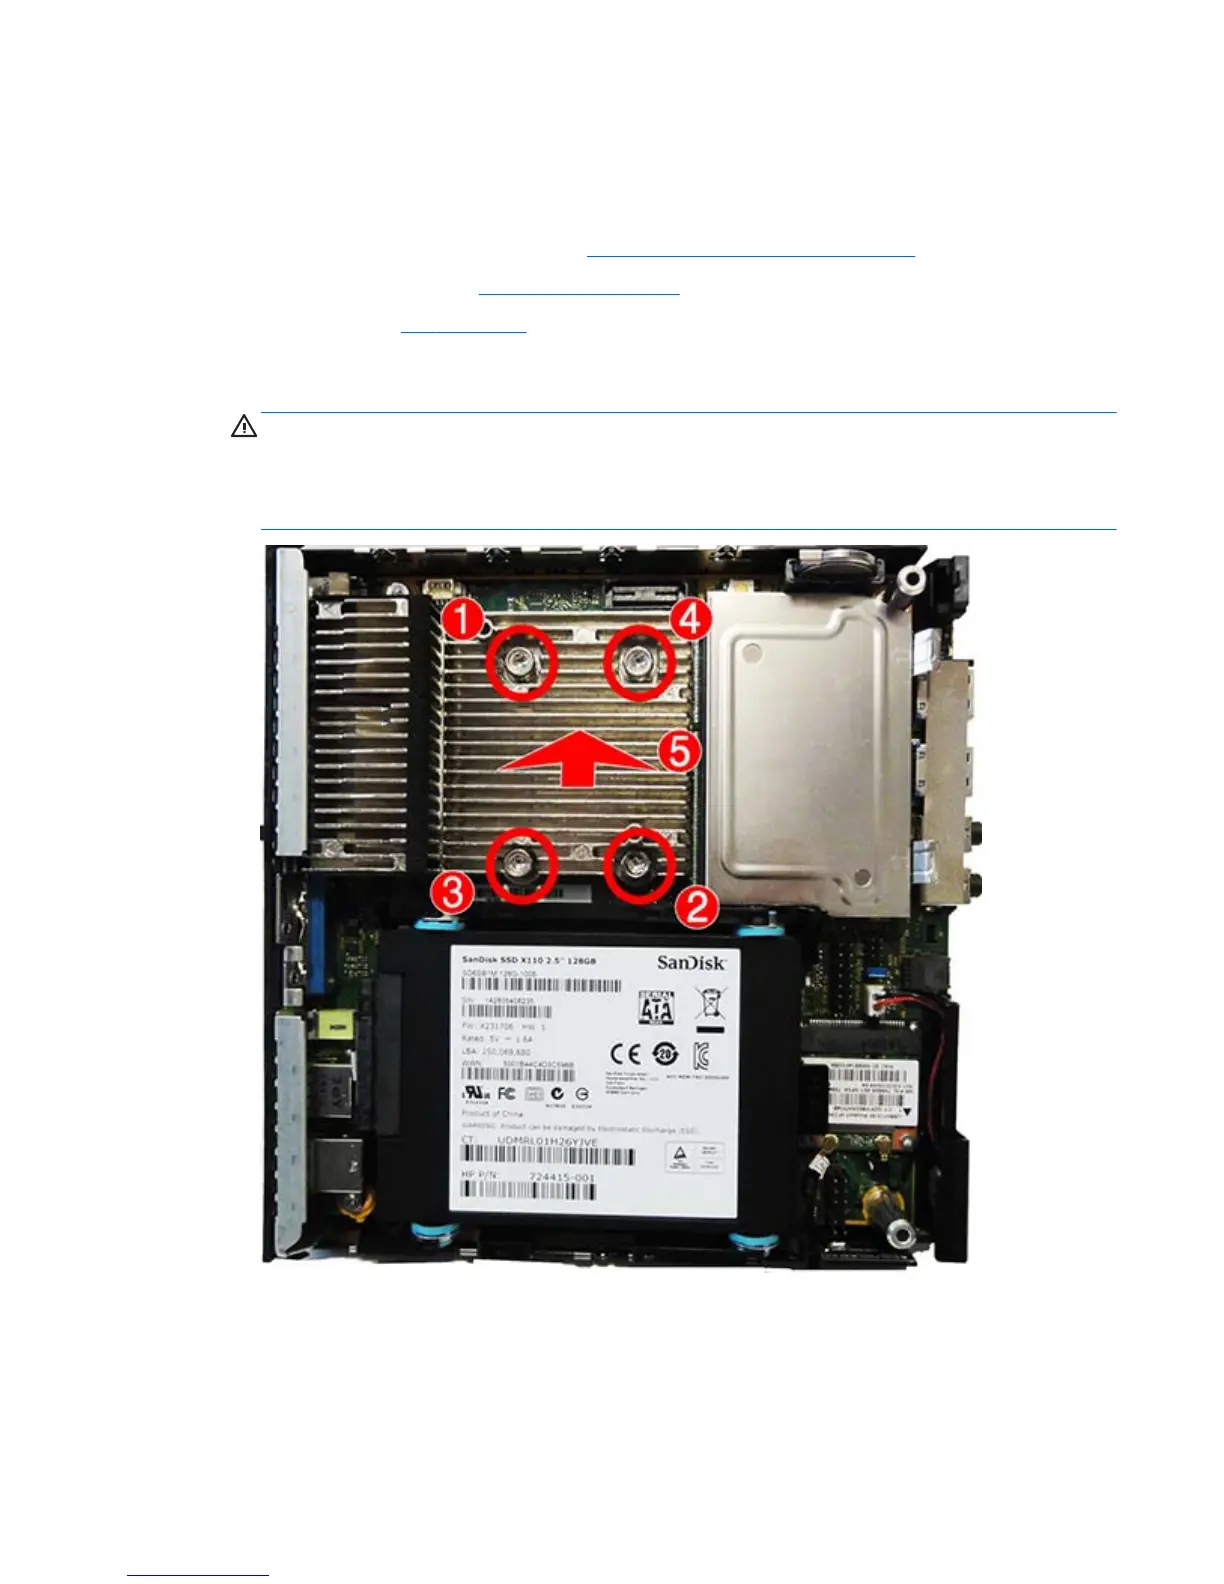
Heat sink
The heat sink is secured with four captive Torx screws. Be sure to remove and replace the screws in the order
indicated on the heat sink.
1. Prepare the computer for disassembly (
Preparation for disassembly on page 17).
2. Remove the access panel (
Access panel on page 18).
3. Remove the fan (
Fan on page 30).
4. In the order indicated on the heat sink, loosen the four captive Torx screws (1) - (4), and then lift the
heat sink out of the computer (5).
CAUTION: Be sure the loosen the screws in the order indicated by the numbers stamped on the heat
sink.
CAUTION: To reduce a degradation in thermal performance, be sure not to touch the thermal grease
on the surface of the processor or the heat sink.
To replace the heat sink, reverse the removal procedures.
Heat sink 31
 Loading...