Figure 3 Attaching the brackets
3. Repeat Step 1 and Step 2 for the remaining rail.
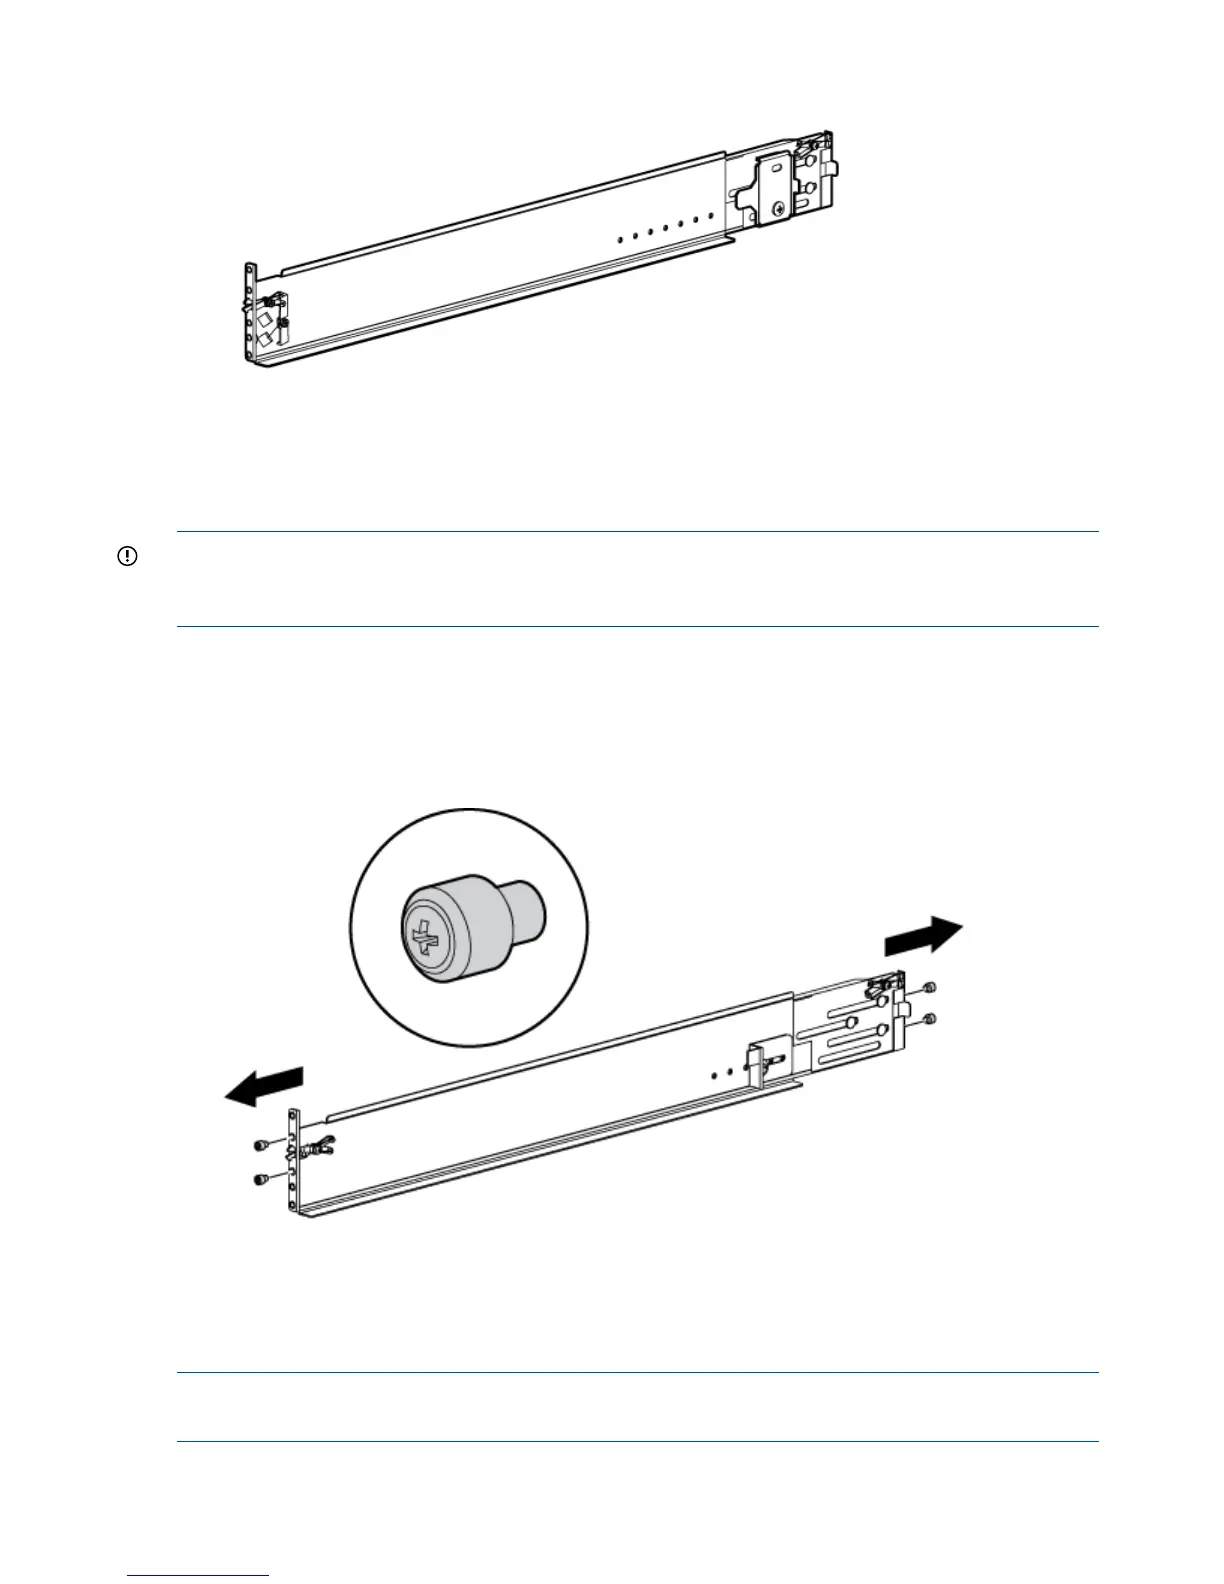
Converting the rails
The rail kit supplied with the disk enclosure comes configured for square-hole racks.
IMPORTANT: Do not remove the pins from the ends of the rails unless you are converting the
rails for use in round-hole racks. These load-bearing pins are designed to fit through the holes
without being removed.
To convert the rails for a round-hole rack:
1. Locate the bag of eight round-hole pins included in the rail kit.
2. Use a No. 2 Phillips screwdriver to remove the standard pins from the front and back of the
left and right rails (four pins on each rail).
Figure 4 Configuring the rails
3. Insert the round-hole pins into the eight holes on the rails where the standard pins were
removed.
Attach the rails
NOTE: The left and right rails are designated by the letters R (right) and L (left) stamped in the
metal on the front of the rack.
12 Install components
 Loading...