To install thehard drive, reverse this procedure.
Fingerprint reader
To remove the ngerprint reader, use this procedure and illustration.
Table 5-7 Fingerprint reader description and part number
Description Spare part number
Fingerprint reader M51625-001
Fingerprint reader cable M50424-001
Before removing the ngerprint reader, follow these steps:
1. Prepare the computer for disassembly (see Preparation for disassembly on page 30).
2. Remove the bottom cover (see Bottom cover and rubber feet on page 30).
3. Remove the battery (see Battery on page 32).
4. Remove the hard drive (see Hard drive on page 37).
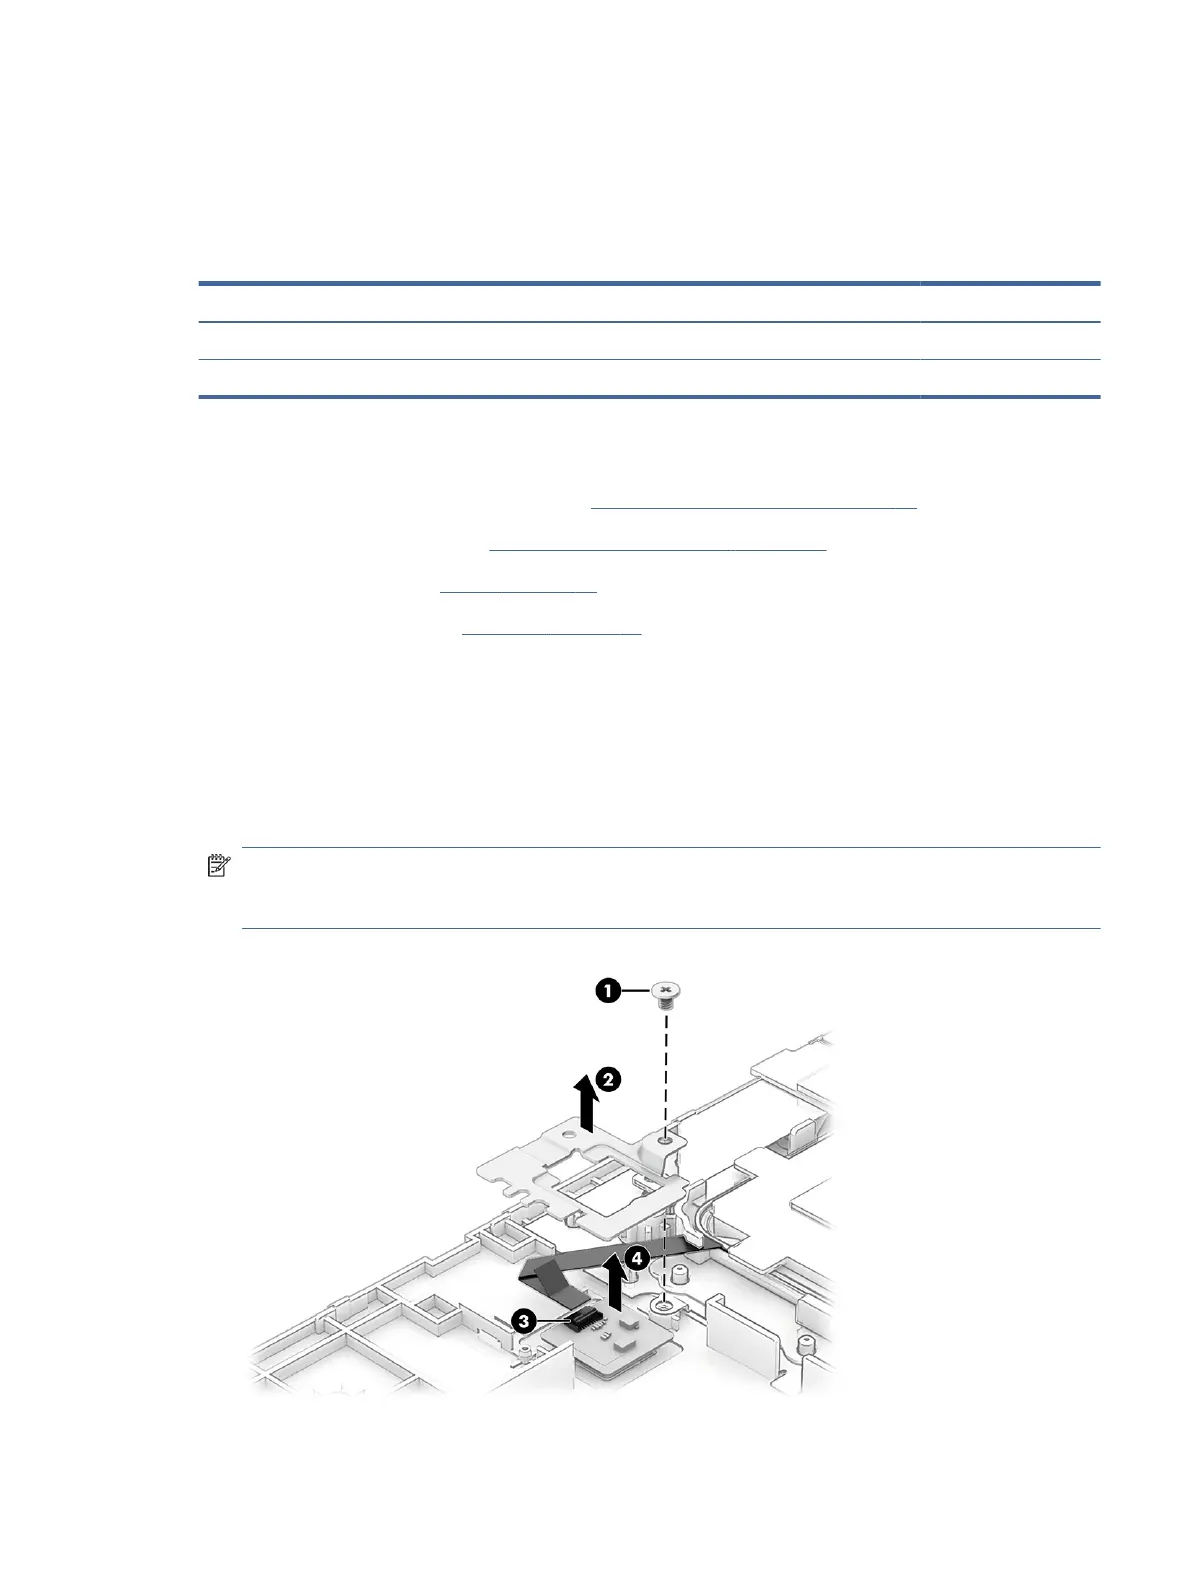
Remove the ngerprint reader:
1. Remove the Phillips M2.0 × 3.0 screw (1) that secures the ngerprint reader bracket to the computer, and
then remove the bracket (2).
2. Disconnect the cable from the ZIF connector on the ngerprint reader board (3).
3. Remove the ngerprint reader from the computer (4).
NOTE: The ngerprint reader is secured with adhesive that is easy to damage during removal. Be sure
to replace the adhesive when installing a ngerprint reader. The adhesive is available in the ngerprint
reader spare part kit.
Fingerprint reader 39

 Loading...