SVC 3-15
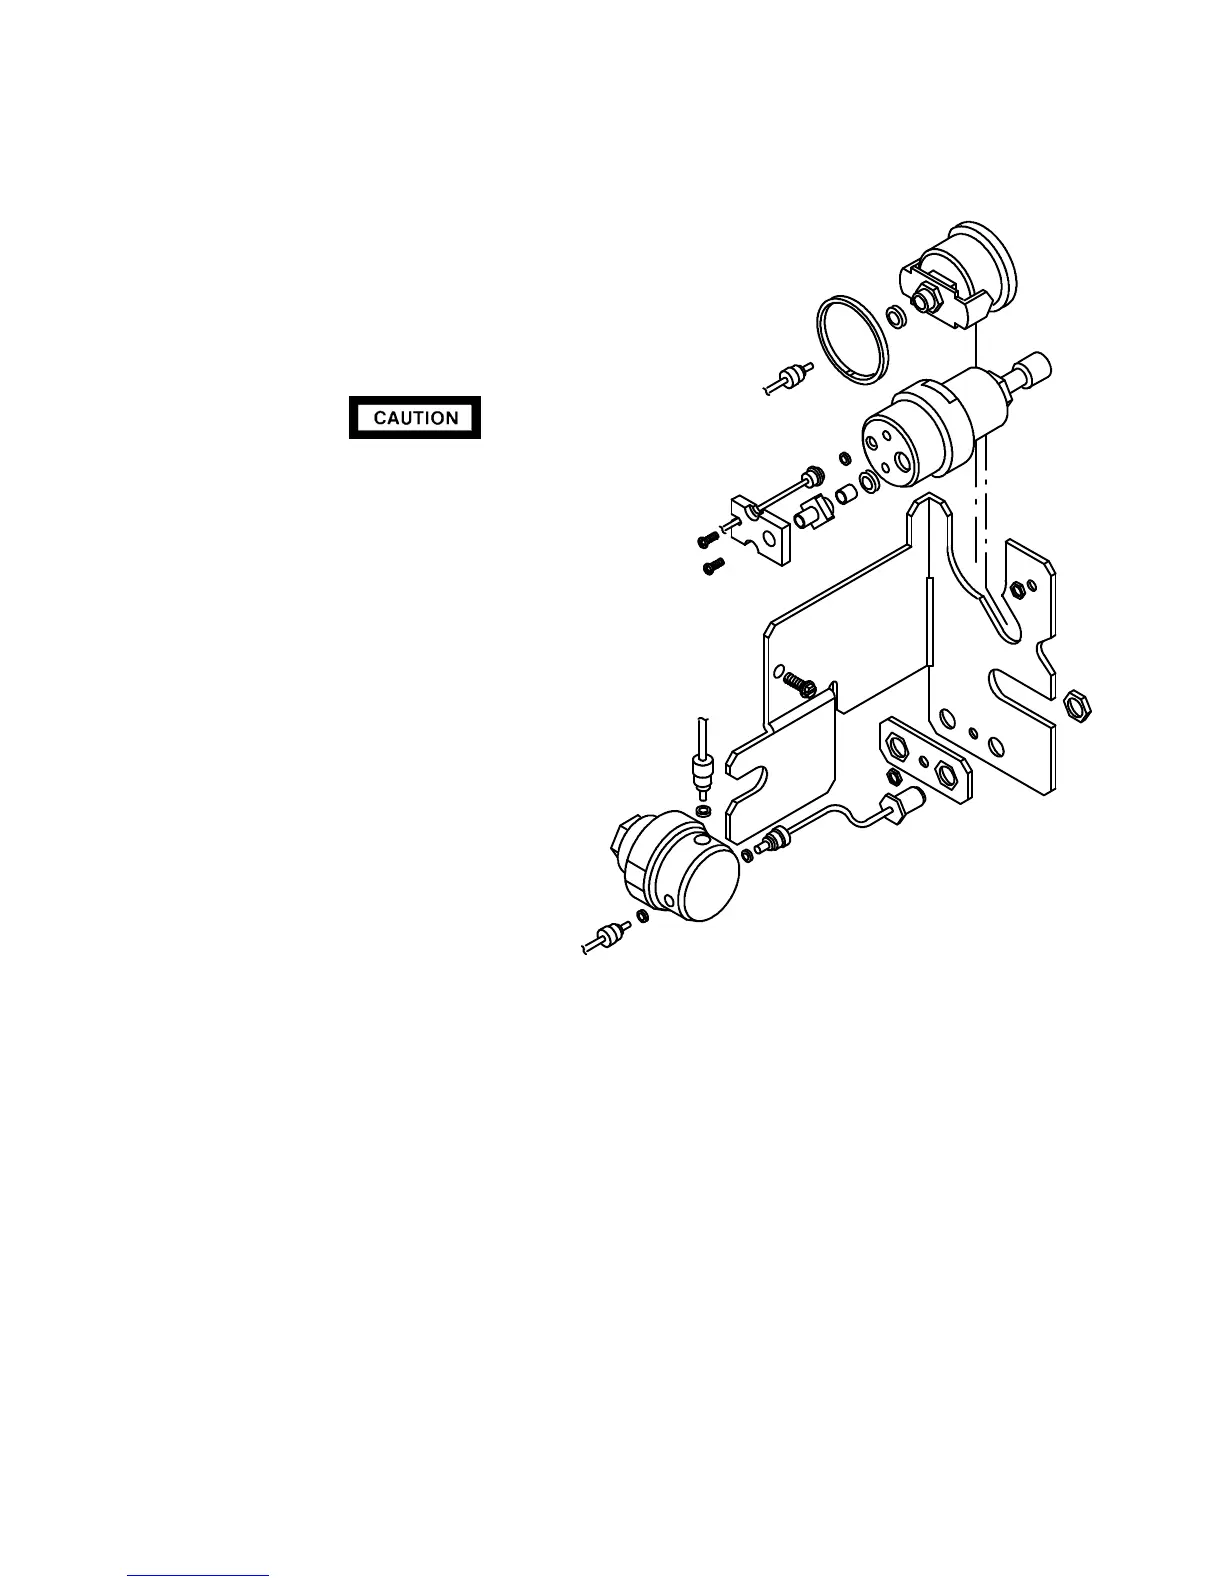
8. Remove two nuts securing the flow module to
the mainframe (one next to the pressure gauge,
and one at the lower edge of the module).
9. Remove the screw securing the flow module to
the instrument flow carrier.
10. Once the flow module is clear of the instrument,
replace the flow control component desired.
When connecting lines and fittings, ensure
that all o-rings are properly installed.
11. Assemble the MPC components in the reverse
order of disassembly.
12. Restore all gas supplies.
13. Leak check all installed fittings.
14. If the system is leak-free, install the left side
panel and secure using two screws.
15. Restore power to the instrument.
Artisan Scientific - Quality Instrumentation ... Guaranteed | (888) 88-SOURCE | www.artisan-scientific.com

 Loading...


