SVC 3-17
6. Disconnect any cables which are connected to the pressure control PCB.
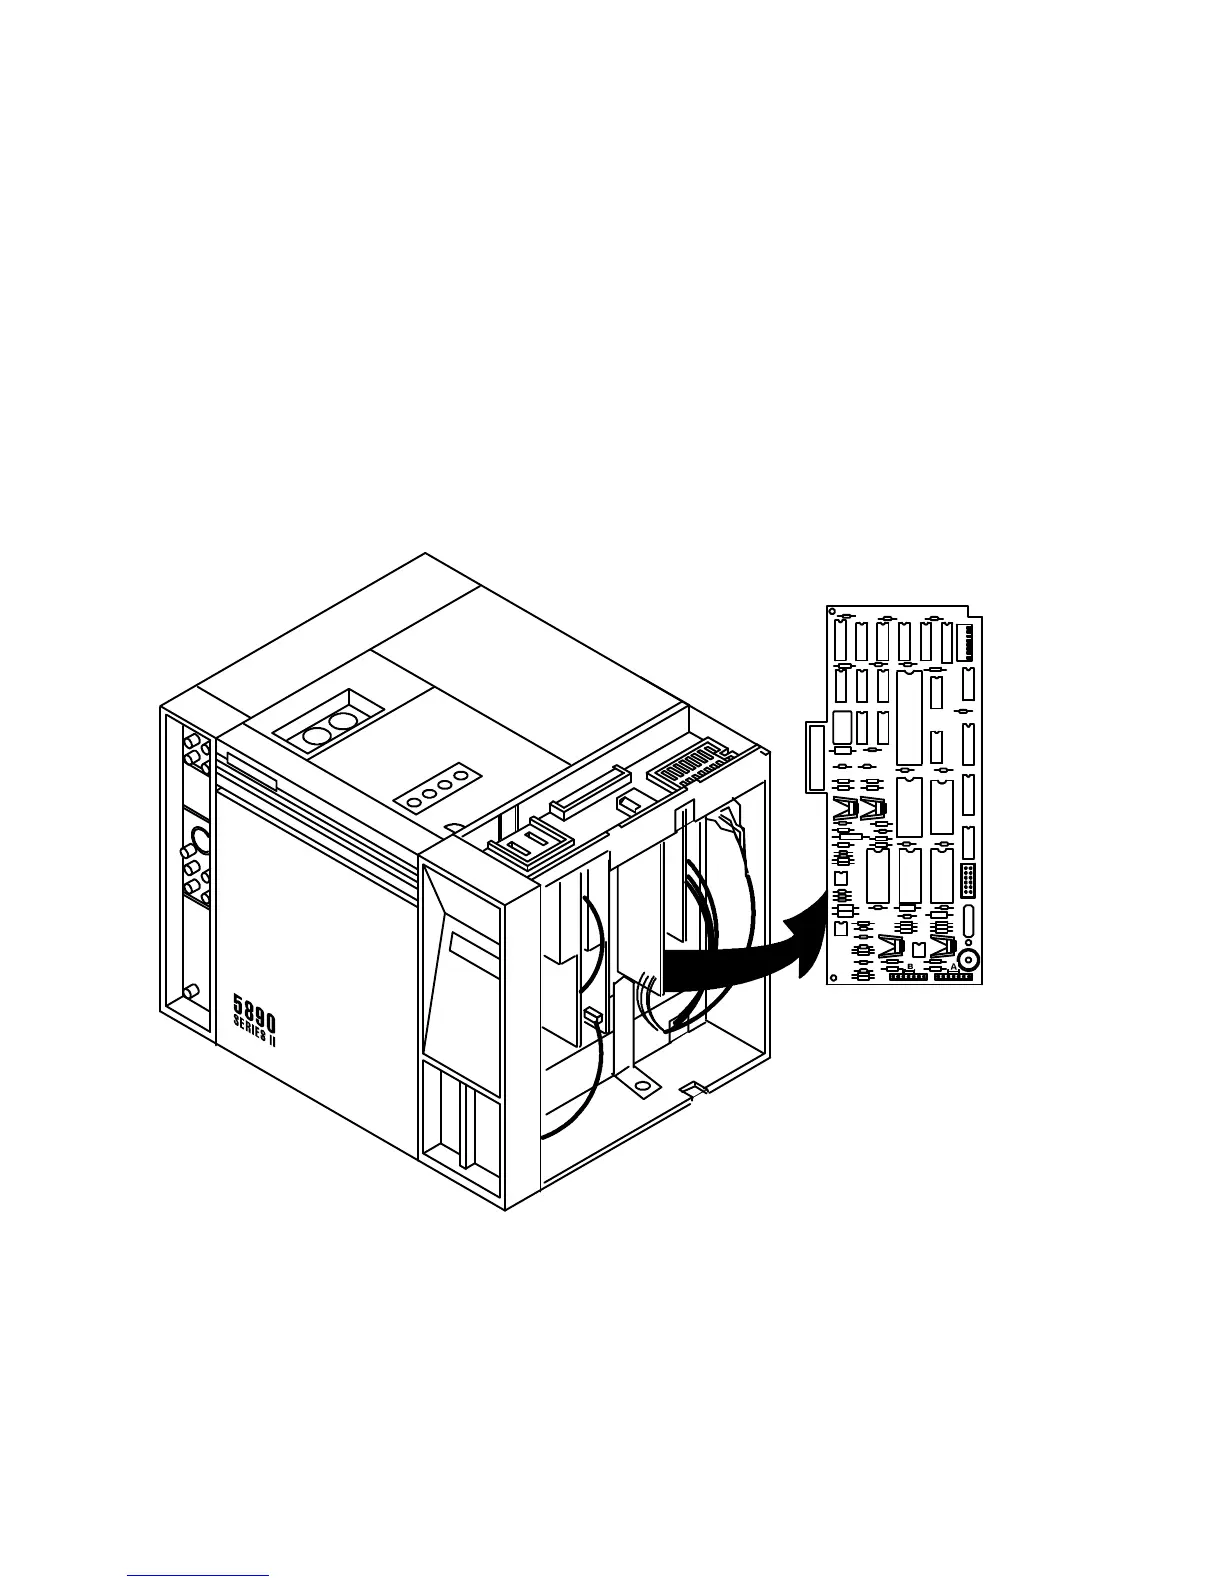
7. Remove the pressure control PCB from the right side of the instrument by grasping it in the
center area along its outer edge and pulling it straight out.
8. Install the pressure control PCB by sliding it into its mounting location on the main PCB.
9. Restore all gas supplies to the instrument.
10. Install the right side panel and secure using
four screws.
11. Install the electronics carrier top cover.
12. Restore power to the HP 5890 Series II.
PRESSURE CONTROL
PCB (TYPICAL)
Artisan Scientific - Quality Instrumentation ... Guaranteed | (888) 88-SOURCE | www.artisan-scientific.com

 Loading...


