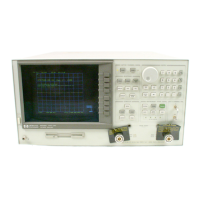
1.
Connect
the
equipmen
t
sho
wn
in
Figure
3-10
.
Figure
CA
V
OSC
here.
Figure
3-10.
Setup
for
Ca
vity
Oscillator
Frequency
Correction
Constant
Routine
2.
Press
4
PRESET
5
4
SYSTEM
5
N
N
N
N
N
N
N
N
N
N
N
N
N
NN
NN
N
N
N
N
N
N
N
N
N
N
N
N
N
N
N
N
N
N
N
N
N
SERVICE
MENU
N
N
N
N
N
N
N
N
N
N
N
N
N
NN
NN
TESTS
4
54
5
4
x1
5
N
N
N
N
N
N
N
N
N
N
N
N
N
NN
NN
N
N
N
N
N
N
N
N
N
N
N
N
N
N
N
N
N
N
N
N
N
EXECUTE
TEST
N
N
N
N
N
N
N
N
N
N
N
YES
.
During
this
adjustmen
t
routine,
y
ou
will
see
sev
eral
softk
eys:
N
N
N
N
N
N
N
N
N
N
NN
N
N
N
N
N
N
N
N
N
N
N
N
N
N
CONTINUE
Sw
eeps
the
curren
t
frequency
span:
y
ou
ma
y
press
it
rep
eatedly
for
additional
sw
eeps
of
the
curren
t
frequency span.
N
N
N
N
N
N
N
N
N
N
N
N
N
N
NEXT
Sw
eeps
the
next
frequency
span
(2
MHz higher).
N
N
N
N
N
N
N
N
N
N
N
N
N
N
N
N
N
N
N
N
SELECT
En
ters
the
v
alue
of
the
mark
er
whic
h
you
hav
e
placed
on
the
spur
and
exits
the
routine.
N
N
N
N
N
N
N
N
N
N
NN
NN
NN
N
ABORT
Exits
the routine.
3.
Press
N
N
N
N
N
N
N
N
N
N
N
N
N
N
N
N
N
N
NN
NN
NN
N
N
CONTINUE
to
sw
eep
the
rst
frequency span
three times.
Each
new
span
o
v
erlaps
the
previous
span
b
y3
MHz (the
center
frequency increases
b
y
2
MHz;
the
span
is
5
MHz).
Therefore,
an
ything
visible
on
the
righ
t
half
of
the screen
of one
set of
sweeps
will
app
ear
on
the
left
half
or
cen
ter of
the screen
when y
ou press
N
NN
N
N
N
N
N
N
N
N
N
N
N
NEXT
.
4.
Press
NNNNNNNNNNNNNN
NEXT
repeatedly
.W
atch the trace on eac
hsw
eep and try to spot the
target spur.
With the lter, the target spur will b e one of t
woob
vious spurs. See Figure 3-11
). Without
the lter (not recommended),
the target spur will be one of four or v
e less distinct spurs
as sho
wn in Figure 3-12 and Figure 3-13
. When the cen
ter frequency increases to 2994.999
MHz, and y
ou ha
ve not \selected"
the target spur,
Cav Osc Cor FAIL
will app ear on the
display.
3-28 Adjustments and Correction Constants DRAFT
3/21/106 15:11
Artisan Scientific - Quality Instrumentation ... Guaranteed | (888) 88-SOURCE | www.artisan-scientific.com

 Loading...