Service Reference Guide, d300, dx6050 319865-008 8–15
Removal and Replacement Procedures— Desktop (DT) Chassis
15. If you normally lock the Smart Cover Lock, use Computer Setup to relock the lock and
enable the Smart Cover Sensor.
16. Reconfigure the computer, if necessary. Refer to the Computer Setup (F10) Utility Guide on
the Documentation CD for instructions about using Computer Setup.
8.10 Drives
The computer supports up to five drives that may be installed in various configurations.
This section describes the procedure for replacing or upgrading the storage drives. A Torx T-15
screwdriver is needed to remove and install the guide screws on a drive.
Ä
CAUTION: Make sure personal files on the hard drive are backed up to an external storage device
before removing the hard drive. Failure to do so will result in data loss. After replacing the primary hard
drive, you will need to run the Restore Plus! CD to load the Compaq factory-installed files.
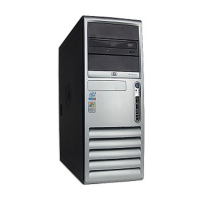
8.10.1 Drive Positions
To verify the type and size of the storage device installed in the computer, run Computer Setup.
Drive Positions
Item Description Item Description
1 One standard 3.5-inch,
one-third height bay (1.44-MB
diskette drive shown)*
4 5.25-inch, half-height bay for
optional drive
2 Internal 3.5-inch, one-third
height bay for hard drive
5 5.25-inch, half-height bay for
optional drive
3 Internal 3.5-inch, one-third
height bay for hard drive)
*Depending on the computer configuration, you may have a bezel blank in this
position. If you do not have a drive in this slot, you may choose to install a 3.5-inch
device (such as a diskette drive, hard drive, or Zip drive).
 Loading...