Upgrading and replacing hardware
Evo D310 Micro Desktop 15
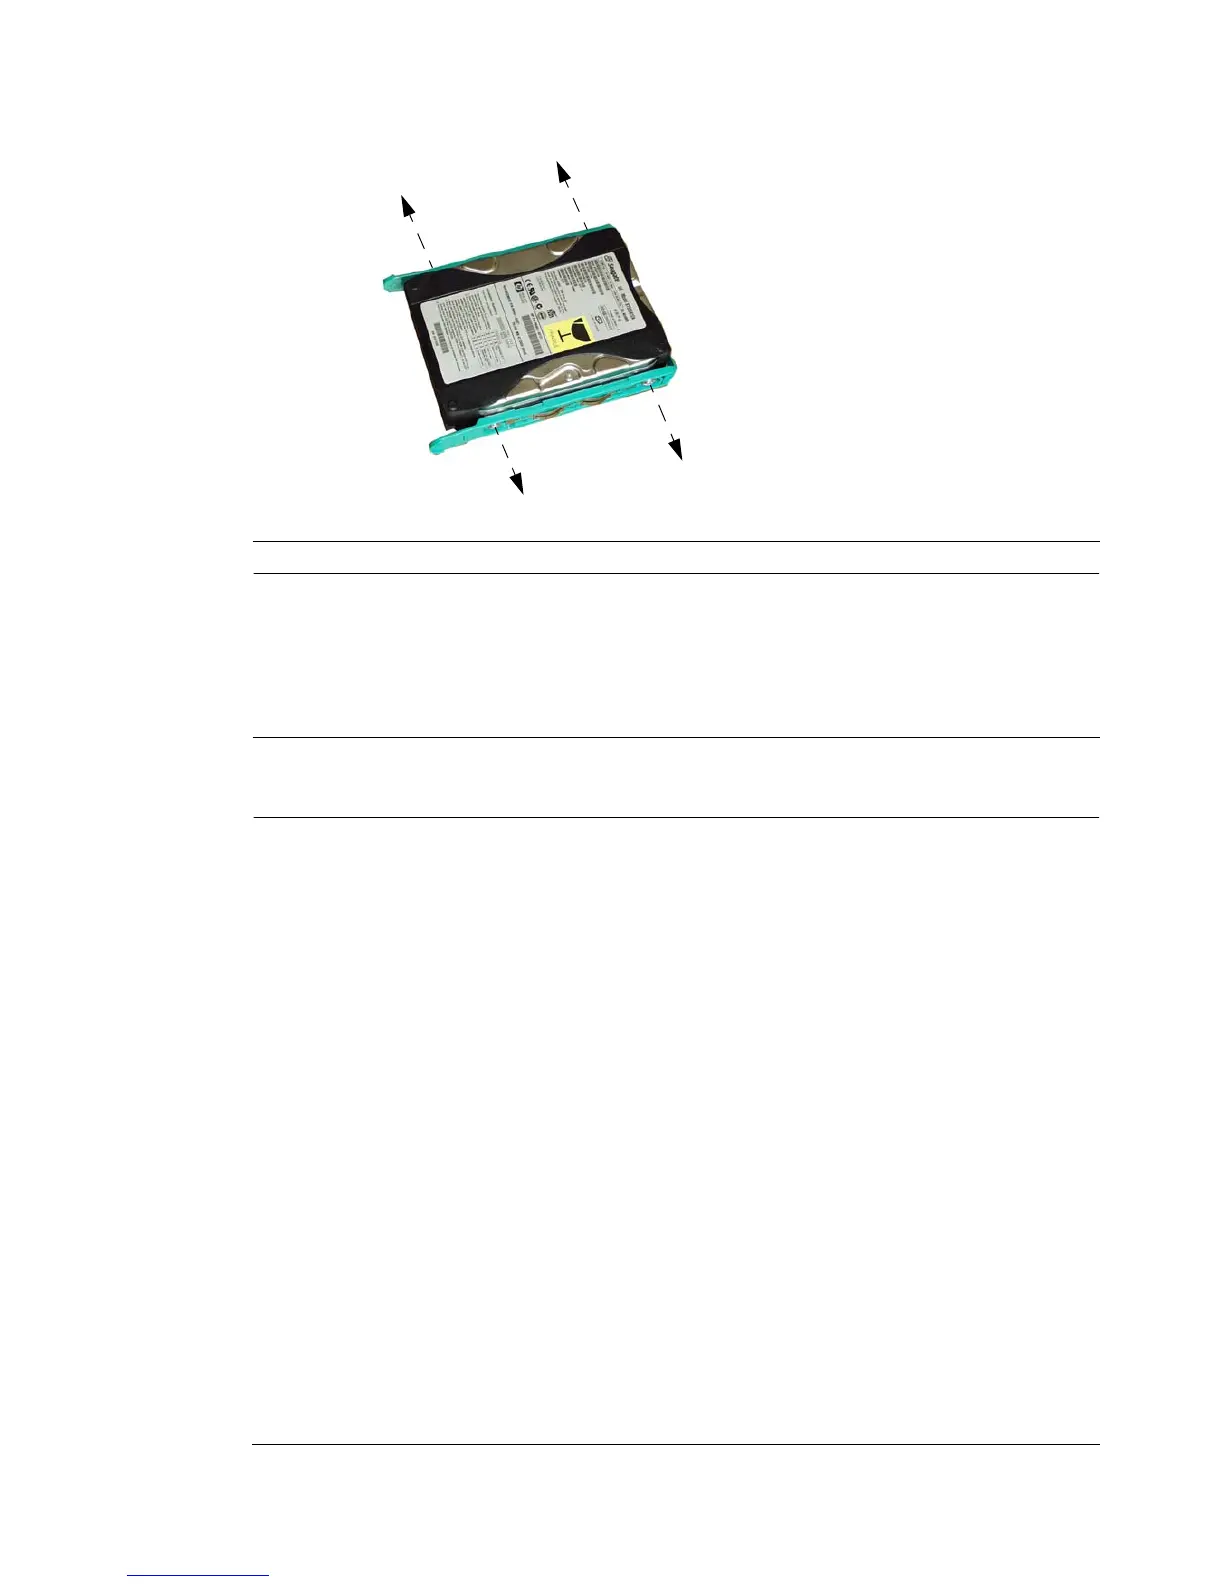
5 Remove the four screws securing the old drive to the tray.
6 Align the new drive in the tray (with the correct orientation), and tighten the screws.
Caution
Take care when handling the hard drive. A small drop can damage it.
7 Slide the drive tray back into the PC.
8 Attach the data and power connectors, rotate the drive bay back into place and close both latches.
9 Replace the PC’s front panel and cover. Refer to page 10.
10 Verify the new configuration by checking the Summary screen. To access the Summary Screen, press
F8
immediately after startup, then press
Esc
.
Note Ensure that you have installed all the required operating system and drivers on the newly installed drive. To reinstall operating system
and drivers, use the Recovery CD-ROMs provided with the PC. In addition, you can find the most up-to-date versions of drivers on the
support site at:
www.hp.com/go/support
.