Upgrading and replacing hardware
18 Evo D310 Micro Desktop
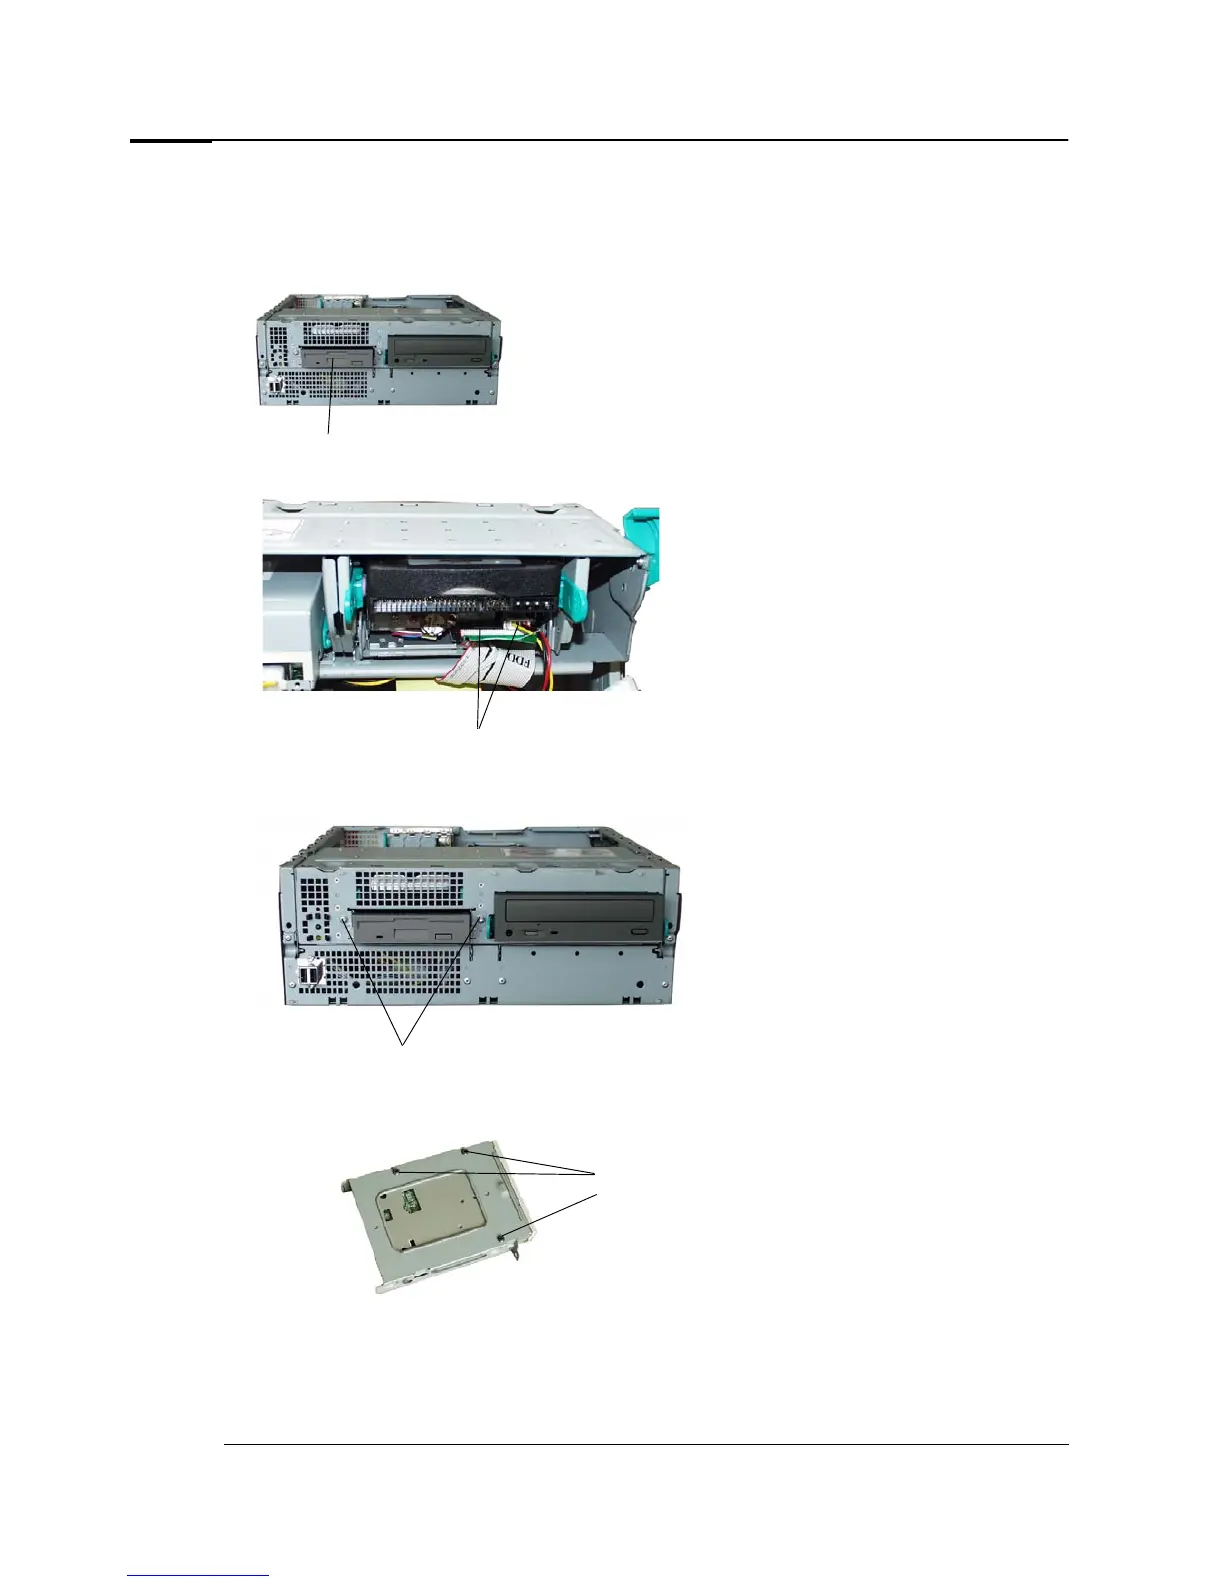
Replacing the floppy disk drive
1 Switch off the PC and remove the PC’s cover and front panel. Refer to page 10.
2 Locate the floppy drive.
3 Detach the data and power connectors from both the floppy and the hard drive (if installed).
4 Remove the two screws securing the drive and slide it out of the front of the PC.
5 Remove the three screws from the floppy drive tray.
6 Align the new floppy drive in the tray and secure it using the three screws.
7 Replace the drive bay in the PC.
8 Attach the screws to the front of the tray.
floppy drive
data/power connectors
screws
screws