3-14
Using Identity Driven Manager
Configuring Times
Defining Holidays
To add holidays for use when defining Times in IDM:
1. Click the
Times node in the Identity Management Configuration navigation
tree to display the Times panel.
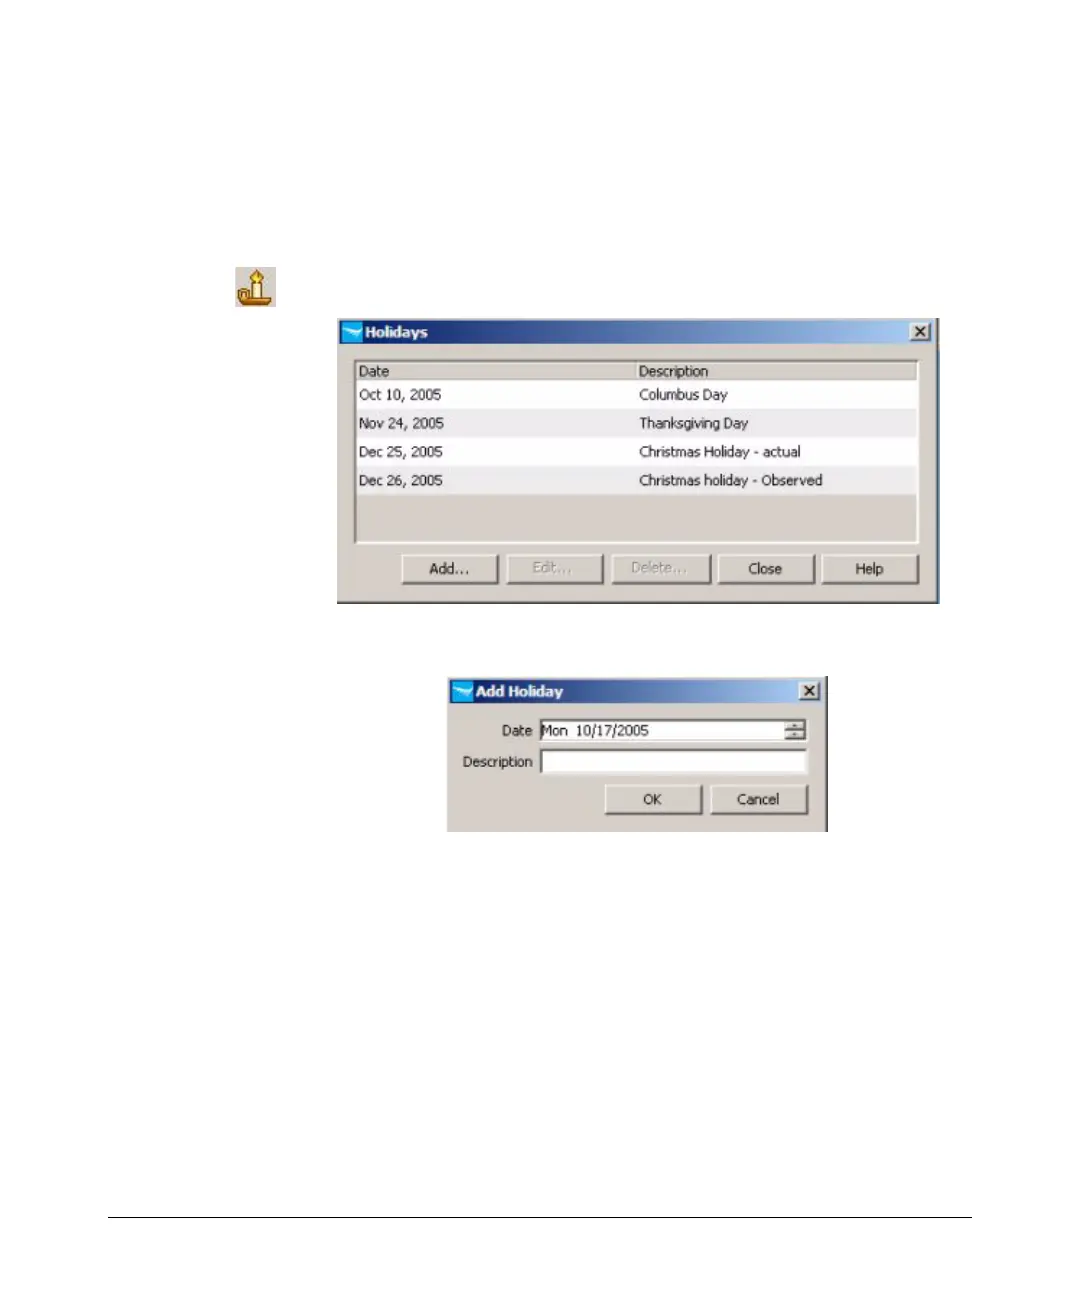
2. Click the Holidays icon in the toolbar to launch the
Holidays window.
3. Click Add. to launch the
Add Holidays window.
4. The Date field defaults to the current date. You can use the field buttons
to increase or decrease the date. You can also type in a new date.
5. In the Description field, enter the text that will identify the holiday in the
Holidays list.
6. Click OK to save the holiday and close the window.
The new holiday appears in the
Holidays list.
To edit a Holiday, select it in the Holidays list, then click Edit... This launches
the
Edit Holiday window, similar to the Add Holiday window.
To delete a Holiday, select it in the Holidays list, then click Delete... Click Yes
in the confirmation pop-up to complete the process.