DDC Instructions
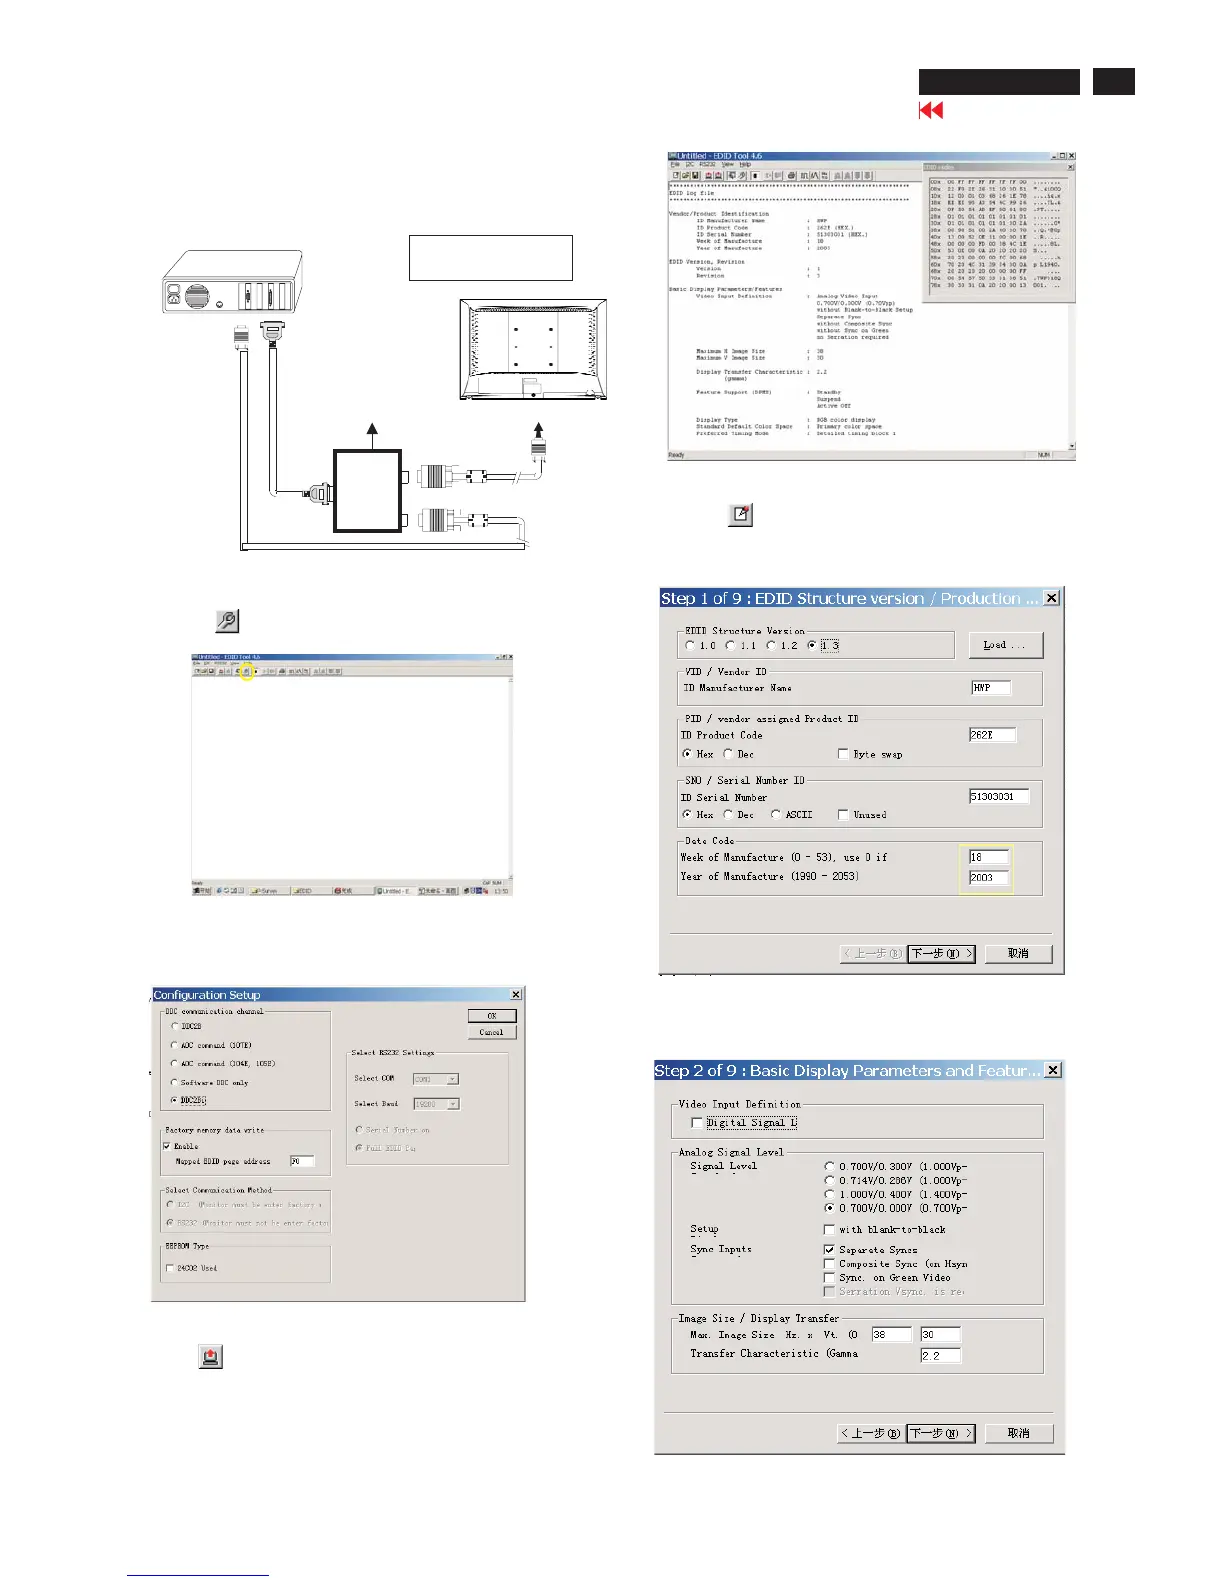
Step 3: Modify DDC data (verify EDID version, week,
year)
Click (new function) icon from the tool bar, bring up
Step 1 of 9 as shown in Fig. 14 .
EDID46 DDC application provides the function selection and
Step 4: Modify DDC data (Monitor Serial No.)
1. Click Next , bring up Fig. 15.
3. Click OK button to confirm your selection.
4. Click icon (Read EDID function) to read DDC EDID data from
monitor. The EDID codes will display on screen as shown in Fig. 13.
Fig. 15
2. Select the DDC2Bi as the communication channel.
As shown in Fig. 12.
Fig. 12
Fig. 13
Fig. 14
Select and fill out,
If necessary.
Re-programming Analog DDC IC
Step 1: After initialize alignment box, connecting all
cables and box as shown in Fig. 10.
Fig. 11
Step 2: Read DDC data from monitor
1. Click icon as shown in Fig. 11 from the tool bar to bring up
the Channels "Configuration Setup" windows as shown in Fig. 11.
Fig. 10
1=Power connector
2=D-SUB connector
PC
To printer port (
L
TP1)
DC Power
8-12V
Printer
Port
To
Monitor
To PC
1
2
----->
----->
To PC Video port (D-sub)
Click this button
=====>
Go to cover page
17
HPL1940
 Loading...