2-30 Removal and Replacement Service Manual
3.
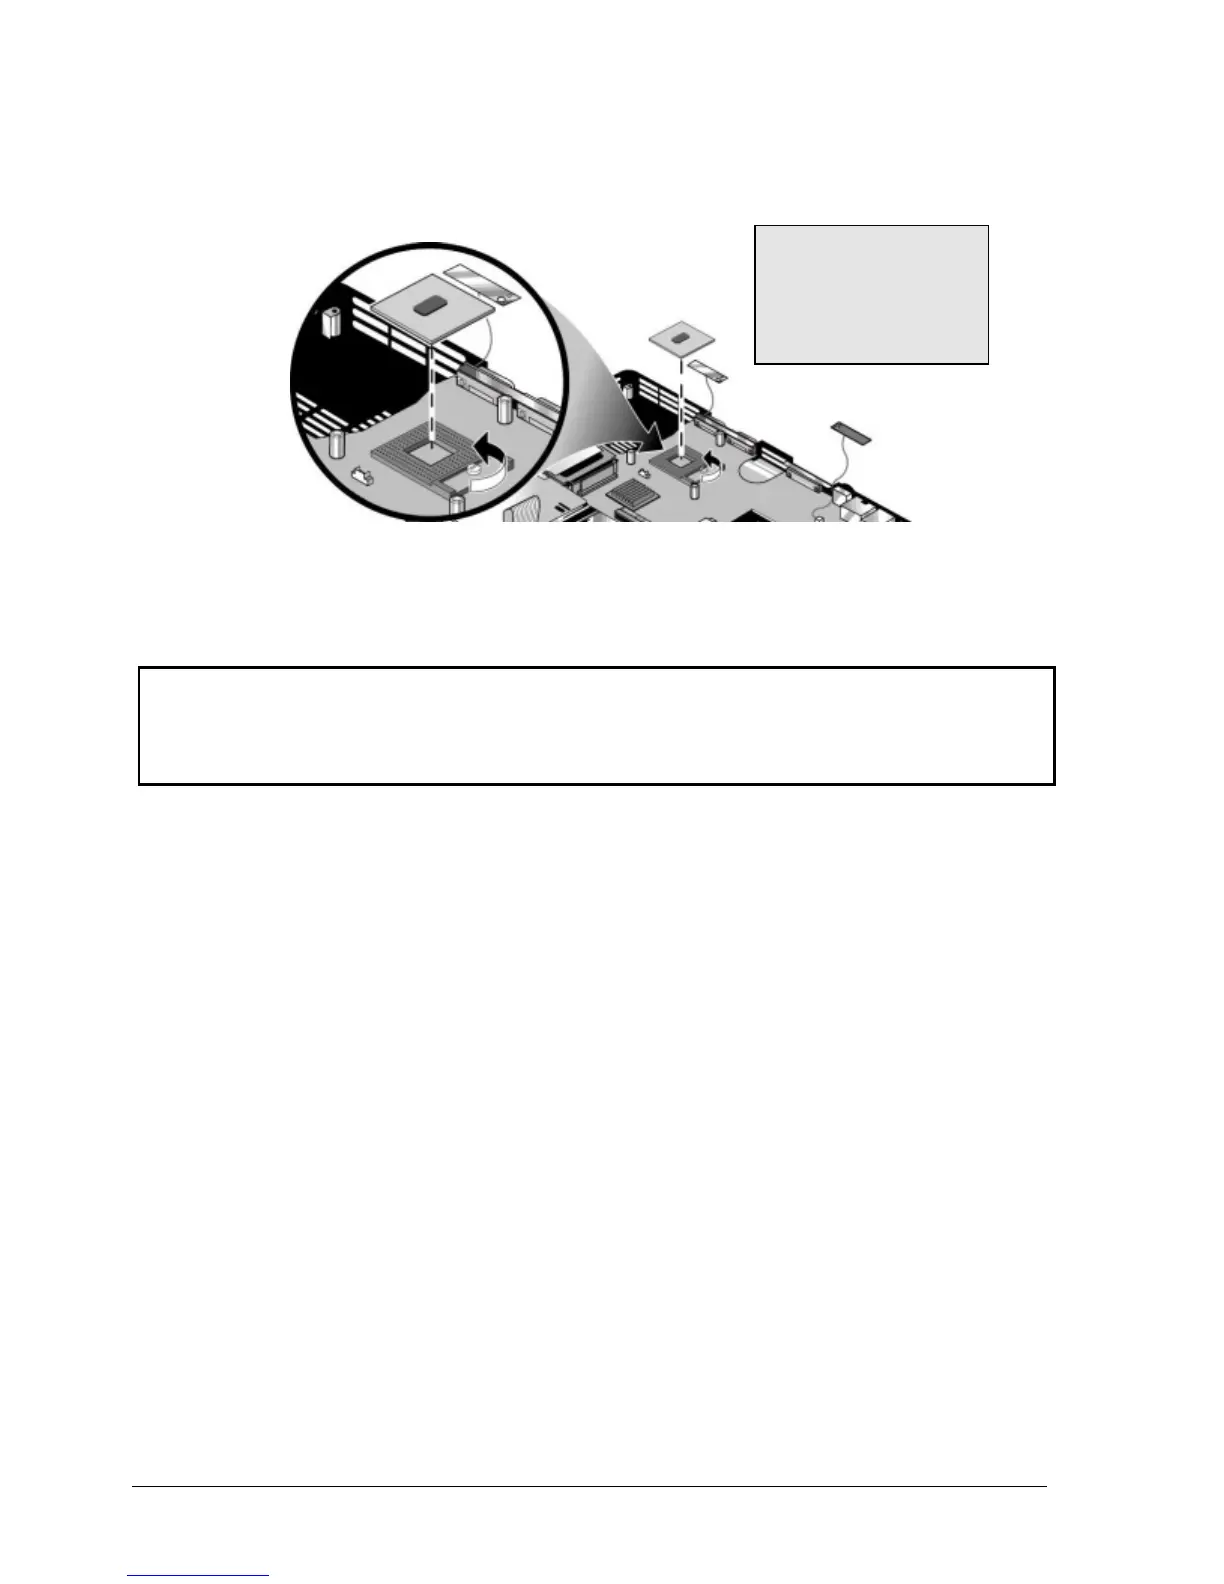
Turn the lock screw one-half turn counterclockwise to release the CPU module (you should hear a
light snap). Carefully lift the CPU module off of its socket on the motherboard.
Figure 2-17. Removing the CPU Module
Reassembly Notes
Caution
Each time you install a new CPU module, you must also replace the heat sink’s thermal pad to
maintain optimum heat transfer. Use a sharp knife or scraper to carefully remove the old thermal
pad from the heat sink, then attach the new thermal pad.
•
The CPU module is keyed for installation, and can be inserted only one way.
•
Carefully insert the CPU module into the motherboard, and turn the lock screw one-half turn
clockwise to secure the CPU module.
•
Be sure to replace the thermal pad on the heatsink, as described in the reassembly notes on
page 2-28.
IMPORTANT: See the
Caution on the next
page before
reinstalling the CPU
module!
 Loading...