Display assembly
NOTE: The display assembly is spared at the subcomponent level only. For display assembly spare part
information, see the individual removal subsections.
Before removing the display assembly, follow these steps:
1. Shut down the computer.
2. Disconnect all external devices connected to the computer.
3. Disconnect the power from the computer by rst unplugging the power cord from the AC outlet and then
unplugging the AC adapter from the computer.
4. Remove the keyboard/top cover (see Keyboard/top cover on page 34), and then remove
the following components:
a. Battery (see Battery on page 42).
b. USB port shield (see USB port shield on page 50).
c. System board (see System board on page 51).
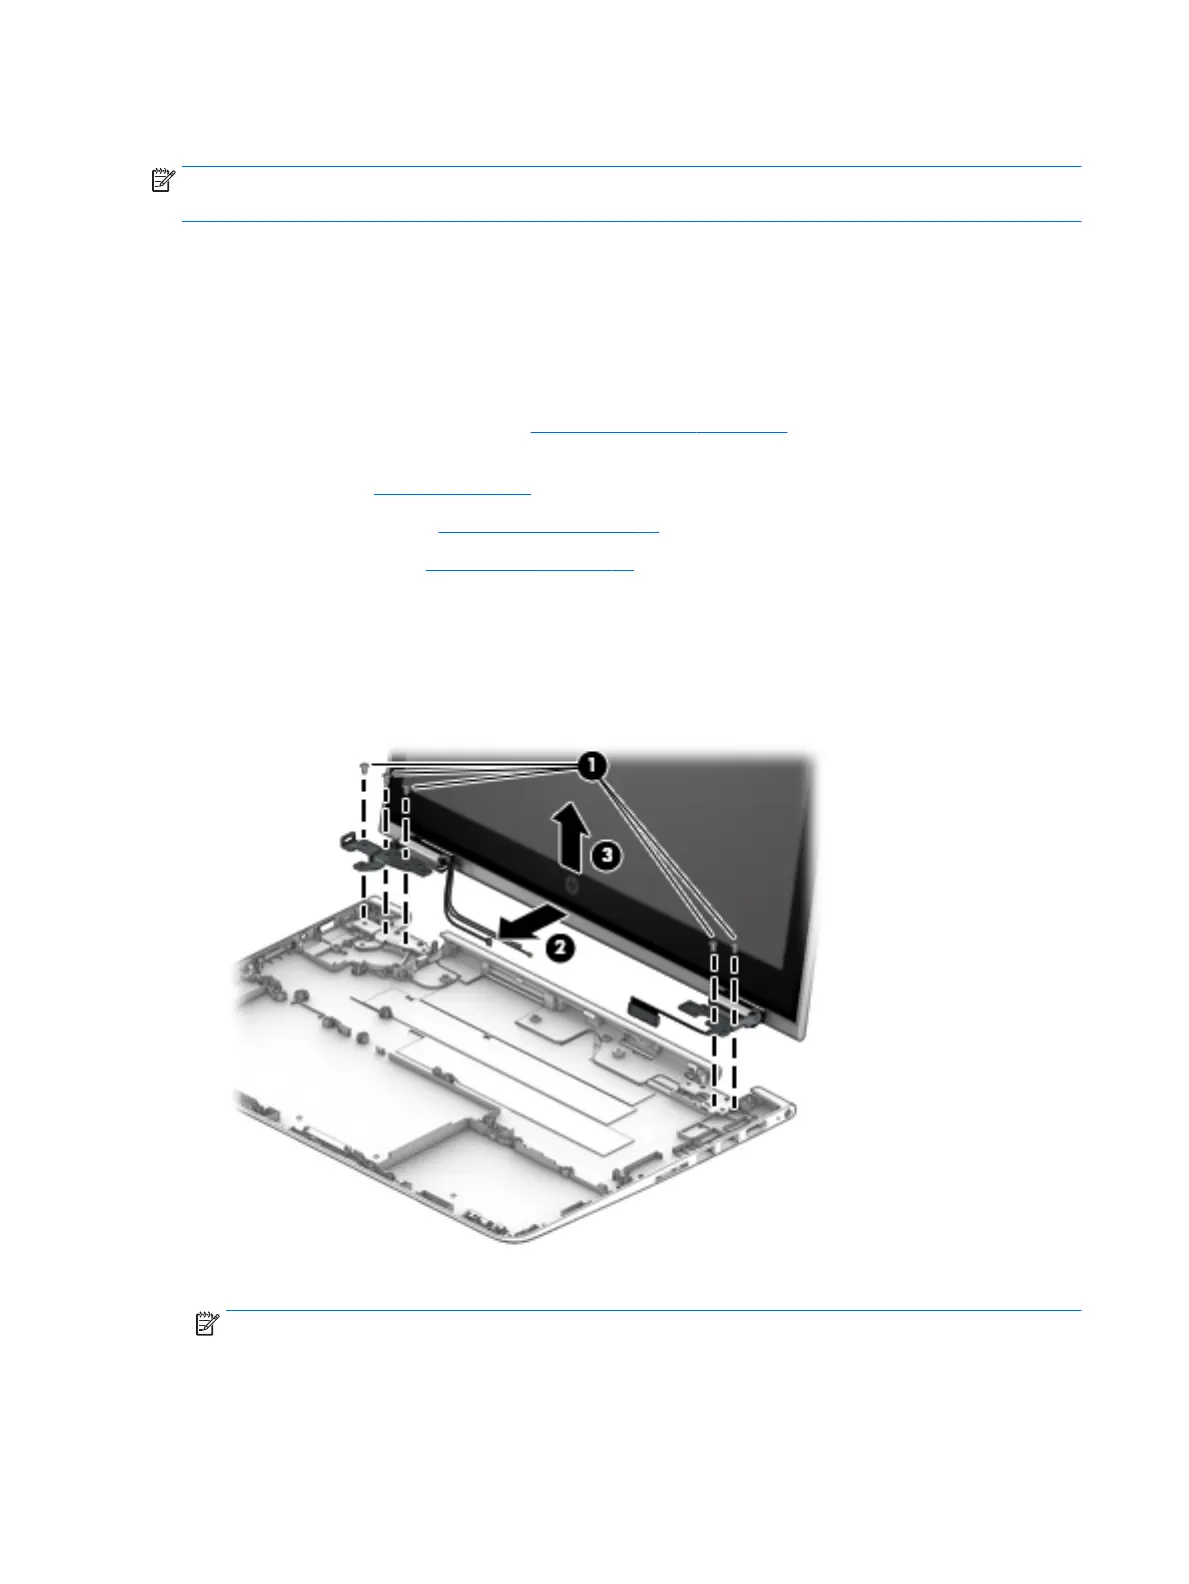
Remove the display assembly:
1. Remove the ve Phillips PM2.5×4.2 screws (1) that secure the display assembly to the base enclosure.
2. Release the display assembly (2) by sliding it forward.
3. Remove the display assembly (3).
4. If it is necessary to replace the display panel assembly:
NOTE: The display panel assembly spare part kit includes the display bezel, display panel, display
panel cable, and the TouchScreen board.
62 Chapter 5 Removal and replacement procedures for authorized service provider parts
 Loading...