Configuring Secure Shell (SSH)
Configuring the Switch for SSH Operation
lHexadecima
"Fingerprints" of
the Same Switch
Phonetic "Hash" of Switch’s Public Key
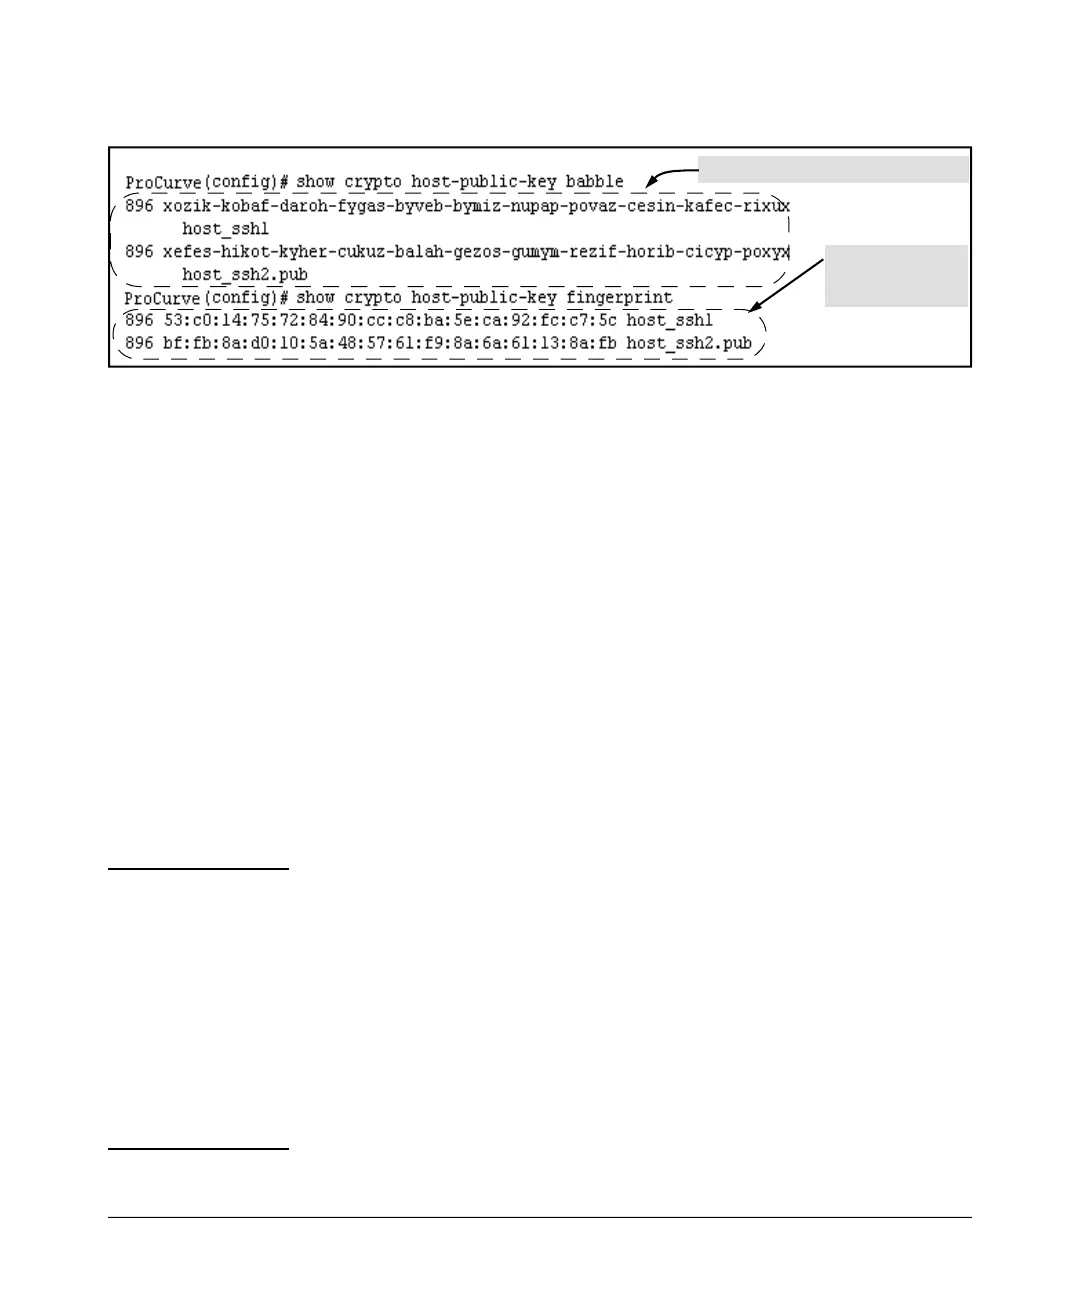
Figure 7-10. Examples of Visual Phonetic and Hexadecimal Conversions of the Switch’s Public Key
The two commands shown in figure 7-10 convert the displayed format of the
switch’s (host) public key for easier visual comparison of the switch’s public
key to a copy of the key in a client’s “known host” file. The switch has only
one RSA host key. The 'babble' and 'fingerprint' options produce two hashes
for the key--one that corresponds to the challenge hash you will see if con
-
necting with a v1 client, and the other corresponding to the hash you will see
if connecting with a v2 client. These hashes do not correspond to different
keys, but differ only because of the way v1 and v2 clients compute the hash
of the same RSA key. The switch always uses ASCII version (without babble
or fingerprint conversion) of its public key for file storage and default display
format.
4. Enabling SSH on the Switch and Anticipating SSH
Client Contact Behavior
The ip ssh command enables or disables SSH on the switch and modifies
parameters the switch uses for transactions with clients. After you enable
SSH, the switch can authenticate itself to SSH clients.
Note Before enabling SSH on the switch you must generate the switch’s public/
private key pair. If you have not already done so, refer to
“2. Generating the
Switch’s Public and Private Key Pair” on page 7-10.
When configured for SSH, the switch uses its host public-key to authenticate
itself to SSH clients. If you also want SSH clients to authenticate themselves
to the switch you must configure SSH on the switch for client public-key
authentication at the login (Operator) level. To enhance security, you should
also configure local, TACACS+, or RADIUS authentication at the enable
(Manager) level.
Refer to “5. Configuring the Switch for SSH Authentication” on page 7-18.
7-15

 Loading...