2-15
Installing the Series 5400zl Switches
Installation Procedures
Installing the Series 5400zl
Switches
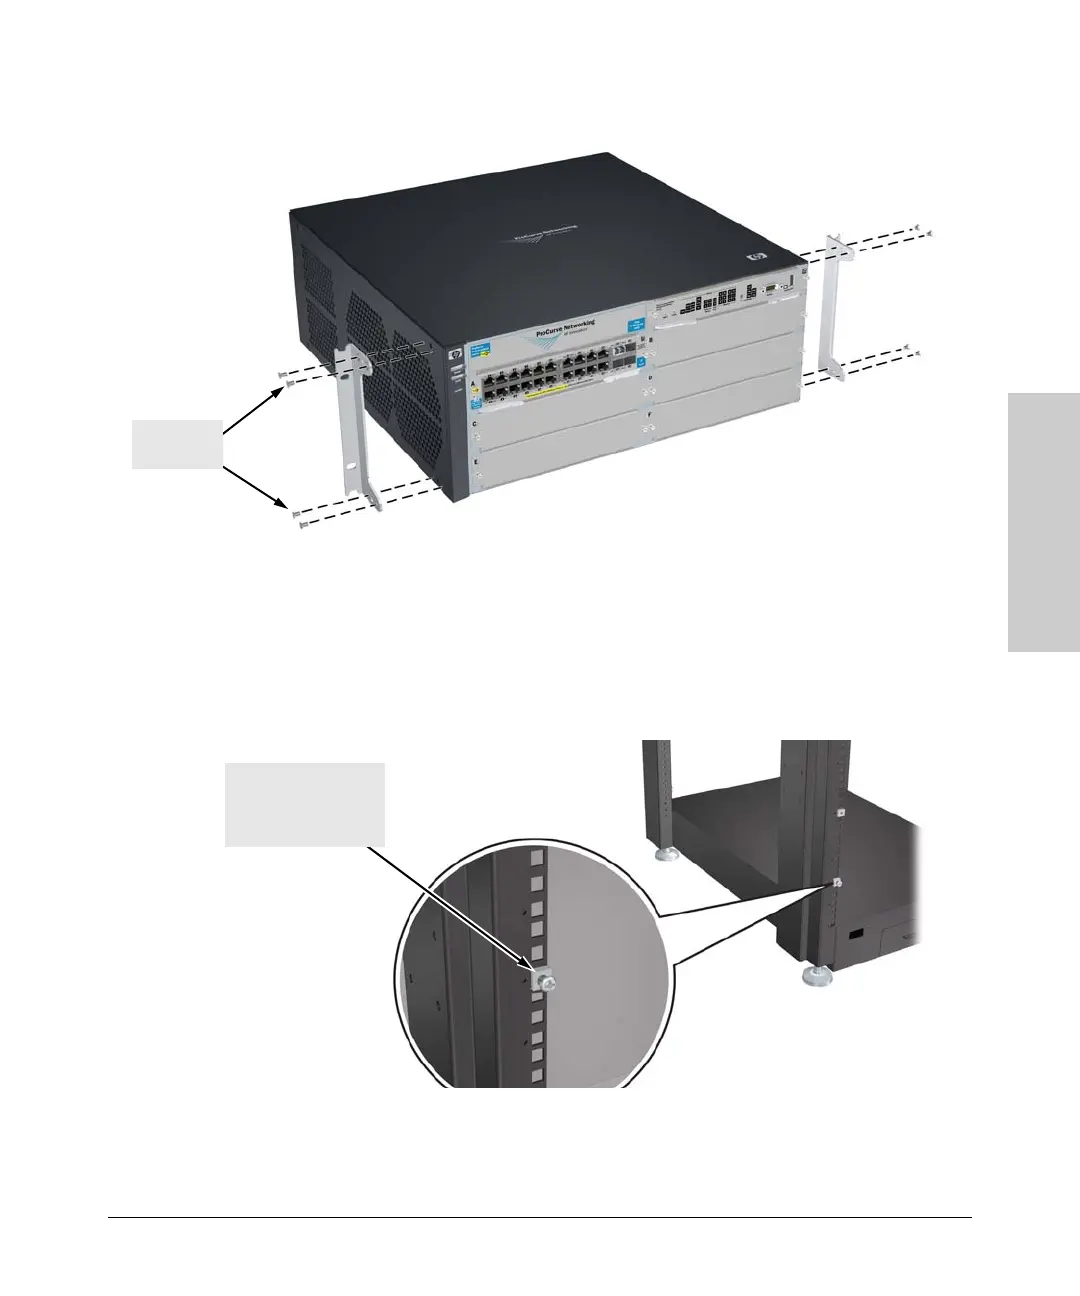
Figure 2-7. Attaching Brackets to the 5400zl Switch
2. Partially install a screw (5/8-inch number 12-24) into the top hole of a pair
of holes that are 0.5 inches apart in each rack/cabinet upright as shown
in the illustration below. Ensure that the screws are at the same level in
each upright.
Figure 2-8. Mounting Screw Positioning
3. Place the switch in the rack and lower it so the notches in the bottom of
the bracket slide onto the screws, then tighten these screws.
8 mm
M4 screws
Partially install a screw
into the top hole of a
close (0.5-inch) pair on
both sides of the rack
 Loading...