Upgrading or replacing controller options 19
6.
While holding the battery assembly, tilt the clip until it is at about 30 degrees to the batteries, and
then push the clip in line with the clip hinges until the clip detaches from the batteries.
The rest of the procedure depends on whether you are replacing a battery or adding one.
• If you are replacing a battery, continue with the next step.
• If you are only adding an optional third battery, go to step 9.
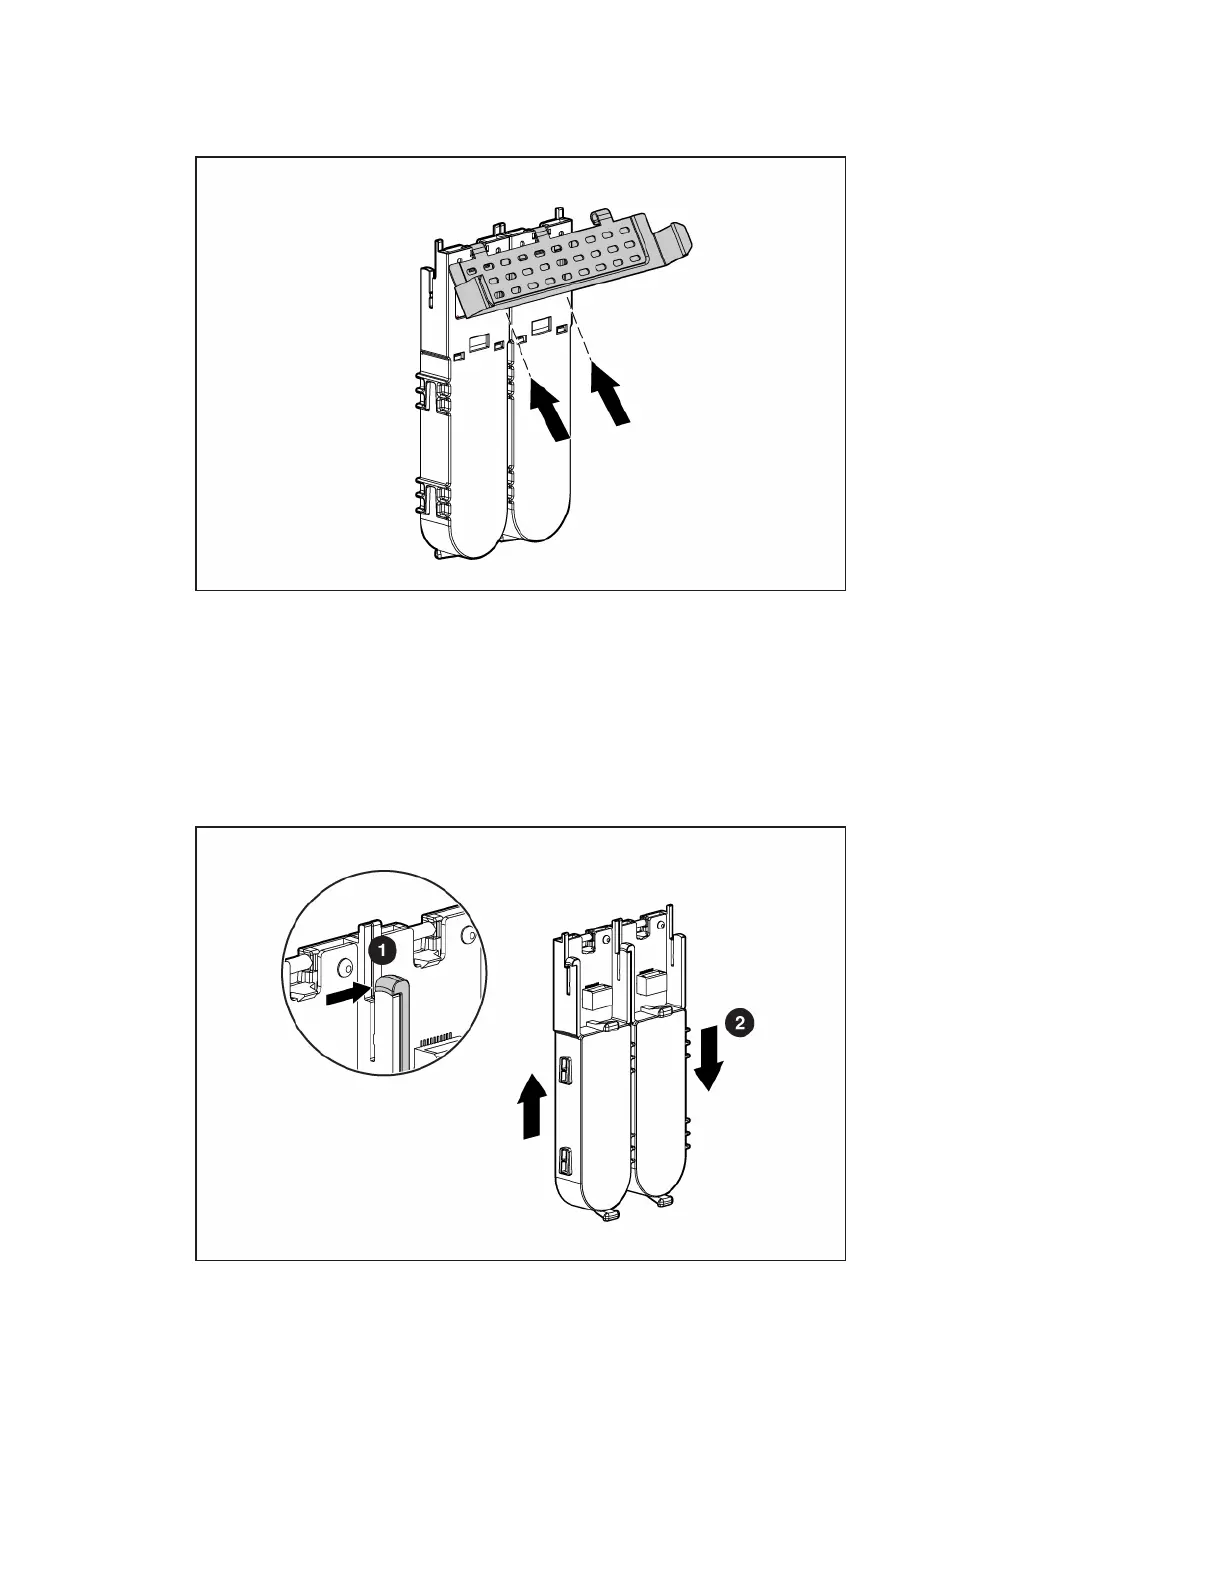
7. Separate the batteries.
a. Turn the batteries over.
b. Pull the lip on the right battery case away from the edge of the adjacent battery case (1).
c. Slide the batteries apart (2).
8. Dispose of the exhausted or faulty battery using environmentally approved procedures ("Battery
replacement notice" on page 40).