HP V-M200 802.11n Access Point Quickstart 3 Configure a simple wireless network
1. Drill two holes of appropriate diameter for the screws or wall anchors. The holes must
be precisely 83 mm (3.25 inches) apart. On the back of the V-M200, there is a hole-
drilling template with small arrows, indicating the correct spacing for the screw holes.
Use this template to correctly space the two holes.
2. If using wall anchors, insert them into the holes. Drive the screws into the wall anchors.
Leave the screws protruding approximately 6 mm (.25 inches) out of the wall.
3. Position the two mounting holes on the back of the V-M200 against the two screws.
4. Gently push the V-M200 against the two screws so that they fit into the mounting holes
and then slide the V-M200 slightly down until it is sufficiently anchored.
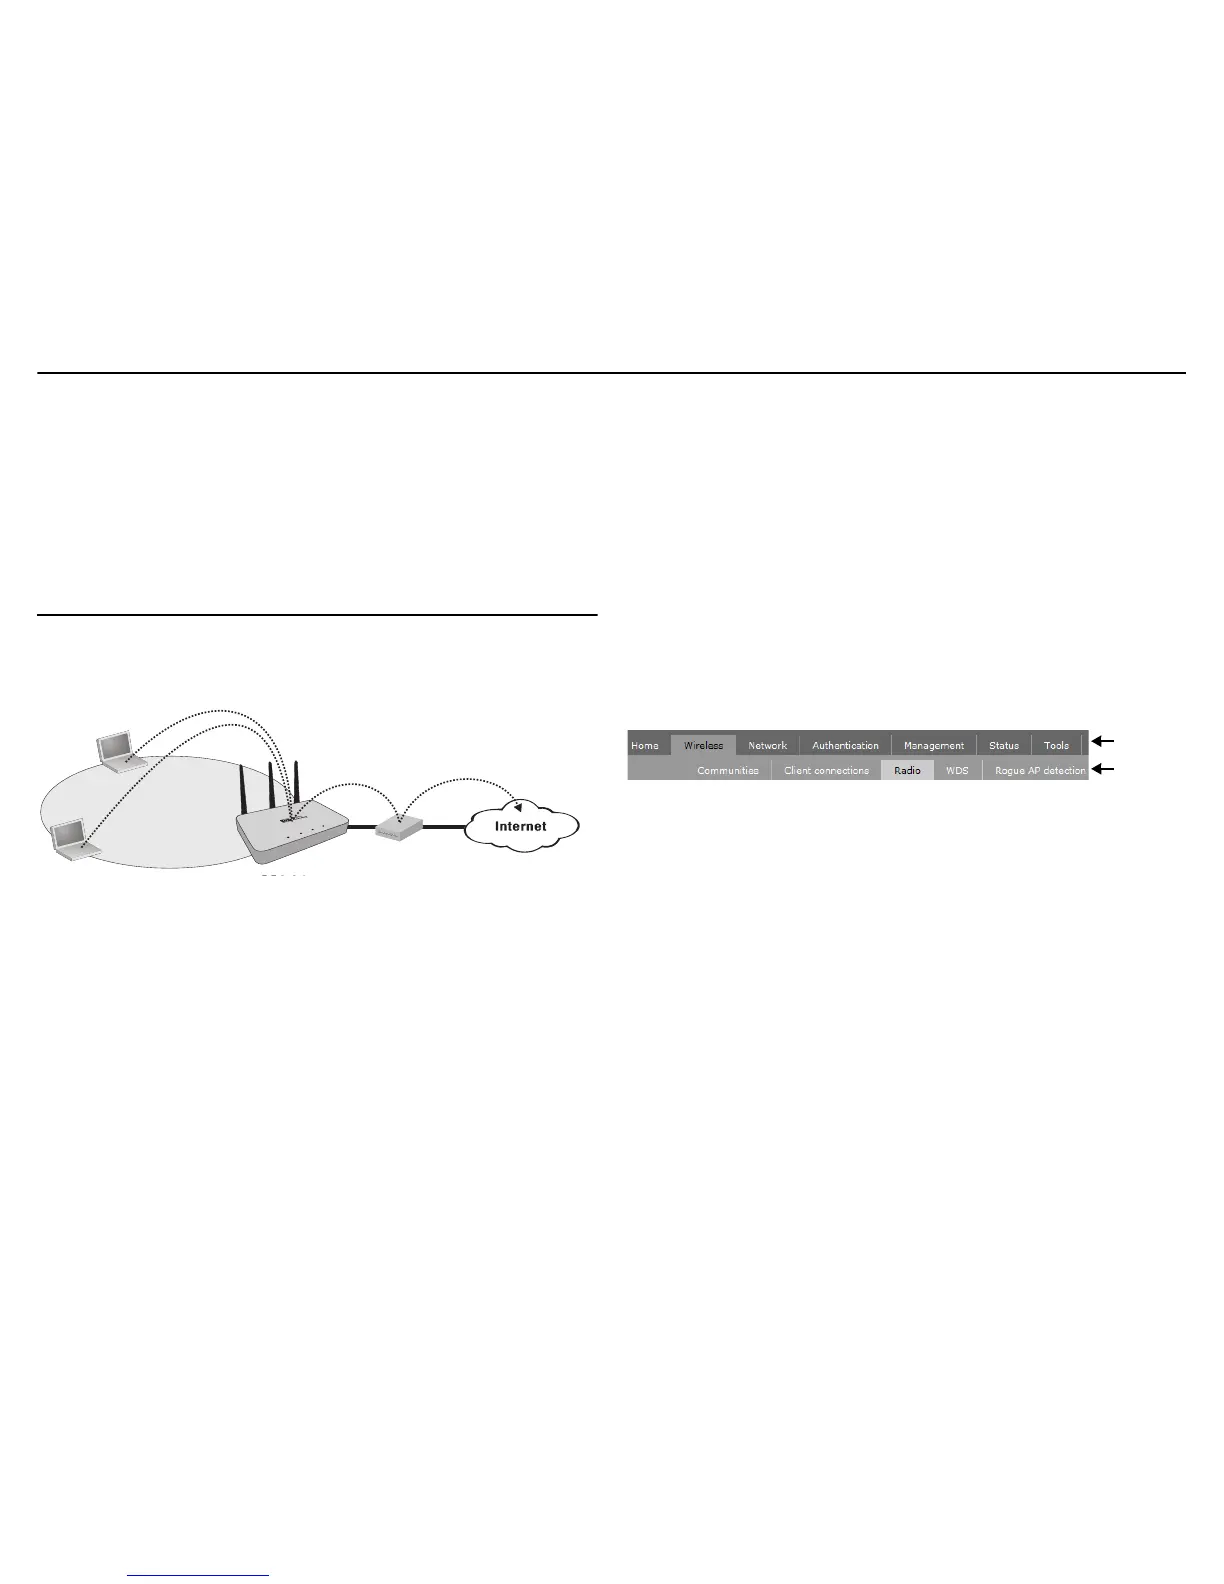
Configure a simple wireless network
This procedure describes how to configure a simple wireless network that enables you to
establish a wireless connection to the Internet through the V-M200. Other wireless network
configurations are possible. See the HP V-M200 802.11n Access Point Management and
Configuration Guide. The topology of this simple wireless network is illustrated as follows:
A. Configuring your computer
1. Disconnect your computer LAN port and configure it to use a static IP address in the
range 192.168.1.2 to 192.168.1.254 and a subnet mask of 255.255.255.0. Set the
default gateway to 192.168.1.1 and DNS server to 192.168.1.1. For example to do this
in Windows Vista, use Control Panel > Network and Sharing Center > Manage Network
Connections > Local Area Connection, right-click Properties then select Internet
Protocol Version 4 (TCP/IPv4) > Properties.
2. Disable any wireless connection on your computer.
3. Connect the cables:
• If using a power supply, use an Ethernet cable to connect your computer to the
V-M200 Ethernet port.
• If using a PoE switch, use Ethernet cables to connect your computer and the V-M200
to an unused factory-default PoE switch.
• If using a PoE injector, use Ethernet cables to connect your computer to the data in
port of the PoE injector and the V-M200 to the data and power out port of the PoE
injector.
4. Power on the V-M200:
• If using a power supply, connect it to the V-M200 then power on the supply.
• If using a PoE switch or injector, power it on.
Initially, the V-M200 power light will blink once every two seconds. Wait approximately a
minute until it begins blinking once per second before proceeding to the next step.
B. Logging in
A factory-default V-M200 is assumed.
Note: The V-M200 is managed via its Web-based management tool using at least
Microsoft Internet Explorer 7/8 or Mozilla Firefox 3.x.
The management tool is organized with menus and sub-menus. Instructions for
making menu selections, such as “select Wireless > Radio” instruct you to select
the Wireless menu and then the Radio sub-menu, as follows:
1. In a Web browser, specify address: https://192.168.1.1.
2. At the security certificate prompt, select the option that allows you to continue to the
Website.
3. On the Login page, specify admin for both Username and Password and then select
Login.
4. On the License Agreement page, read the agreement and then select Accept License
Agreement.
5. The registration page appears. It is recommended that you select Cancel now and then
register later by selecting Maintenance > Registration.
6. In some regions, a Country prompt appears. Select the country in which the V-M200 will
operate.
Caution: The correct country must be selected. See Country of use on page 2.
C. Quick Setup
The first time you log in to the management tool, the Quick Setup home page is automatically
presented at the end of the login sequence. This page lets you choose one of four
configuration scenarios to use as the basis for your network. Pick the scenario that most
closely resembles your network and then make the appropriate settings.