6. Secure front of rail to the front RETMA column using the provided flat securing screw/guide pin in the bottom screw
position of the rail.
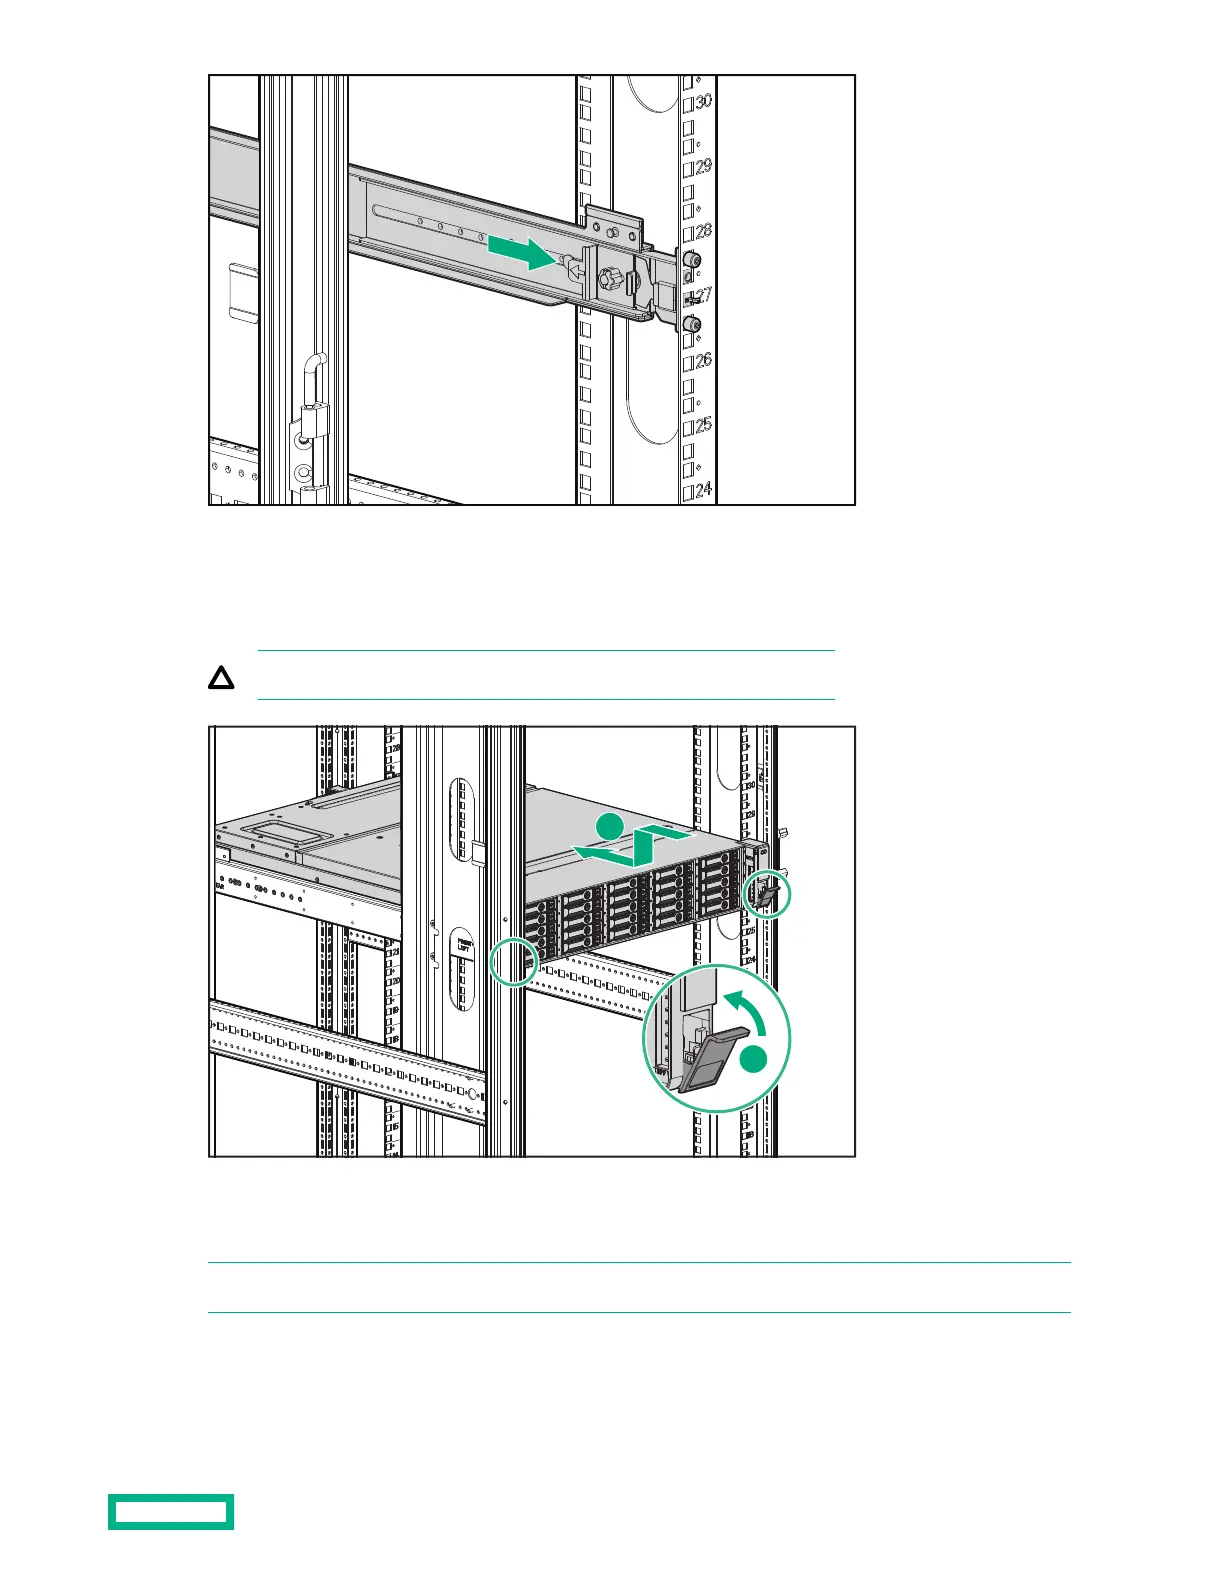
7.
Slide the enclosure into position on the rails (1). Secure the chassis into the rack by tightening the captive CTO screw
behind the latch on the front left and right bezel ears of the chassis (2).
CAUTION: The front CTO screw must be attached at all times when racked.
8. The rear ends of the rails have a CTO bracket that must engage with the enclosure to secure it to the rails. Align the
CTO bracket to the corresponding rear slot into the chassis. The movable bracket can be slid forward or back to
correct position. The provided screw will secure the bracket and chassis to the rail.
NOTE: The provided screw must be secured tightly. Hewlett Packard Enterprise recommends using a T25 driver.
Installing 13
 Loading...

