10 11
Description of battery charging
11. Image detail value: Level 5 (0-4). Press the Up button or Down
button for selection, and press the Power button to confirm and
return to the main menu.
12. Language selection: Press the Up button or Down button for
selection, and press the Power button to confirm and return to the
main menu.
13. Cursor calibration: Press the Up button or Down button for activa-
tion, select the Exit item to return to the main menu, press the Power
button to confirm to go to the second layer menu, press the Up button
or Down button for selection (10m, 30m, 60m, 100m, 300m, 600m,
custom), press the Power button for confirmation, and the calibration
distance is displayed in the lower right corner of the display. Press
the Up button or Down button to change the value of Y axis, and
press the left button or right button to change the value of X axis. The
coordinate values of X-axis and Y-axis are displayed on the display.
Press the Power button for confirmation and return to the previous
layer. After all calibration is completed, select the exit option, return
to the main menu, and deactivate the cursor calibration.
14. Firmwar upgrading: When power is on, connect the device with
the computer using USB, copy the upgrading file of uconfig.bin to the
SD card of the device, and then disconnect the USB. Press the Up
button or Down button to the “Firmware Upgrade” option. Press the
Power button for confirmation. The display of YES on the display
screen indicates successful upgrading. If it is not successful, please
repeat the upgrading steps. After upgrading is ok, connect the device
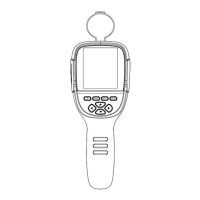
15. Eyepiece visibility adjustment: Rotate the visibility adjustment
knob left and right to adjust your visibility.
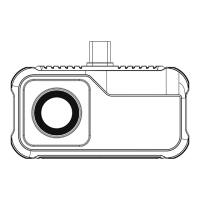
16. Adjustable lens: Rotate the adjustable lens left and right to focus.
Rotation clockwise means near focus, and rotation counterclockwise
means far focus.
with the computer with USB, and delete the upgrading file.
Remember: Do not rename the upgrade file or change the file suffix
type. Otherwise, the upgrade will fail.
This product is built-in with chargeable batteries. When the power is
insufficient, please charge it in a timely manner. Charging can be
made in 2 modes.
Charging mode 1:
Batteries are charged by the USB Type-C interface of the thermal
image telescop. After it is fully charged, unplug the USB wire.
Charging mode 2:
1.Unscrew the battery cover and take out the batteries.
2.Used the charger from the original manufacturer to charge the
batteries. Install the batteries properly according to the polarity as
shown on the charger.
3.After it is fully charged, disconnect power supply for the charger,
and remove the batteries.