41
1
Checking Installation Effectiveness
Checking the Installation
2
Checking Equipment Prior to Powering Up
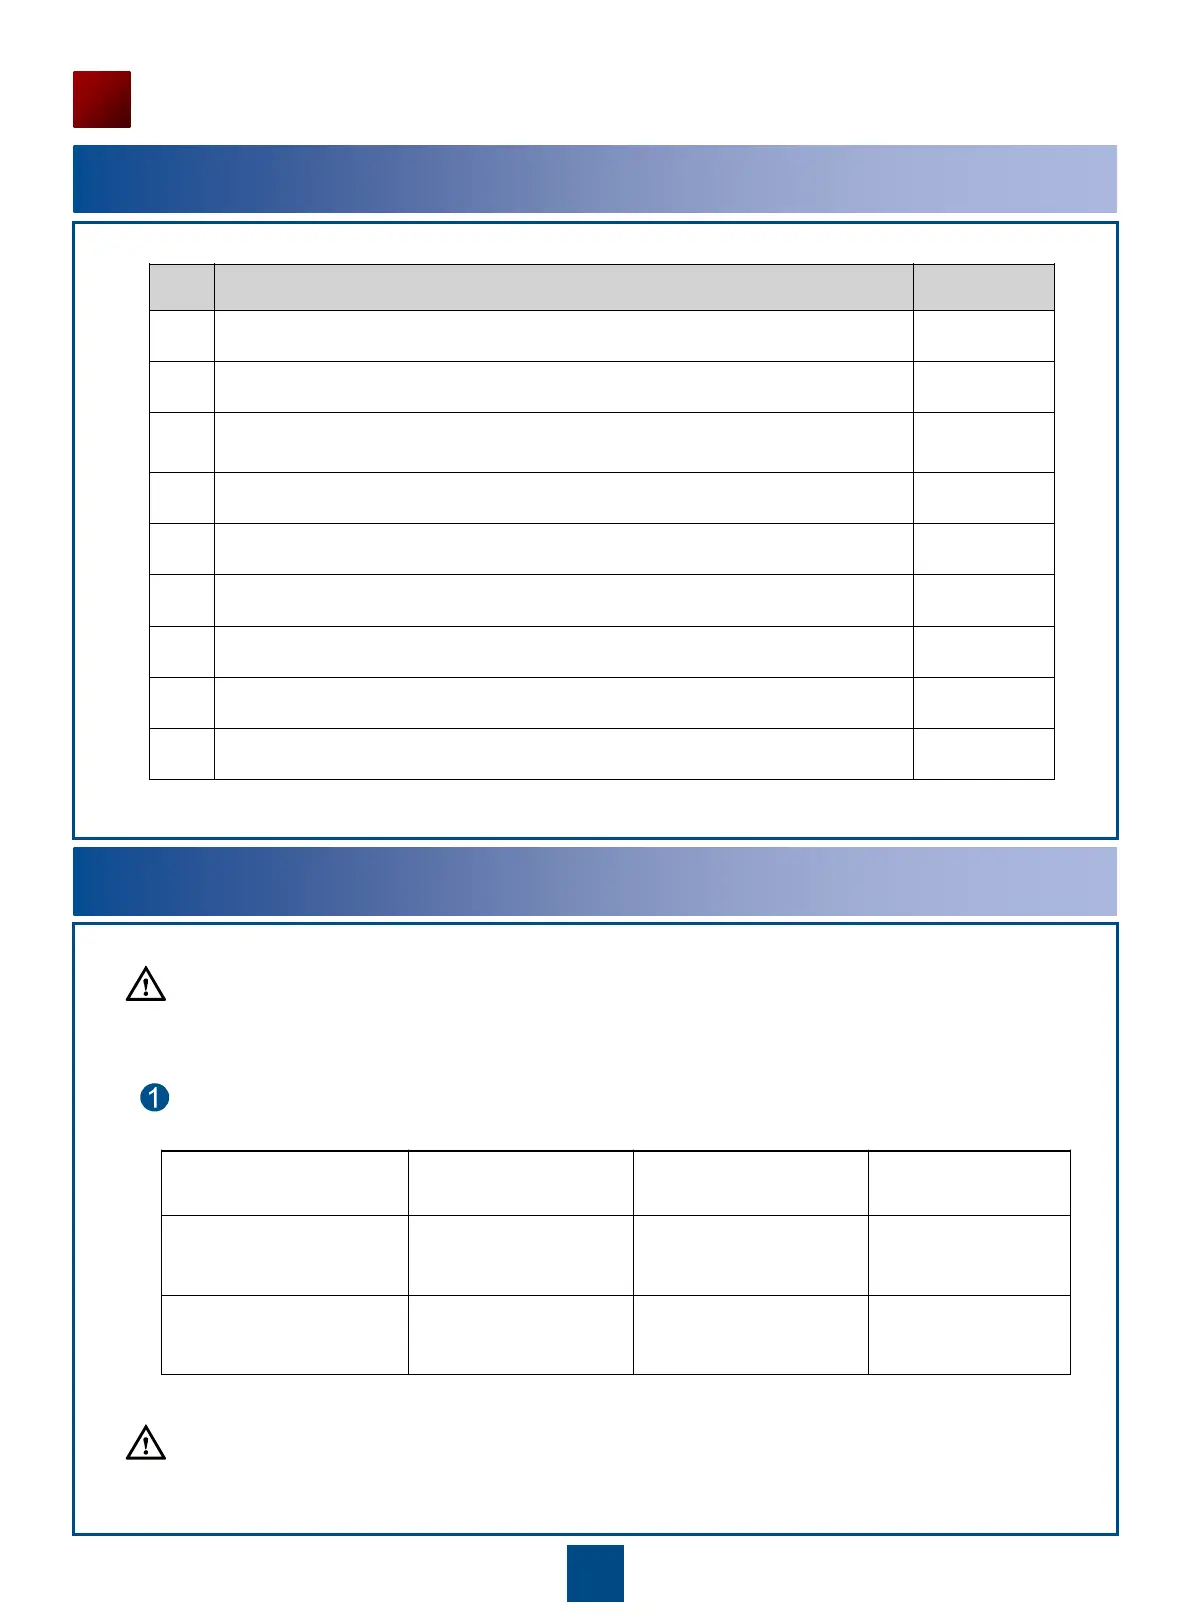
No. Item to Check Method
1 The cabinet is installed in the position specified in the engineering design
documents.
Check the
position.
2 Mechanical parts of the cabinet have been installed correctly and securely, and are
undamaged. Cabinet surfaces are clean and have no scratches.
Check
3 Cable holes at the top and bottom of the cabinet are sealed properly. Check
4 Cables have been run according to specifications in the engineering design
documents.
Check
5 Cables are not damaged or broken and have not been spliced together. Cable
connectors are fastened correctly and securely.
Check
6 Labels at both ends of the cables and fibers have been filled in correctly and are
legible.
Check
7 Fibers outside the cabinet are not squeezed or pressed together by other cables or
articles, and are run through protective corrugated pipe or cable tough.
Check
8 No fibers are bent at a radius of less than 40 mm. No protruding objects obstruct the
paths of the fibers.
Check
9 Fibers are properly arranged and bound with binding straps, and have not been
scratched.
Check
Ensure that fixed optical attenuators have been installed as required before powering on the subrack.
Turn off the power supply facilities, and use a multimeter to measure the resistance between NEG (-),
RTN (+), and PGND.
Turn off all the power switches after the measurement.
Circuit Breaker Resistance Between
NEG (-) and RTN (+)
Resistance Between
NEG (-) and PGND
Resistance Between
RTN (+) and PGND
Turn all the power
switches on the DC power
distribution box to "OFF".
∞ ∞ 0
Turn all the power
switches on the DC power
distribution box to "ON".
> 20,000 ohms > 20,000 ohms 0
CAUTION
CAUTION
 Loading...