4.5.1 Wall-Mounted Installation
Procedure
Step 1 Determine the positions for drilling holes using the ÉàÀ²ÊªȝÑč template. Level
the positions of mounting holes using a level, and mark the positions with a
marker.
Step 2 Secure the mounting bracket.
When drilling holes, avoid the water pipes and power cables buried in the wall.
NO TE
M6x60 expansion bolts are delivered with the SUN2000. If the length and amount of the
bolts do not meet installation requirements, prepare M6 stainless steel expansion bolts by
yourself.
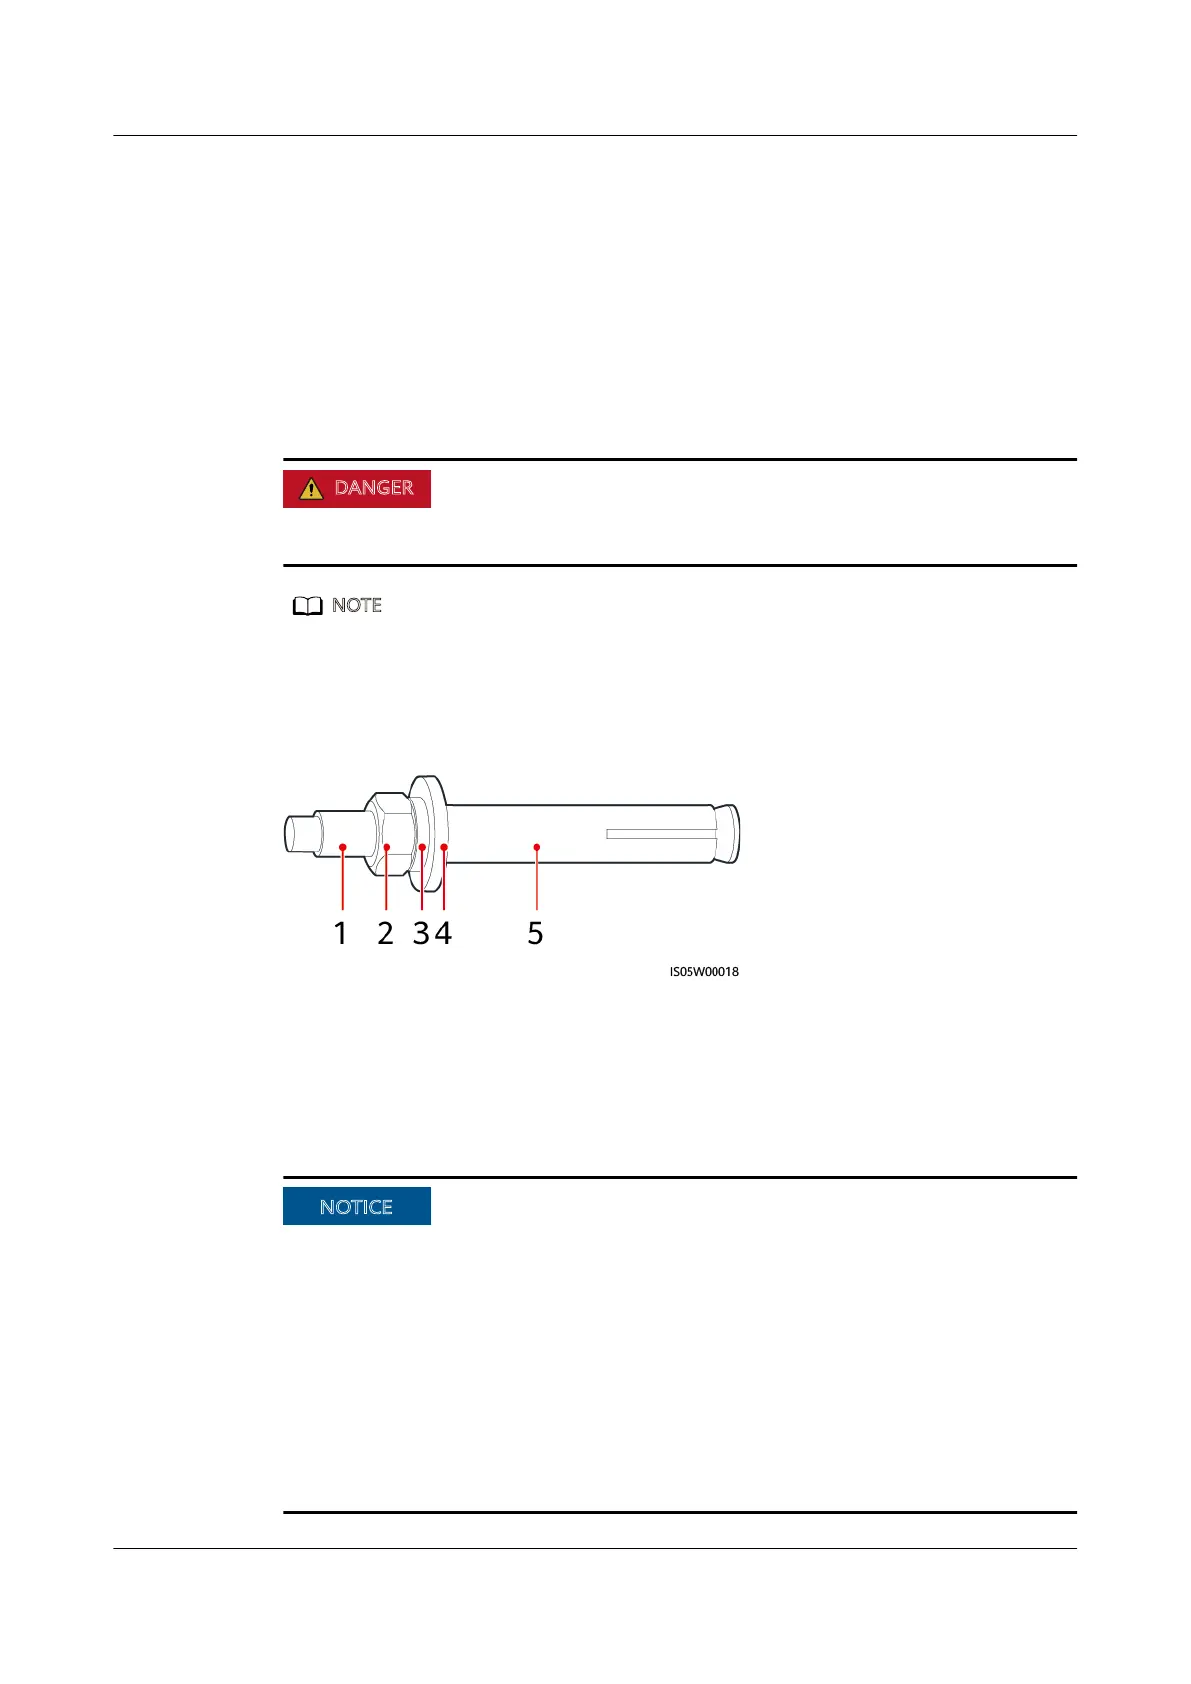
Figure 4-8 Expansion bolt composition
(1) Bolt (2) Nut (3) Spring washer
(4) Flat washer (5) Expansion sleeve
ɲ fÑÝàüÊìñäì²Ê¯Ãì²ÑÊÑàÑÊììý²ì¯ăäȀýàä©ìăªÑªªÃäÊÊ
anti-dust mask when drilling holes.
ɲ w²ÝýăÊăñäì²ÊÑààÑñÊ쯯ÑÃäÊÉäñà쯯ÑòäìÊäȇ/©
the holes are inaccurately positioned, drill holes again.
ɲ >üÃ쯯ѩì¯ĂÝÊä²ÑÊäÃüý²ì¯ì¯ÑÊàìýÃéìààÉÑü²Êª
the nut, spring washer, and ēì washer. Otherwise, the mounting bracket will
not be securely installed on the wall.
ɲ >ÑÑäÊì¯ÊñìȀäÝà²Êªýä¯àȀÊēì washer of the expansion bolt at the
bottom.
SUN2000-(2KTL-6KTL)-L1
User Manual 4 System Installation
Issue 03 (2020-09-15) Copyright © Huawei Technologies Co., Ltd. 25
 Loading...