Installation and
Care Instructions
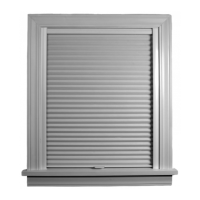
Standard
Rectangular Shadings
Nantucket
™
Window Shadings
THANK YOU THANK YOU
THANK YOU THANK YOU
THANK YOU for purchasing a Hunter Douglas product. Your
new window shading has been custom built for you from the
highest quality materials. Once in your window, it will provide
you with a lifetime of beauty and trouble-free use.
Getting Started
• Remove the window shading from the package. Keep the
packaging until the shading operates to your satisfaction.
• Check the diagram to make sure you have the necessary parts.
Tools needed for installing your Nantucket
™
shading:
• Carpenter’s Level
• Flat Blade Screwdriver
• Measuring Tape
• Pencil
• Phillips Screwdriver
• Pliers
• Power Drill,
1
/
4
" Hex
Driver, and Drill Bits
• Quick Release Card
For assistance, call the
Hunter Douglas Customer Information Center at
1-888-501-8364
7:00 AM to 4:30 PM MST, Mon.-Fri.
Visit our Web site at hunterdouglas.com
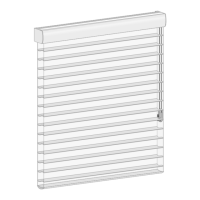
Sheer Knit
Fabric Facing
(Rear)
Continuous
Cord Loop
Sheer Knit
Fabric
Facing
(Front)
Bottom Rail
Cord
Tensioner
End Cap
Hold-Down
Bracket
(Optional)
Dust Cover
(Optional)
Headrail
End Cap
Bottom Rail
Weight
Weight
Lock
Weight
Lock
Fabric
Vanes
Headrail
Limit
Stop
Spacer
Block
(Optional)
Installation
Bracket
Extension
Bracket
(Optional)
Limit
Stop
Back Cover
Bracket
(Optional)