4. Attach the front cable clamp for the hydrostatic
transmission.
5. Push the ball joint onto its bracket and attach the
locking spring.
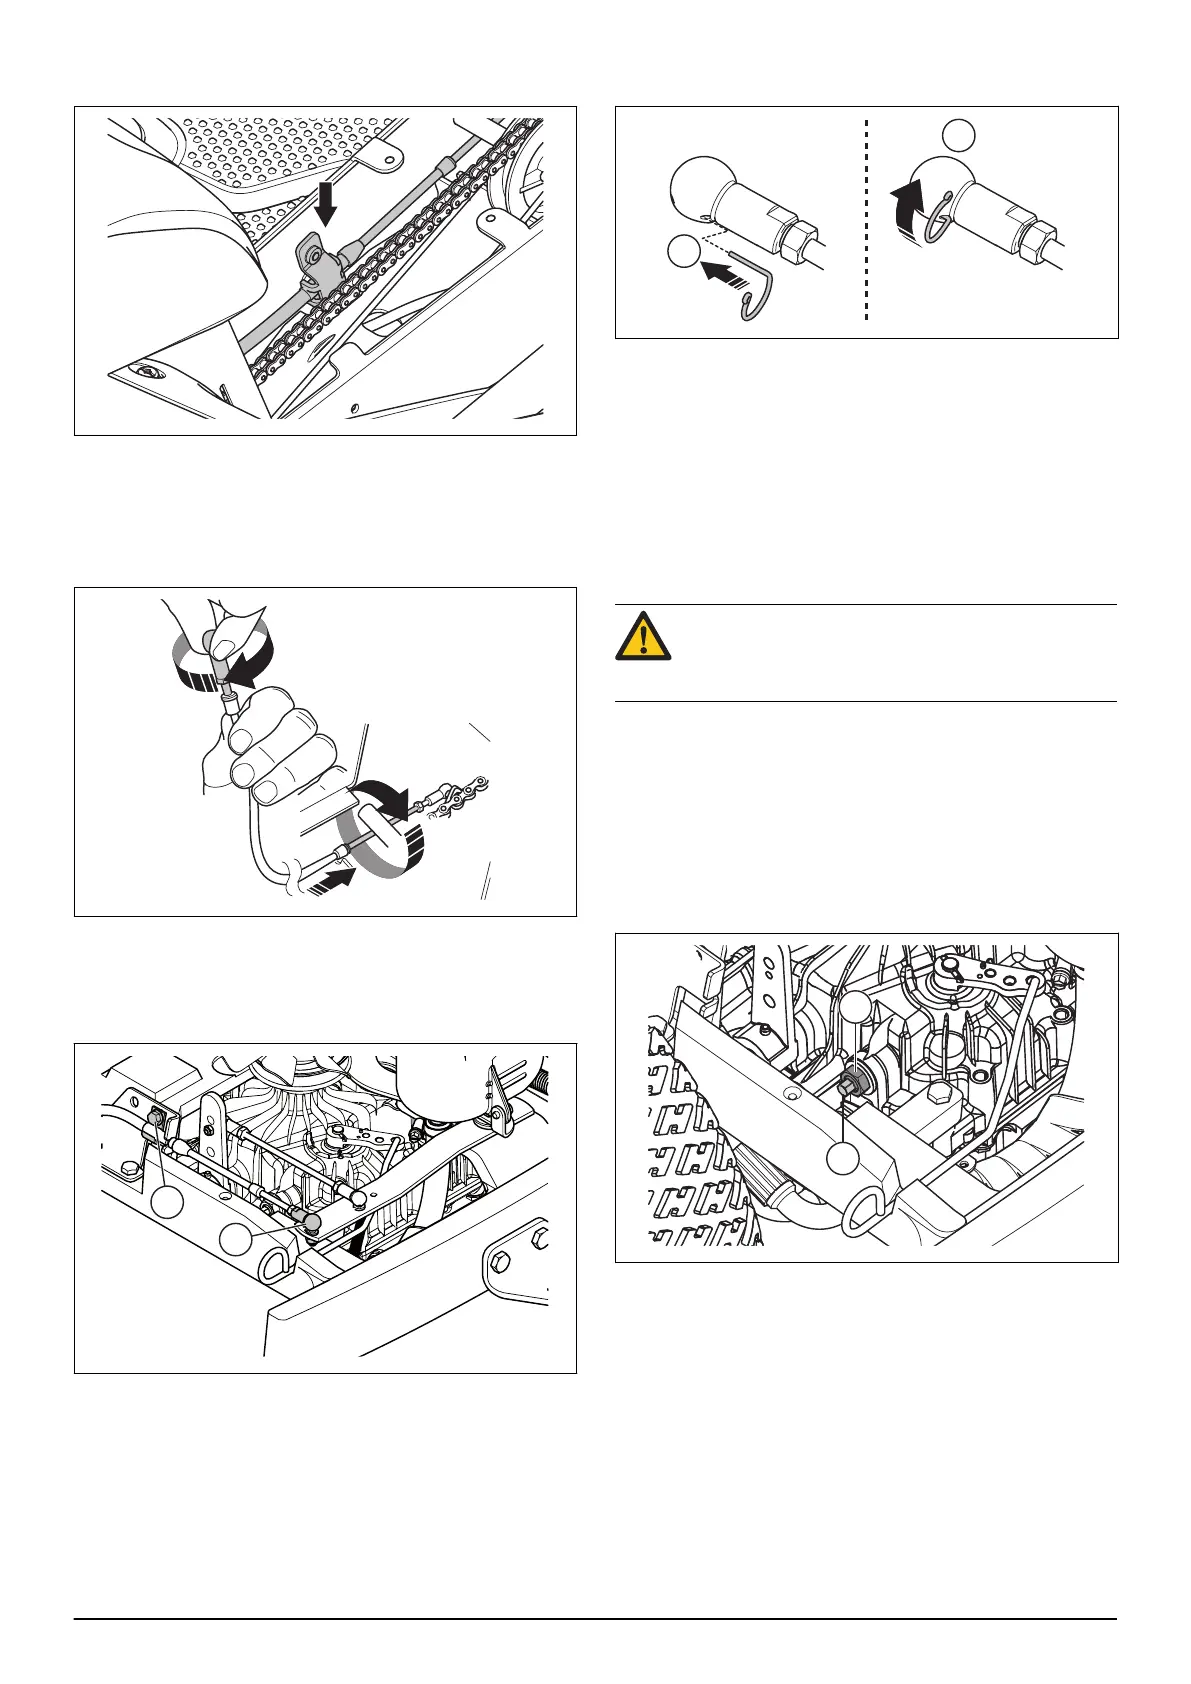
6. Attach the ball joint onto the rear part of the
hydrostatic transmission cable. Turn the ball joint
10-12 turns until the ball joint is the correct length.
7. Pull the hydrostatic transmission cable along the
other cables.
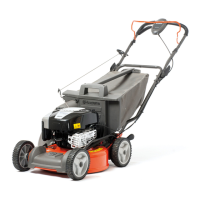
8. Put the hydrostatic transmission cable in the rear
casing bracket and attach the rear clamp (B).
9. Adjust the hydrostatic transmission cable. Refer to
To adjust the hydrostatic transmission cable on page
38
.
10. Connect the rear ball joint (A).
11. Put the locking spring into the hole (A) and push it
around the ball joint shaft (B).
12. Tighten the locknut for the rear ball joint.
13. Attach the frame tunnel cover. Refer to
To remove
the covers on page 18
.
14. Operate the product forward and rearward to make
sure that the transmission operates correctly.
9.5.6 Transmission maintenance
9.5.6.1 To adjust the transmission neutral position
WARNING: Engine exhaust contains poisonous
carbon monoxide. Attach an exhaust hose
before you start the engine indoors.
1. Bleed the hydraulic system. Refer to
To bleed the
drive system on page 32
.
2. Put the product on the adjustment tool for wheel
speed. Refer to
Servicing tools on page 15
.
3. Start the engine and give it full throttle.
4. Loosen the locknut (A) on the transmission
adjustment shaft.
5. Turn the adjustment shaft (B) clockwise until the
wheels start to turn rearward.
1676 - 001 - 26.11.2021 Repair instructions - 37

 Loading...