EasyManua.ls Logo

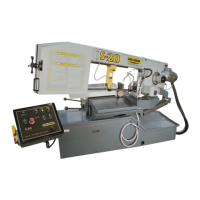
Hyd-Mech S20P User Manual

Hyd-Mech S20P
43 pages
To Next Page IconTo Next Page
Page #1 background imageLoading...
Page #1 background image
1
THANK YOU,
On behalf of everyone at HYD·MECH Group Limited, we would like to thank and congratulate you on your decision to
purchase a HYD·MECH bandsaw.
Your new machine is now ready to play a key role in increasing the e󰀩ciency of your operation, helping you to reduce cost
while boosting quality and productivity.
To ensure you are maximizing the power and versatility of your new HYD·MECH bandsaw, please take the time to
familiarize yourself and your employees with the correct operation and maintenance procedures as outlined in this
manual. Please keep this instruction manual for future reference in a known location and easily accessible to all users of
the device.
HYD·MECH o󰀨ers a great variety of options, components, and features for its various models. Therefore, some of the
equipment described in this manual (various illustrations and drawings) may not be applicable to your particular machine.
The information and specications provided in this manual were accurate at the time of printing. HYD·MECH reserves the
right to discontinue or change specications or design at any time without notice and without incurring any obligation.
Thank you.
Hyd·Mech Group Limited
P.O. Box 1659, 1079 Parkinson Road
Woodstock, Ontario, N4S 0A9
Phone : (519) 539-6341
Service : 1-877-237-0914
Sales : 1-877-276-SAWS (7297)
Fax : (519) 539-5126
e-mail : info@hydmech.com
Printed FEB 2016
S20P
393396
Question and Answer IconNeed help?

Do you have a question about the Hyd-Mech S20P and is the answer not in the manual?

Hyd-Mech S20P Specifications

General IconGeneral
BrandHyd-Mech
ModelS20P
CategorySaw
LanguageEnglish

Summary

Safety Instructions Overview

Safety Summary and Mandatory Information

Covers essential safety instructions, mandatory reading, and basic rules for safe operation.

Owner and Operator Responsibilities

Defines the duties of owners and personnel for machine safety and adherence to procedures.

Basic Rules and Machine Usage

Intended Use, Misuse, and Liability

Specifies the machine's intended purpose, examples of misuse, and liability disclaimers.

Owner's Responsibilities in Detail

Work Organization, Personnel, and Training

Covers manual accessibility, personnel qualification, training, and workplace conditions.

Operator & Maintenance Personnel Duties

Safety Equipment, E-Stops, and Hazards

Details checks for safety equipment, emergency stops, safe operation practices, and hazard labels.

Clothing, Jewelry, and PPE

Specifies requirements for operator attire, jewelry, and personal protective equipment.

Personal Safety and Workplace Environment

Glove Usage, Hearing Protection, Workplace Safety

Guidelines on glove use, hearing protection necessity, and maintaining a safe work area.

Master Disconnect and Residual Risks

Master Disconnect and Lock-out Procedures

Explains lock-out procedures for the master disconnect switch before maintenance.

Residual Electrical and Air Risks

Details residual voltage risks in capacitors and air pressure after power disconnection.

Safety Hazard Labels Explained

Voltage, Blade Cut, and Pinch Point Warnings

Describes hazards like voltage, moving blade cuts, and pinch points with their labels.

Safety Label Identification

Hazard Label Images and Part Numbers

Shows images and part numbers for specific safety hazard labels on the machine.

SECTION 1 - INSTALLATION

Inspection and General Safety Precautions

Emphasizes inspection for shipping damage and outlines general safety rules for installation.

Operator Safety Guidelines

Provides specific safety rules for the operator during installation and operation.

Machine Handling and Setup

Forklift Lifting and Shipping Preparation

Details safe lifting procedures with a forklift and removing shipping wrap.

Foundation, Levelling, and Anchoring

Guides on selecting location, levelling the machine, and anchoring it securely.

Machine Fluids and Wiring Connections

Cutting Fluid, Hydraulic Oil, and Wiring

Specifies fluids and details electrical power connection procedures for the machine.

SECTION 2 – OPERATING INSTRUCTIONS

Operator Control Panel Overview

Introduces the control panel and its function for operating the saw.

Operating Modes and Limit Settings

Manual and Semi-Automatic Operation Steps

Details the steps for operating the machine in manual and semi-automatic modes.

Setting Head Up and Down Limits

Guides on how to set the upper and lower limits for the saw head's movement.

Cycle Parameters and Machine Settings

Understanding and Displaying Cycle Parameters

Lists available parameters and their abbreviations displayed on the machine.

Modifying Machine Parameters

Explains how to enter and change machine parameters for optimal operation.

Key Machine Parameters and Alarms

Machine Parameter Settings

Lists parameters like language, machine type, blade speed, and tension with factory settings.

Machine Alarms and Error Messages

Details common machine alarms and error messages with recommended actions.

Advanced Operation Settings

Setting Head Linear Potentiometer Limits

Provides a procedure for setting the head position limits using the linear potentiometer.

Head Swing and Angle Brake Adjustment

Explains how to adjust the head swing angle and operate the angle brake.

Coolant, Guides, and Work Stop

Coolant Flow and Guide Arm Positioning

Describes the coolant system, wash gun, and guide arm adjustments for lubrication.

Work Stop Assembly Operation

Details the use of the work stop assembly for setting cut length.

Blade Basics and Cutting Best Practices

New Blade Break-in Procedure

Explains the critical "break-in" process for new blades to ensure longevity and performance.

Coolant, Clamping, Speed, and Feed Rate

Covers coolant use, stock clamping, blade speed selection, and feed rate for optimal cuts.

Optimizing Blade Pitch Selection

Determining Correct Teeth Per Inch (T.P.I.)

Guides on selecting the appropriate blade pitch (Teeth Per Inch) based on material width.

SECTION 3 – MAINTENANCE AND TROUBLESHOOTING

Safety During Maintenance (Lock-out/Tag-out)

Details safety procedures, including lock-out/tag-out, before performing maintenance.

Lock Out Procedure Steps

Outlines the step-by-step procedure for safely locking out the machine.

Blade Changing Procedure

Opening Doors and Loosening Tension

Instructions for opening the wheels door and loosening the blade tensioner.

Accessing and Removing the Blade

Steps for opening the blade guard and removing the worn blade.

New Blade Installation and Adjustment

Uncoiling and Placing New Blade

Guides on safely uncoiling a new blade and placing it onto the wheels and guides.

Blade Play and Guide Adjustment

Instructions on checking and adjusting blade play and guide contact with an Allen key.

Blade Tension and Tracking Adjustment

Blade Tension and Cover Replacement

Details tensioning the blade, replacing the cover, and checking blade movement.

Idler Wheel Tracking Adjustment

Provides steps for adjusting the idler wheel to ensure proper blade tracking.

Wheel and Guide Adjustments

Drive Wheel Tracking Adjustment

Explains how to adjust the drive wheel for correct blade distance from the flange.

Blade Guide Block Adjustment

Guides on adjusting the blade guide blocks with carbide pads for optimal performance.

Carbide Guides and Blade Perpendicularity

Carbide Insert Replacement

Details the process for replacing carbide inserts in the blade guide blocks.

Adjusting Blade Perpendicularity

Step-by-step instructions for ensuring the blade is perpendicular to the work table.

Blade Brush Adjustment

Adjusting Blade Brush Contact

Explains how to adjust the blade brush for optimal contact with the blade gullets.

Angle Brake Adjustment

Angle Brake Adjustment Procedure

Provides a detailed procedure for adjusting the angle brake to secure the head.

Slide, Stop, and Gearbox Maintenance

Blade Tension Slide Adjustment

Details how to adjust the blade tension slide to reduce play.

90/30 Degree Stop Adjustment

Explains recalibrating the mechanical stops for head swing positions.

Gearbox Lubrication

Notes that the gearbox is permanently lubricated and maintenance-free.

General Lubrication Points

Lubrication Requirements and Recommendations

Outlines lubrication needs for moving assemblies and specifies recommended grease.

SECTION 4 - ELECTRICAL

Electrical Schematics Reference

Directs users to a PDF on an attached CD for electrical schematics and parts lists.

SECTION 5 - HYDRAULIC

Hydraulic System Operation and Oil Level

Discusses hydraulic system start-up, oil level maintenance, and pressure adjustment.

Cylinder List

Provides a list of part numbers, descriptions, and quantities for hydraulic cylinders.

SECTION 6 - MECHANICAL ASSEMBLIES

Mechanical Assembly Drawings and Parts List

Refers users to a PDF on an attached CD for mechanical assembly drawings and parts lists.

SECTION 7 - OPTIONAL EQUIPMENT

Mist Coolant System Details

Explains the operation and adjustment of the mist coolant system.

Work Stop and Lamp Assemblies

Describes the work stop assembly and the work lamp assembly.

Additional Optional Features

Variable Vise Pressure Option

Details the adjustment of vise clamping pressure and its indication on the gauge.

Overhead Bundling Operation

Guides on adjusting speed and operating the overhead bundling feature.

SECTION 8 - SPECIFICATIONS

S20P Bandsaw Specification List

Provides a comprehensive list of specifications for the S20P bandsaw model.

S20P Machine Layout and Dimensions

Detailed Dimensional Drawings

Presents a layout drawing with key dimensions and detail views of the S20P bandsaw.

SECTION 9 - WARRANTY

Hyd-Mech Limited Warranty Terms

Outlines the warranty period, coverage, exclusions, and limitations for the S20P bandsaw.

Related product manuals