12 13
User Guide User GuideHYDRAFACIAL MD
™
Elite
™
HYDRAFACIAL MD
™
Elite
™
EN EN
Set-Up
Tool Holder
1. Loosen thumbscrews rst.
2. Attach the tool holder, top rst onto the accessory rail.
3. Tighten the thumbscrews to lock the handpiece holder in place.
Waste Canister
1. Secure waste canister shelf to the back of the System.
2. Attach the waste canister lid and secure the clamps.
3. Insert the tube on the lid into the waste canister port on the back of the unit.
4. Make sure the waste canister sits securely on the ledge. Use a Phillips screwdriver to install the ledge.
Note: Always remove the waste canister before transporting the unit.
HydraFacial Handpiece
1. Connect the blue twist lock (Return Line) to the blue connector on the bottom of the handpiece and secure by twisting thumb tight.
Do not overtighten.
2. Connect the clear twist lock (Supply Line) to the cartridge and secure it by twisting the lock only thumb tight. To prevent the lock
from breaking, do not overtighten the twist lock.
3. Plug the small tube attached to the handpiece into coupling tting in the System.
4. Connect the large tube attached to the handpiece into the waste canister.
5. Insert the cartridge into the handpiece. Align the arrow on the cartridge with the unlock symbol on the handpiece.
Push rmly until it snaps into place, then twist the cartridge up until the arrow aligns with the lock symbol.
Note: If the cartridge is difcult to insert, drizzle a small amount of water into the cartridge to lubricate it, and try again.
6. To remove the cartridge and insert skin solution vials (sold separately), twist the cartridge until the arrow aligns with the unlock
symbol, then pull the cartridge straight out. Then insert the vial into the handpiece. Push rmly until it snaps into place.
Note: Keep all the toggle switches off while using vials.
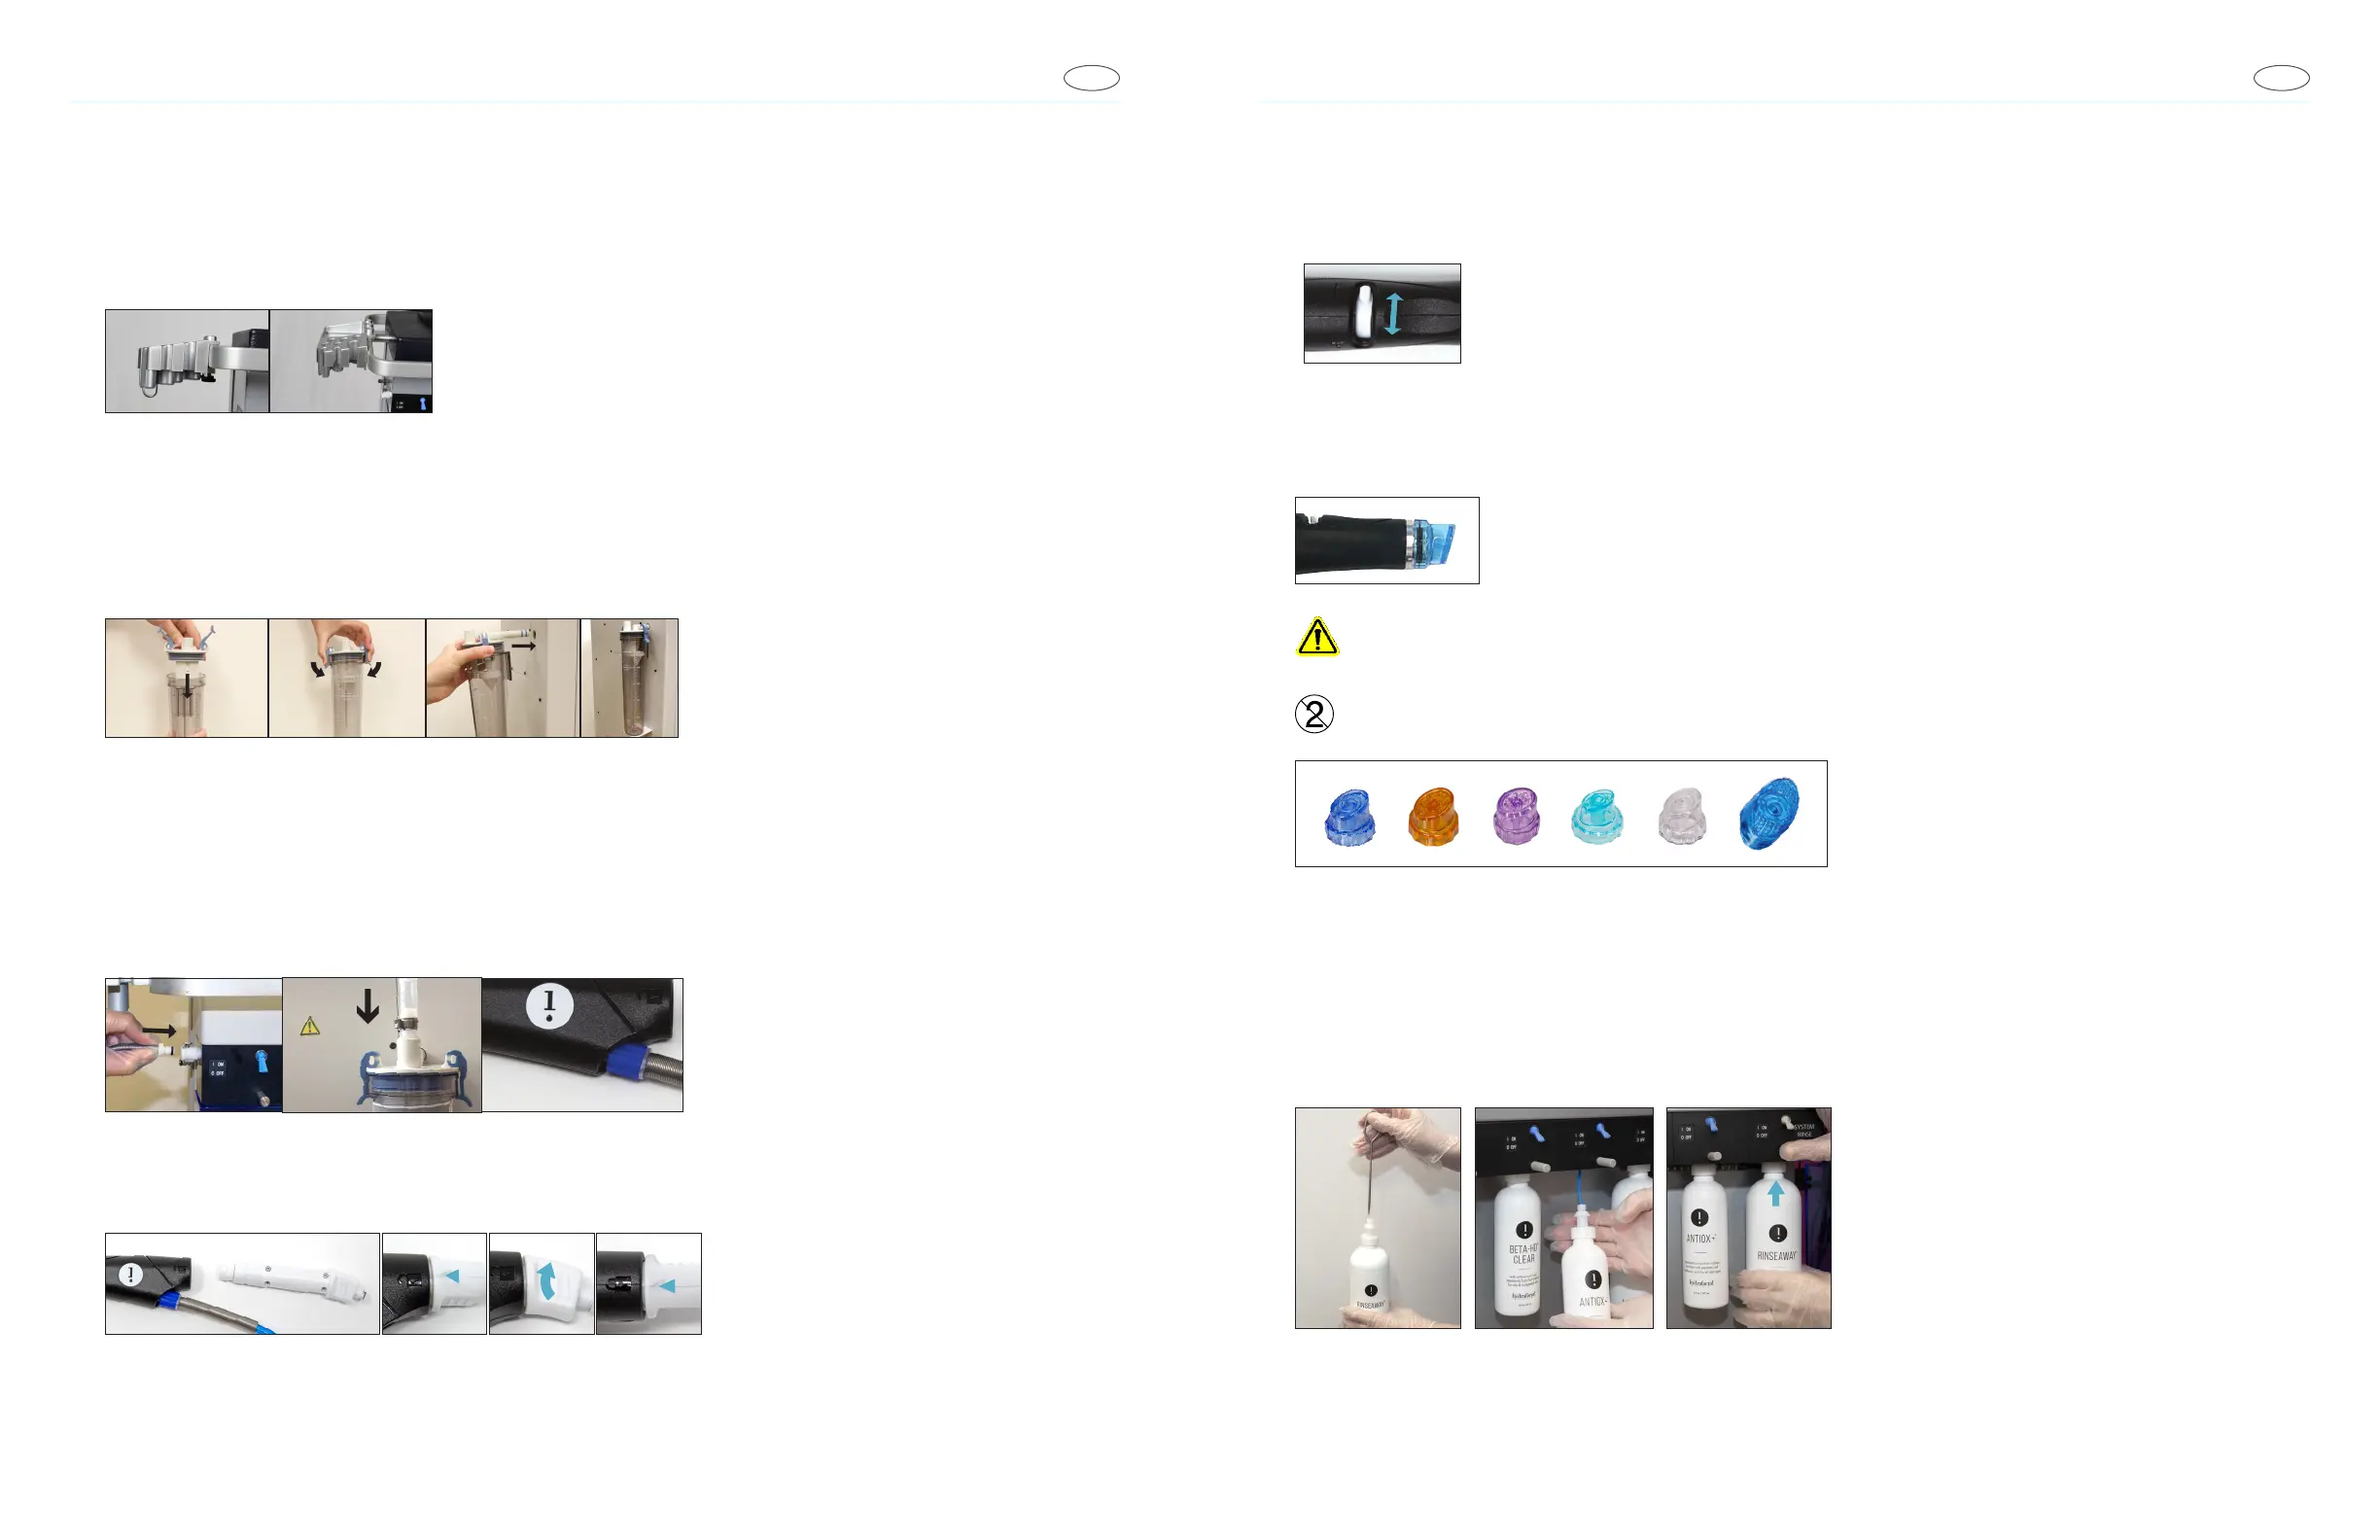
7. Turn the ow control valve toward the “+” sign to increase the serum ow or towards the “–” sign to decrease the ow.
HydroPeel Tip
1. Align the HydroPeel tip and attach it to the handpiece.
Caution: Avoid dropping or damaging the disposable tip prior to treatment. Disposable tips suspected of being
damaged should be discarded and replaced. Damaged tips may cause scratches or discomfort to the client.
Single use only.
Skin Solution Bottles (Sold separately)
1. Open the front door. Remove the cap of the skin solution bottle and use the puncture tool to pierce the seal inside the bottle.
2. Press and hold each manifold button as you insert each bottle into the manifold, and then release the button.
Note: The Rinseaway
™
System Cleaning Solution should be installed in the manifold with the gray toggle switch labeled
“SYSTEM RINSE”.