Smartec HSA 17
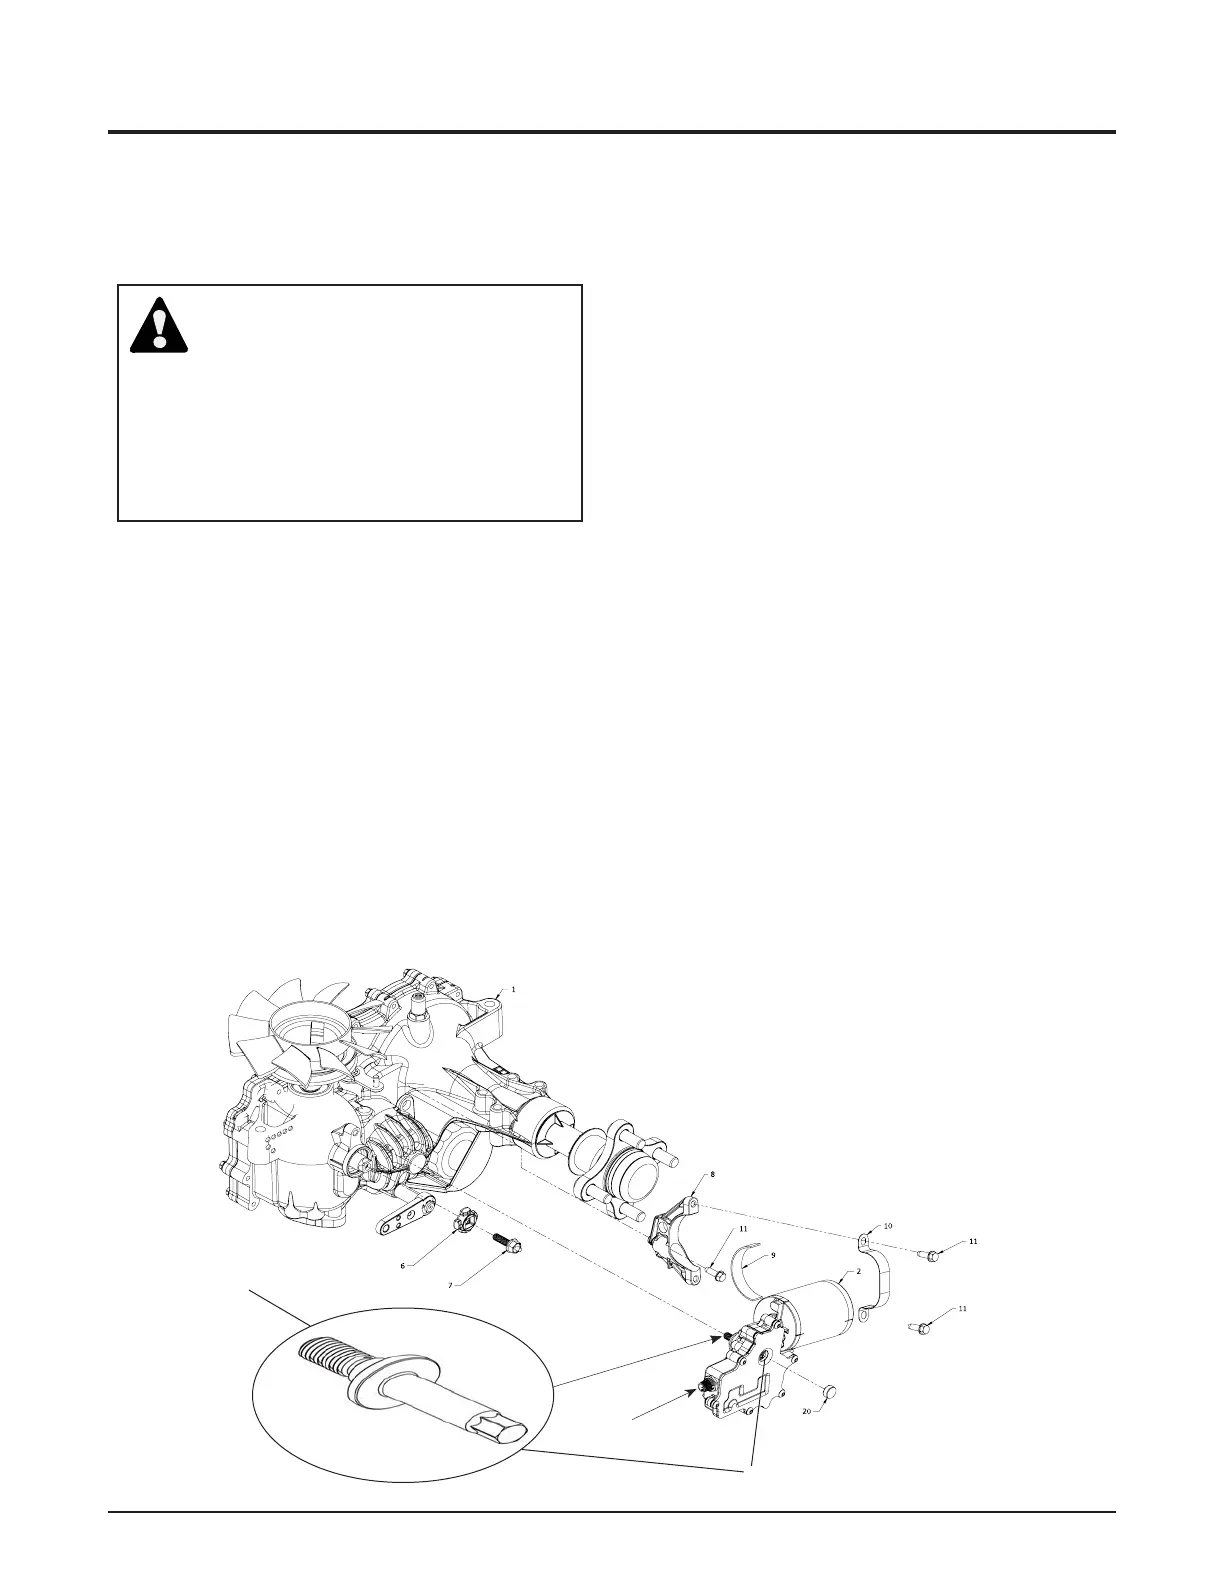
Refer to Figure 8.
Disassembly
1. Disconnect the Mownet cable connector from
the HSA Mownet connector.
2. Disconnect both the positive (+) and negative
(-) HSA power connectors from the back of the
HSA (2).
3. Remove hex screws (11a).
4. Remove the band clamp (10) from the anti-
vibration bracket (8).
5. Remove rubber plug (20).
REMOVAL, INSPECTION AND/OR
REPLACEMENT OF HIGH SPEED
ACTUATOR (HSA)
TRANSAXLE HSA REMOVAL AND REPLACEMENT
6. Loosen (but do not remove) the jackshaft screw
(15).
7. Remove the high speed actuator (2).
Inspection
1. Inspect the trunnion bolt (7) for wear.
2. Inspect the adapter gear (6) for wear.
Assembly
1. Install the high speed actuator (2)
2. Tighten jackshaft screw (15). Torque to 170-200
in lbs.
3. Install the band clamp (10) to the anti-vibration
bracket (8).
4. Install hex screws (11a). Torque to 50-80 in lbs.
5. Install rubber plug (20). Press until plug contacts
jackshaft (15)
6. Connect both the positive (+) and negative (-)
HSA power connectors to the threaded posts
on back of the HSA (2). Torque to 8-12 in lbs.
6. Connect the Mownet cable connector to the
HSA Mownet connector. Torque to 5-10 in lbs.
7. Calibrate the HSA (high speed actuator) using
the Smartec Connect software. Reference page
13 of this manual.
b
a
a
15
15
HSA Mownet connector
SMARTEC Service
Before removal of any SMARTEC compo-
nents the electrical power source should
be disconnected and the SMARTEC com-
ponents must be de-energized by waiting
1 minute prior to performing any repairs.
Figure 8