T2™ 33
If the unit has been torn down completely, the
following summary identifi es the assembly pro-
cedures necessary to completely assemble the
unit. Each assembly procedure is located by a
page reference.
The part reference numbers provided in each
assembly procedure are keyed to the individual
exploded views, and are also keyed to the com-
plete unit exploded view on page 35.
1. Install the expansion tank hose and fi tting.
See page 32.
2. Install the LH axle assembly. See page
31.
3. Install the fi lter assembly, cylinder block and
motor shaft. See pages 29-30.
4. Install the bypass arm. See page 28.
5. Install the pump block and swash plate. See
page 27.
6. Install the input shaft. See page 26.
7. Install the reduction gear set. See page
25.
8. Install the bull gear set. See page 24.
9. Install the RH axle assembly. See page
23.
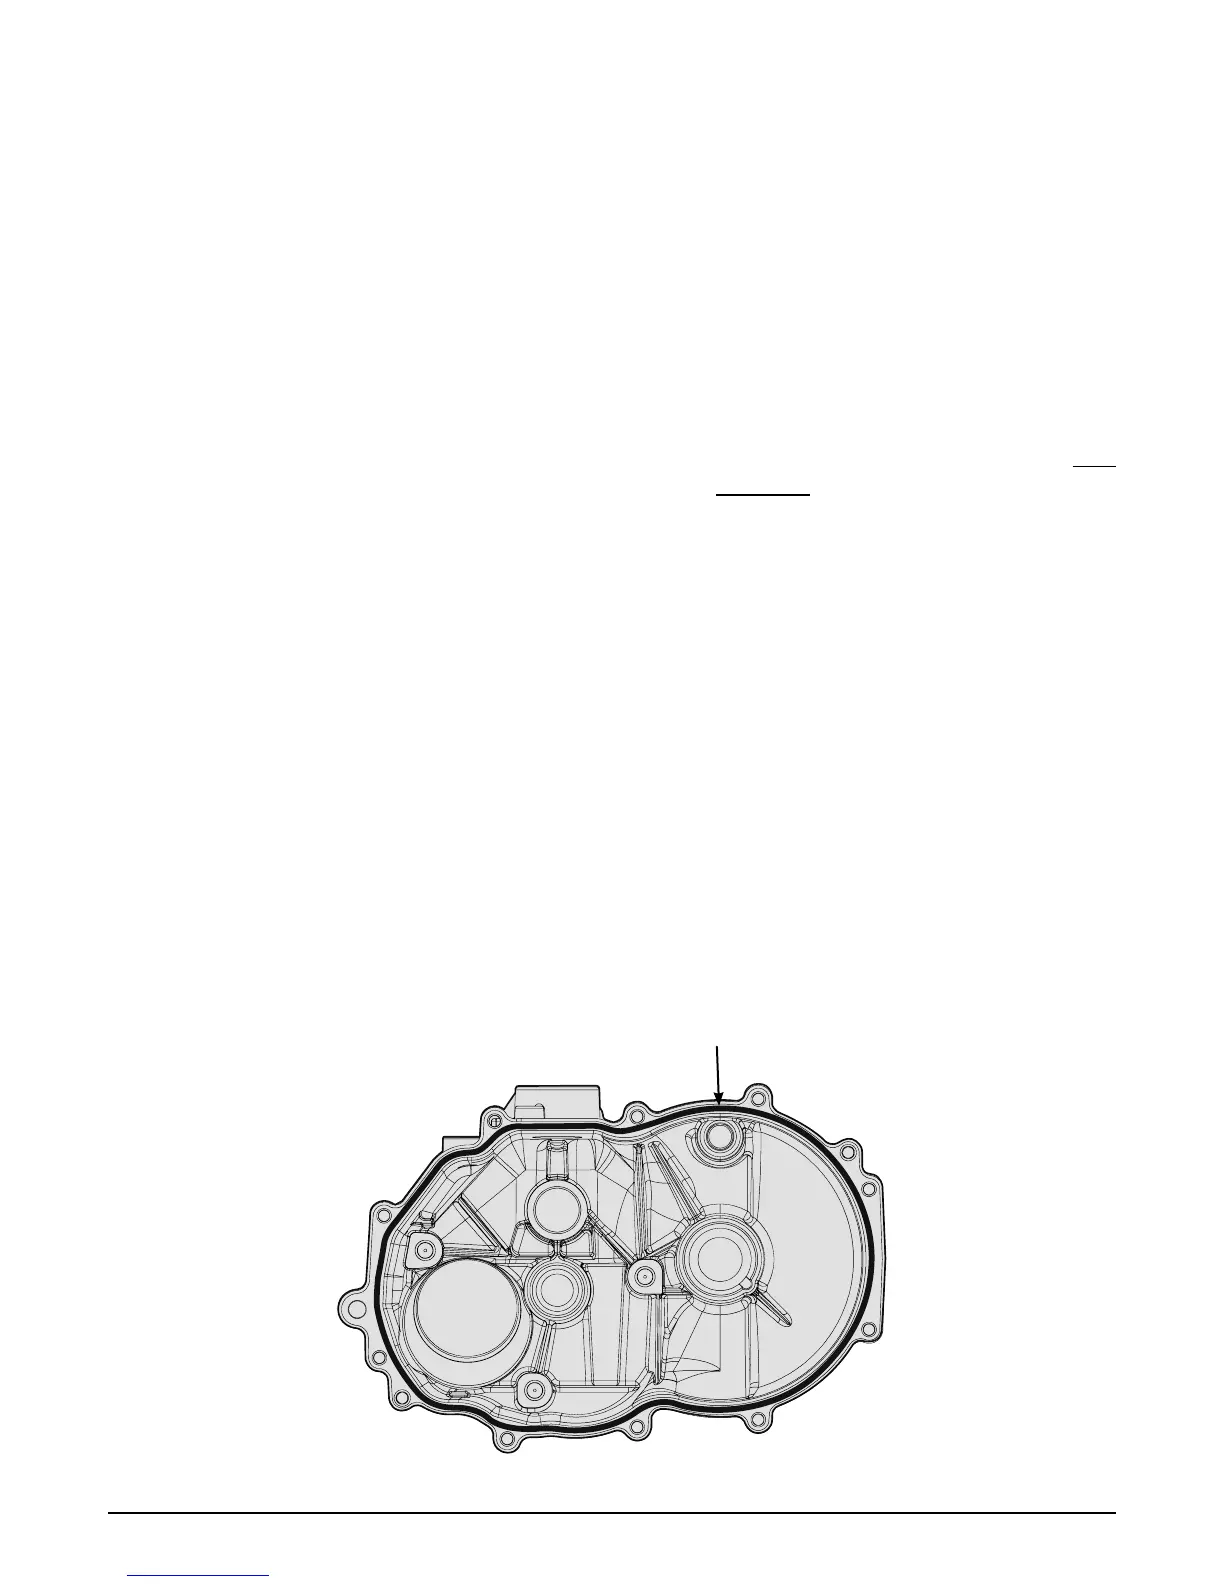
Figure 27, Sealant Application Diagram
ASSEMBLY AFTER A COMPLETE TEAR DOWN
10. Apply sealant to the main housing prior to
assembly with the side housing. See page
33.
NOTE: Prior to applying the new sealant, the
old sealant must be removed from all
surfaces.
A small consistent bead (approx.
1/16 – 1/8 inch) of the sealant around
the housing face will be suffi cient. Use
sparingly.
The illustration below indicates the cor-
rect sealant path.
11. Install the Brake assembly. See page 21.
12. Install the control arm (RTN) assembly. See
pages 19-20.
13. Install the expansion tank. See page 18.
14. Fill transaxle with clean oil.
15. Install the fan and pulley assembly. See
page 17.
16. Install the transaxle into the vehicle.
17. Perform the purge procedures listed on
page 11.
Sealant Path for Main Housing