It is advisable to perform calibration procedures in the order given below:
6.1 Warning
– Never insert or remove the driver while the electronic system is powered on.
– Protect the regulator on power line with an external 2A fuse.
– Refer to to identify components mentioned in calibration procedures.
– The E-MI-AC electronic drivers are designed to work in open loop system, where the coupled
proportional valve is not required to work at its limits.
6.2 Start-up
Factory pre-set adjustments might not meet the requirements desired for the specific application.
Performances can be optimized by on-site re-adjustments of Bias, Scale and Ramps potentiome-
ters, in sequence.
– Remove the cover and connect the electronic driver according to the desired connection dia-
gram, see .
For double solenoid valves two electronic drivers type E-MI-AC-01F/7 must be used connected as
shown in .
Start-up instructions are the same for each driver.
On the first driver two cable clamps must be mounted, one for the external wirings and one to give
power and signal to the second driver which is equipped with one cable clamp and one blind
plug.
A differential voltage signal -10 V ÷ +10 V must be supplied to the first driver.
Note that the first driver will work with signal from 0 to 10V while the second driver will work with
signal from 0 to -10 V.
– The current supplied to the coil can be measured by a voltmeter connected between pins M
and 2 of the screw terminal. The reading range will be: l[mA]=10xV[mV] (for example reading
70 mV the current in the coil will be 700
1mA).
Bias adjustment (dead band compensation) see , .
– Supply electrical power to the driver; supply a reference signal voltage = 0,1 V
DC. Gradually
turn the P4 bias potentiometer until a movement of the controlled actuator is obtained.
– Turn in the opposite direction until the actuator is stopped.
Scale adjustment, see , .
Supply max. current reference signal; check if the current in the coil reaches the max. value desi-
red, turning P3 clockwise (see the regulation curve of the employed valve used).
Ramps see , .
Turning the ramp potentiometer clockwise, acceleration and deceleration time can be increased to
obtain the optimization of the complete system.
97
98
98
5
5
9
G010
6 INSTALLATION AND START-UP
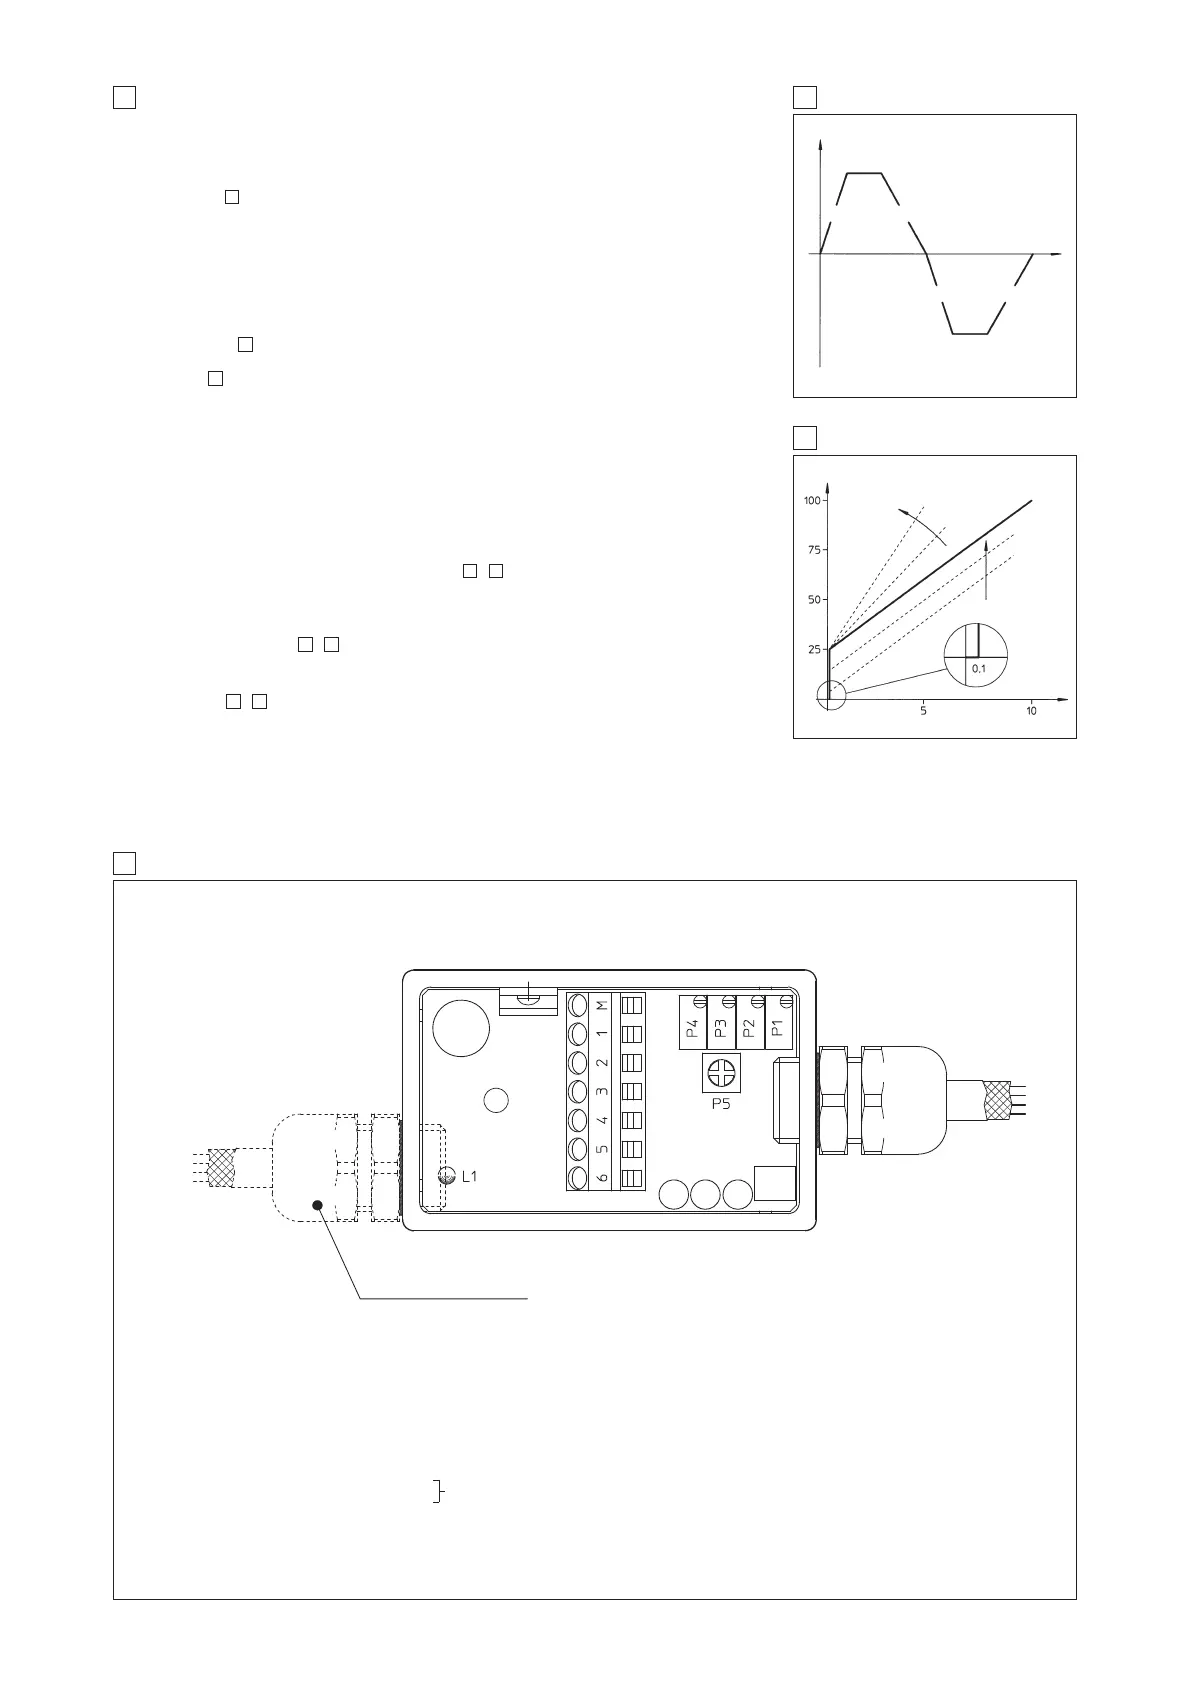
9 E-MI-AC-01F TOPOGRAPHICAL VIEW OF REGULATIONS
7 RAMPS
P1 P2
P4 BIAS
ADJUSTMENT
Current [%]
Reference [V]
/7 OPTION ONLY
8 E-MI-AC ADJUSTMENT
Valve opening
Time
/RR OPTION
UP AND DOWN
DISSYMMETRICAL
RAMP GENERATOR
P1
P2
CONNECTIONS
M monitor (driving current)
1 Power V+
2 Power GND
3 Output +5V
DC (10mA)
4 Reference signal input +
5 Reference signal input –
6 Connect to contact 5 for current
signal (/RR option only)
ADJUSTMENTS
P1 Ramp up
P2 Ramp down (/RR option only)
P3 Scale
P4 Bias
P5 Dither (/RR option only)
L1 Channel enabled led
P3 SCALE
ADJUSTMENT
supply 24 VDC